• Skip to main content
  • Skip to primary sidebar

Jenmenke

Road Warrior

  • Road Warriors
  • Garden
  • Food
  • Babble
  • Home

Food

New and Improved Cornflake Wreath Cookies

December 20, 2009

STOP! Before you scroll through the photos: First, a little background. Please.

These are Charlie’s cookies. We’ve already made several batches of these cookies and Charlie is bored with the standard green wreath. I am also out of cornflakes, and – as it turns out – green food coloring. As usual, I refuse to go to the grocery store. Therefore, the photos taken of the process are going to, no doubt, be a little disturbing. Or at least off-putting.

Additional things that may be helpful to know as you read this post, and all previous and future posts I might make:

I never remember to take photos of the things I want to write about. Or, I start taking pictures, then forget to finish as I start running short of time, we eat whatever I’m making, and I say “Oh shoot. I forgot to take the rest of the pictures.” I never seem to have the correct ingredients. I think of all kinds of clever things to write while I’m cooking and snapping away, only to go completely blank when I sit down to type. And, I still don’t know why I am even doing this in the first place.

Well. I’m never really completely blank.

So, back to the old Cornflake Wreath Cookie recipe. This is a favorite of mine and Charlie’s. Dave likes them and so does Morgan. But they are Charlie’s favorite, and I make them for him. These are also my go-to recipe for any event I have to bring a few dozen to share. Since I usually forget that I am supposed to even bring cookies to share, I need to move quickly. I can whip up a batch in about 8 minutes, which might seem impossible to you, if you have ever tried to make the damn things.

Frankly, I have never once, not ever, succeeded in making the recipe according to directions. Have you? Seriously. Have you?

I am positive there is some insider’s secret to creating a ring of sticky, gooey, marshmallow-coated cornflakes. And, even if you DID succeed in getting the mess into the shape of a wreath, it ends up being only a fraction of the amount that you actually want to consume. So you end up eating three. Probably to the horror of the person who made them, since the formation of each fricken’ wreath likely took a minimum of 15 minutes.

Therefore I present to you the New and Improved Cornflake Wreath Cookie recipe.

Here are the changes I made to the original recipe: I add 1 teaspoon each of vanilla and almond extract (instead of 1/2 tsp). I use one 10 ounce bag of regular sized marshmallows (not 4 cups of mini), because I never have the minis. I use twice as much cereal (to make them more nutritional). Do you believe that? I use Red Hots with abandon (not just 3). And, I don’t waste my time forming them into rings. Honestly. You’d have to be insane to even try.

Maybe I’m just jealous that I can’t do it.

But I’m darn good at the rationalizations, aren’t I?

Without further a do:

The Recipe (if you can call it that)

Microwave 1 stick of butter in a large bowl for about 1 minute. It doesn’t have to be all melted.

Add the bag of marshmallows (be sure it’s the 10z bag and not the bigger one),

and toss with the partially melted butter.

Stir well and microwave for an additional 1 minute to get it smooth.

Add 1 teaspoon each of vanilla and almond extract.

Add enough food coloring to get the mixture the color you want. I do not recommend either blue or purple. My kids, however, do.

Add 8 cups of cornflakes (or, as I did here, the third bag of the Chex box you bought at CostCo and your kids won’t eat because they don’t like the wheat. That’ll teach them.), and gently stir marshmellow mixture to evenly coat the cereal.

Spray two spoons all over with non-stick cooking spray and scoop blobs of the mixture onto wax paper.

Immediately sprinkle generously with red hots.

After about an hour, flip the “wreaths” over so that the bottoms get hard. That way you can store them in a ziplock bag.

I just did that, and while I was at it, I sampled these pitiful purple Wheat Chex cookies. Not only are the truly hideous, but I also ran out of almond extract and only had about 1/4 teaspoon.

It doesn’t matter. They were really good. How much you wanna bet I’ll be the only one who eats them? (The blue ones are already half gone).

New and Improved Cornflake Wreath Cookies (in less than 10 minutes)

1 stick (1/2 c) butter
8 cups Cornflakes
10 oz bag Marshmallows
1 tsp vanilla
1 tsp almond extract
1 tsp (or more) food coloring. I recommend GREEN
red hot candies

Microwave butter in large bowl for 1 minute. Add bag of marshmallows and toss to coat. Microwave marshmellows and butter for 2 minutes. Stir and microwave another 1 minute and stir until smooth.

Add vanilla, almond extract and food coloring. Add cornflakes and stir gently to coat.

Spray two spoons with Pam (or non-stick cooking spray). Spoon large blobs onto wax paper. When mixture is gone, immediately sprinkle with red hots. If you wait too long, the candies won’t stick.

After about an hour, flip the wreaths over to let the bottoms harden. Store in ziplock bags.

Filed Under: Food Tagged With: christmas, cornflake wreath cookies, chex cereal, fast cookies, no bake, new and improved

Old Fashioned Popcorn Balls

December 14, 2009

popcorn ball confetti

A Christmas Tradition.
And A Giant Weight-Off When They are Done.

Every year, the weekend after Thanksgiving, I head up to my Mom and Dad’s in Hayward to do an insane amount of activity in about 48 hours. The usual list includes making:

Chocolate Balls (coming soon!), Popcorn Balls, Cornflake Wreath Cookies (with my own lazy twist) and a Gingerbread House. I also then make a wreath with boughs my mom has leftover from a big wreath-making extravaganza weekend with friends. And finally, when I think I can take no more, my 69 year-old mom, with far more energy than I, rallies me into the car to go get my cheap christmas tree from a church lot up there.

Then, I hop in the car with my two kids and usually my niece, but occasionally a nephew or two, and head home.

I would like to say that this weekend is a warm and fuzzy, calm and cozy time of memory making. The reality is that my TV-starved kids, let loose at the cabin, out from under their Dad’s watchful eye, turn into 18-hour TV zombies while systematically clicking off the DVR’d episodes of CSI, NCIS, the Mentalist and anything else my parents have squirreled away.

I know, I shouldn’t let them. But the truth is I don’t really care. At least not for this one weekend. We don’t watch TV at home and I fear I am creating the kind of monster I occasionally brushed up against as a kid. The kind whose parents didn’t let them eat candy or junk food and would somehow find themselves at my house where there was always bags of chips, fun-size candy bars, ice cream and pop. My mouth would hang ajar as I watched these seemingly normal kids come unglued in an uncontrolled eating frenzy. It always seemed to me that if the parents had demystified candy and let the kids figure it out, they wouldn’t be such fiends. But who knows.

I really fear that I am just such a parent in the TV department.

I blame it on Dave.

He’s a bit of a control freak, you know.

But I hate TV, too. So I go along with it.

To a point.

What the heck? How did I get going on this tangent? For crying out loud. Back on point.

I’ll cut to the chase and stop beating around the bush: No, the kids don’t help me with the baking. Ironically, they think that I am a control freak.

Funny, isn’t it?

Anyway, I have learned to let certain things go. Like the gingerbread house, for example.

gingerbread

But the popcorn balls? Are you insane? Sorry, but unless you are cruel, don’t make your kids help you with these.

popcorn history

I have never, ever had a popcorn ball like this recipe makes. It was my Grandma Esther’s recipe and she taught me how to make them a few years before she died. I taught my mom (I love to say that), and now we make them every year. We guard them with our life and never offer them to guests. They are too precious.

I wish I was kidding.

Because I feel bad about that, I would like to share the recipe so that you can make them yourself. It takes my mom and I about two hours to make eight batches. That’s how many we need to make it through Christmas. Each batch makes 8-10 popcorn balls.

It’s easy. Just a pain. First, you pop all the popcorn and then measure 8 level cups into a big bowl.

8 cups popcorn ready for the fun

Then you cook the syrup. Remember: DON’T STIR!

Cooking the syrup

Pour over the popcorn:

Careful. It's HOT!And mix it all up really good:

Stir it up!Butter your hands and form them into balls. Work QUICKLY! (Don’t worry, my mom always makes funny faces like this. I’m not worried about her wrath for posting it because, remember? She doesn’t READ my blog! Revenge is sweet. And Dad? Don’t tell on me.)

Go Mom Go!

Then sit back and have a beer before you move to on to the dreaded wreath-making project:

wreaths(which of course by that time of the night you will open another beer for duration of wreath making. Preferably a Negra Modelo.)

Popcorn Balls

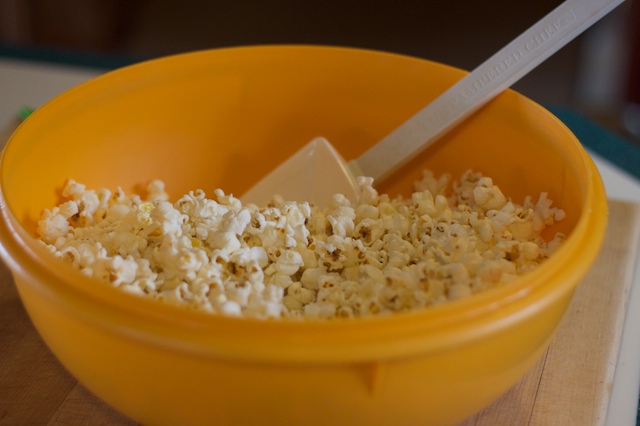
Pop enough popcorn for the amount of balls you plan to make. For our 8 batches, that amount is a heaping grocery bag full. I use a StirCrazy popper and it works great. I always lightly salt the popcorn as I go.

CALIBRATE YOUR THERMOMETER! Candy thermometers are notoriously inaccurate. Calibrate it by putting it in boiling water. If it doesn’t read 212 F, then make note of how high or low it is and adjust your recipe accordingly. My mom’s cheapo (which broke in the middle of our frenzy this year) is off a whopping TWELVE degrees. If I hadn’t known that, the popcorn balls would have been ruined. Don’t take this step lightly.

In a regular sized saucepan, add

1/2 c sugar

1/2 c brown sugar

1/4 c butter

1/4 c light corn syrup

1/4 c water

1/8 – 1/4 tsp salt

food coloring to make the colors you want.

Place all ingredients into a medium heavy bottomed sauce pan and bring to a boil. DO NOT STIR. You may gently swirl the pan in the beginning melt stage, but then just leave it alone.

Boil to 240. It will rise to about 235 fairly quickly and a take another minute or two to reach the last few degrees. Be sure to take any thermometer inaccuracies into account at this point!

Immediately take off heat and pour over 8 level cups of the popped popcorn (use a large 8 cup measuring bowl to scoop and measure popcorn into a large bowl). Use a rubber spatula to get every last drop of syrup out of the pan.

Stir syrup into popcorn well, so that kernels are evenly coated. Using the rubber spatula, be sure to keep scraping the bottom, where the syrup pools.

Butter your hands well (to protect from heat and to prevent from sticking) and begin forming into small balls. Work quickly! It gets harder to form balls as syrup cools.

Place balls onto waxed paper.

That’s it!

Here’s a few tips:

Begin with the lightest color and work to the darkest. For example this year we made yellow, orange, and 2 batches of red. Then I cleaned the pan by swirling in hot water to get most of the color out. Then we did 2 batches of blue and then 2 batches of green. That way you don’t muddy the color and aren’t cleaning the pan after every batch.

Store the balls in the giant, 2 gallon zipper bags to keep from drying out.

Hide one of the bags somewhere no one else knows about. That way, when Dave (aka ‘the skinny German’) eats four every night and they disappear long before the allotted time, you will be able to have some for yourself.

Filed Under: Food Tagged With: baking, popcorn balls, christmas, gingerbread house, chocolate balls, wreath making

Rosemary Cracker Bread

December 10, 2009

IMG_6864

Go Make Some

I’ll admit, it’s a bit of a pain. But look at that picture! It’s so cool looking. And good! Amazing to behold! And yes, I’ll admit this, too: it’s a repeat.

Remember everyone, my computer died on Sunday. I’m working off the kid’s iMac. It isn’t as bad as I had feared, but for some reason — and I don’t really have time to troubleshoot this week — Aperture isn’t generating thumbnails from my camera. So, I’m using iPhoto for now, and going bare-blog-bones for the next week or two.

The reason I’m reposting the Rosemary Cracker Bread, is because it’s so FESTIVE. And — if you are an overachiever such as I — a PERFECT gift for the holidays. I bought some of those clear cellophane candy-type bags and use a cool twine hang tag to close it up. Fragile packages of bliss.

Anyway, for whatever reason, this video of mine does not get many hits on youtube. Go figure. The ciabatta recipe is racking up the views, but not my sad and lonely cracker bread.

I had to make them recently for the people who won my 8-Months-Of-Bread live auction item. And as usual, I couldn’t leave well-enough alone and tweaked the recipe ever so slightly. Here is my latest version:

IMG_6852

Rosemary Cracker Bread

1 1/2 cups flour

1 tsp ground flax seed (optional. but then you can say the crackers are trendy and healthy!)

1/2 cup cold water

1 tsp salt

dash of sugar

2-3 T finely chopped fresh rosemary

1/8 cup olive oil

Preheat oven to 500 with a pizza stone on a rack.

Put flour, flax, salt, sugar and rosemary in food processor. Pulse to blend. Add oil, pulse 3-4 times. Turn machine to ‘on’ and add water in stream till dough comes together. Run for about 20 seconds. Turn dough out and knead to smooth ball. Divide into four pieces and cover with a towel. Let rest 5 minutes.

Begin with one of the four dough pieces. Using a pasta roller, start on the widest setting and finish on the thinnest, just as you would for rolling out pasta dough. It helps to divide the dough one more time about mid way through the rolling process, so that one piece of dough results in two long (approx 4″ x 15″)  strips of rolled dough. I also dust the dough with flour on both sides before rolling at the thinnest setting. The two strips get baked at the same time, for a total of four batches of two strips from one cracker bread recipe. I do not begin rolling the second piece of dough until the first batch is cooked. Multi tasking for this recipe always results in burned crackers for me!

Spritz dough with water from a spray bottle and sprinkle with sea salt (or kosher) and fresh ground pepper. Slide parchment paper directly into oven onto baking stone. Flip crackers over and move from front to back of oven after about 1 minute. Watch closely. Your oven my vary. You want to flip after the dough bubbles, but is still pliable. I do this quickly by reaching in with tongs. Watch closely after that. Take out after no more than a minute — sometimes less. You don’t want them browned. There will be light brown spots or speckles and maybe an edge or two will be darkening, but that’s it. The strips will still be flexible. You can cut them into 6″ lengths at this point with a pizza cutter for uniform sizes, or wait until they are crisp and break them for a more half hazard look.

Cool completely on a rack, then package and store in festive cellophane bags to impress your friends.

If you don’t have a pizza stone large enough to bake the strips on, you can use a large cookie sheet. You will need to dramatically increase the cooking time. Watch for the dough to begin to bubble, give it another 30 seconds to a minute and then flip it. You want to take them out when they are beginning to stiffen. So if you grab one out of the oven it will bend into an arc slightly when held in the middle, but won’t bend in half.

My directions make it sound much more complicated than it is. I just wanted to be as helpful as I could be, having made many, many batches of these crackers and coming up with helpful tips along the way.

Of course, you can always watch the original video, which helps if you want to see the roller technique and oven set up.

Filed Under: Food Tagged With: no yeast, gifts, pasta roller, dough, Rosemary, lavosh, la panzanella, cracker bread

More Uses for Garden Garbage

December 4, 2009

Dead Cilantro stuffed into bucketWait! Before you rip those dead plants out of the garden and throw them into the compost/garbage (I seriously hope you aren’t throwing them in the garbage. I just had to tie it in with the title.), ask yourself if you can salvage anything.

Seeds, baby.

In my case, cilantro seeds. All over the internet, in books, in conversations, I hear this: “I just don’t have any luck growing cilantro.” Well, I have the solution.

1) plant some like you normally would, in an area that you won’t care about it going to seed.

Cilantro seedlings

2) curse when it bolts and goes to seed way, WAY earlier than you wanted it to.

Cilantro gone to seed

3) leave it there

4) let it get old and dried out, occasionally running your hands through it and shaking the plants to get some of the seeds to fall to the ground.

Stop! Don't throw this away!

5) rip it out and put it someplace dark and dry. Or in my case, stuff it in a bucket and leave it outside for about a month, let it get rained on and throw it into the compost. Then start all over. Actually, don’t do what I do. Do what I say. Same as parenting.

6) save the seeds. You’ll have a lot. Cook with them like I did here (as coriander). And save the rest for planting next year.

6a) Sort the seeds. I use various sized strainers with differs holes and mesh sizes:

Cilantro Seeds crumbled off plantsIMG_6547Cilantro after 1st sortCilatro last sortingcleaned and sorted coriander

7) in the spring, let the cilantro grow from the volunteer seeds that fell on the ground in the area it was planted the year before. Or, in my case, all around the bench where I inadvertently left it and the compost, where I ultimate threw it.

8 ) amend the volunteers in more orderly rows with the seeds you saved a few weeks after the first volunteers emerge.

9) cilantro doesn’t seem to suffer much, if at all, from pests or virus/wilts and therefore can stay in the same spot for many years. If you lighten up a bit, give up the idea of perfect rows and let nature take its course, you should have cilantro all year long. Sometimes in high summer, I will plant a few additional short rows in dappled shade to make sure I’ve got some in August, which is a tough month for cilantro.

10) let it go to seed, let it go to seed, let it go to seed. Even if you decide not to save the seeds. Walk by and rattled the dried plants. Let the seeds fall to the ground. And you will never have a problem growing cilantro again. You will have this constant cycle of new plants growing amidst the old.

This also works for arugula. In fact, I have arugula EVERYWHERE: in the driveway, in the chicken yard, in the prairie, and in the garden.

I wouldn’t have it any other way.

(That was a good way to end, but I want to mention one more thing, because I tried this and it seems to work quite well. Everyone says you can’t preserve fresh cilantro. And I agree, for the most part. It isn’t good frozen or dried. People do it, but it just doesn’t taste the same. I tried turning it into cilantro butter and storing it in the freezer, though it will keep in the fridge for a couple weeks and tastes a bit better. It is really good. It doesn’t seem to suffer the same fate as when you try to freeze it by itself.  Give it a try!)

cilantro butter


I would be remiss not to mention that it also works for chives and various other weeds.

Filed Under: Food, Garden Tagged With: arugula, growing cilantro, tips, volunteer seeds, saving cilantro seeds

Throw-and-Go Green Chile Posole

November 25, 2009

Green Chile Posole! Ole!

Great for Turkey Leftovers!

Disclaimer: This was throw and go for me.

Remember, I am the one with all the psycho frozen accouterments in her freezer. But…

But.

If you follow my psycho ways, unfolding in snippets on this site, you too can have this ridiculously amazing posole made for dinner in about 20 minutes.

Another Disclaimer: I like to geek-out in my approach to many things in the cooking world. I eschew (it’s a big vocab day, people) casseroles and church cookbooks that use gross canned ingredients.

Actually, I don’t.

I just think I do.

It’s hard to explain.

I’ll try.

I’m a snob. But see, even though I’m a snob, I still like when other people make the kind of food I don’t like to make. I love it, in fact. Rarely, do I stick my nose up at anything (except beets). But for some reason, I can’t bring myself to use recipes that use cream of chicken soup, lipton onion soup mix, etc.

As I write this, it’s sort of coming clear to me (Really, who needs therapy when you can write and solve your own problems?): It’s the martyr thing! Everyone knows I’m a martyr! That must be it. Even though I like the dishes made with these maligned ingredients, I feel as though I can’t use them. Why? Because it is too easy! I have to work in order for it to be worthy.

That’s really stupid, isn’t it?

Anyway. I digress.

My point, is that I have concocted a way to make dinner fast and still find a way to be smug about it. How great is that?

I did use one secret canned ingredient in this concoction of mine because I had no other choice. (Driving to the grocery store is an automatic “then I’m not making that tonight”.) Of course, the next time I make this, I will feel the need to find the ingredient in its natural state and do it the ‘right’ way. Only then will I be confident to say ‘it isn’t worth the work’ and feel just fine about this super easy way to make it.

Remember the Barbecued Pulled Pork from summer? And the fact that I really prefer the pork without the BBQ sauce? And that I always sneak some out and freeze it? Provided Lola doesn’t get to it first and eat half of it? (That really happened, by the way). Well, the pork I used for this recipe, was in fact, the pork from the pulled pork I made and posted during the summer. Anyway, you use about a pound or two of pulled pork. Whatever you happen to have.

Next time I make this, the plan is to use leftover dark turkey meat. I bet it will be as good, if not better! If you try it first, let me know!

I grabbed about two precious cups of frozen chopped onion and sautéed that in Garlic Confit oil with about three cloves of Garlic Confit for a few minutes.

Then I added 8 cups (because that was the amount I had in the frozen bag, which, in hind sight, was too much) of frozen chicken stock made from — once again — garbage. But I haven’t photographed that process yet, so it will be a post for another time.

tomatoes frozen whole and grated into broth

Because I wanted this be green (the color), and because I’m still trying to figure out how to use all those whole frozen Green Zebra and Aunt Ruby German Giant green variety tomatoes (They really make for a nasty color sauce, or salsa.), I thought, “Aha! I’ll grate some frozen green tomatoes into the broth. Once again, I realize it is only me who happens to have frozen green tomatoes at the ready. But really. You can use fresh red, or canned. I used a microplane grater and grated about 3 small tomatoes.

I added two cans of hominy. Yes, this was to be a mother-load batch of posole, due to that damn ridiculously large amount of chicken stock.

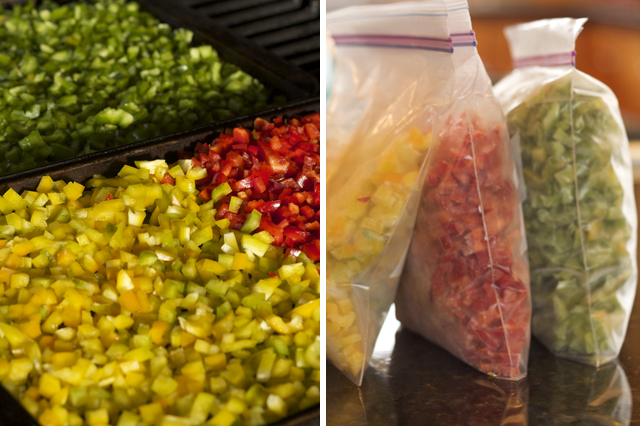
I added about a cup of chopped frozen peppers. (Hot green ones) I just realized I never posted my chopped and frozen pepper process? Duh. It’s the exact same process that I use for onions. And just as handy.

peppers

I toasted about 3 tablespoons each of coriander seed and cumin.

fresh cilantro seed (coriander) and cumin

Then I ground that up in my mortar and pestle and threw that into the pot.

rough-grind it up!

But here was the problem: it turns out that green chile is actually a type of pepper. That is to say, jalapenos or Thai hot peppers just won’t do. At least, that’s what I learned when I researched it. I never knew that! So I was stumped. Lord knows I wasn’t about to get in the car and go to the store to buy some. So what could I use, what could I use… something green…

La Victoria Green Sauce? The one and only thing I put on top of my signature tacos? … no. Too thick. And the ingredients list green tomato as the first ingredient. No ‘green chile’ in sight…

Should I just give in and roast some poblano or pasilla dried chili?

No, dammit. I want a green posole! Like the one at the top of Vail mountain that I pay $8 a bowl for.

So I dug around in my pantry and came up with this:

hominy and green chile enchilada sauce. Ole!

Green Chile Enchilada sauce. I don’t even know where I got it or how old it was. And I poured it in.

Wa-la! A few grindings of pepper. A sprinkling of salt to taste… Simmer for another few minutes…

Then I fried up some corn tortilla strips, topped each bowl with pepitas (fancy name for shelled pumpkin seeds) and a big handful of crumbled Cotija Mexican cheese. And in my bowl, went a big dollop of cottage cheese. I know it sounds gross, but it’s like a mild sour cream with a lot less fat. It’s really good!

Green Chile Posole! Ole!

Start to finish: 20 minutes.

And of course, you don’t need to get this stuff from your freezer. You can just go out and buy it and use it fresh and chop what you need. But once I was almost done throwing this together on the fly in just minutes, I realized it was this poster-child recipe for all the stuff I’ve made and frozen over the past months. And so fast!

…Well for me anyway.

Nah nah nah nah boo boo.

Filed Under: Food Tagged With: pulled pork, turkey leftovers, green chile, chili, posole, pozole, Green Zebra, Aunt Rubys German Giant, super fast meal

National Kale Day

November 20, 2009

(Well, at my house anyway.)

single leaf of black tuscan kale

Why is there no national Kale Day? Actually, I have no idea if there is a National Kale Day. There probably is. If there is, then my question automatically morphs into: Why didn’t I know about National Kale Day?

With that settled, I will tell you why there should be a special day for Kale.

1) It’s a SUPERFOOD. (no, I don’t have the stats on it. Just be content to know that it is, in fact, a superfood.)

2) It is BEAUTIFUL.

3) It is DELICIOUS.

4) It FREEZES so well, you wouldn’t know it had ever been frozen at all.

I could go on and on… Maybe I should. I have read that having “top 10” lists on your blog increases traffic exponentially. But then, that would just be a cheap trick to drive traffic and I absolutely hate bloggers who have gimmicks, exploit their subjects & commenters and whine about traffic. So I’m stopping at four.

I realize of course, that I will soon be out of topics that I am as over-the-moon, passionate about as I am about kale. Things that I am so completely sure will change everyone’s life if they would only try it. Like:  Making bread. Planting garlic. Composting the lazy way. Making apple jelly from the garbage of your pies… There’s so much more (just read the archives), but those are the ones that come to mind. If I had to rate them, I’d have to put bread at the top of the heap. Almost EVERYONE loves fresh bread. It is so easy to make. So easy. Why aren’t you making bread?

I digress.

This post is about KALE.

black tuscan kale

Why isn’t everyone planting Kale? And eating organic, fast*, superfood kale all winter long? Maybe you don’t think you like it. Maybe you don’t even know about it. Three years ago, on impulse, I bought a four-pack of kale plants at Shady Acres because I thought it was pretty. By November, I wished I had more. Two years ago, I planted more, and tried to “overwinter” it. Note to Minnesotans: nothing overwinters here, so just forget about it, Yes, even when your father in law explains how they did it. Don’t be tempted. Last year, I stumbled upon this preservation method for my kale. I’m not saying it’s the best way…

Actually, I am saying it’s the best way. So pay attention.

1) I plant my kale.

2) I battle the damn cabbage worms all summer long. [You probably won’t have this step. I seem to host the world’s largest population of cabbage moths/worms. These guys plague my broccoli, too.]

3) I plant another couple rows of kale after the broccoli is harvested, some time in July. Usually this works great, but not this year. My second planting was a failure. I am devastated over this because now I will only have half the amount of Kale as I planned on. I don’t know what happened. But I can tell you this: it is November 19th and that planting is now growing fantastically. We didn’t have a hot summer, but maybe it was just too hot for that variety of kale (red russian). Who knows. Currently, it is growing so earnestly, I can’t even bring myself to turn it under like I have with the rest of the garden. …Maybe I can overwinter it.

Red Russian Kale, happily growing in... November.

3) I wait until a few hard frosts kills just about everything else above ground.

kale, happily growing along in mid November

4) I add “harvest kale” to my to-do list in my planner

5) I deal with the apples

6) I wash the windows

7) I turn a new page in my planner and re-write “harvest kale”

8 ) I clean out the greenhouse

9) I clean the pool cover

10) I install a new garden fence

11) When I am in danger of turning another page in my planner. (Or, if snow and ice is forecasted) I actually do “harvest the kale”

12) I sit on the step in the sun, bundled up, and cut the central stem out of the kale. Tip: find a great audiobook or podcast to listen to while you do this. A chore becomes a vacation.

late afternoon sun, destemming kale

All the kale pictured here is Black Tuscan Kale (or Nero Di Toscana among many other names), which has long, narrow leaves. Usually, I also have the curly kale and/or a russian variety. I take the central stems out of all varieties. But, as the case usually goes, black tuscan is the most tedious. And that’s all I have this year.

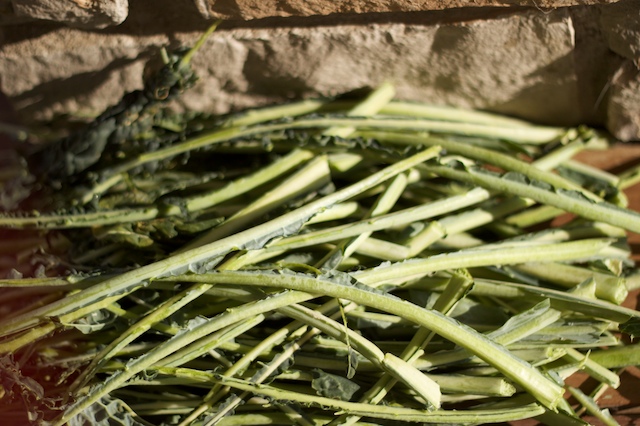
my 2-hour pile of kale stems. (removed)

13) I get out my big deep fat turkey fryer that hasn’t been used for that purpose in about ten years (what an insane trend that was), fill the pot 3/4 full of water, and add about 1/2 cup of salt.

the turkey fryer mod

14) I begin the hunt for a propane tank to attach to the turkey fryer kale cooker.

15) I don’t have any propane. The tank is empty. This is a problem.

16) I decide to cook the kale in the house. Tip: cook it outside if you can. It stinks.

now thatsabowl-a kale! (About the amount I cook at once in big pot)

17) I add the kale to boiling water and cook for about 10-15 minutes, stirring frequently with tongs.

stir frequently while cooking

It will go through stages. It will want to float at the beginning. Then it will foam madly for a bit (don’t let it boil over, it’s a mess), then it pretty much sinks. I always figure it’s almost done at that point. Some recipes call for sauteing, braising, etc. But I’m with the person who said that boiled kale tastes the best because it takes out any bitterness. For the record, Kale is the ONLY vegetable I will say this about. I never boil any other greens, broccoli, asparagus. Never.

Morgoon assists the photographer. Don't be confused. She wasn't helping the cook. There's a big difference.

18) I don’t pour the water out, because I have three or four batches more to cook. I lift the kale out with tongs and then lift the turkey fryer kale cooker insert out to get the rest.

Cooked kale

19)  I dump the hot, cooked kale into my (clean) sink to cool and put the next batch in to cook.

Cooking off in the sink

20) I squeeze as much water out as possible as soon as it’s cool enough to touch.

Squeeze, squeeze, squeeze. YUCK. Nothing pleasant about it.

21) I pull apart the squeezed wads (yes, that’s a gross word to describe kale, but — honestly — it is gross. And it is a wad) and spread out on cookie sheets.

Cooked, Squeezed, Picked apart and Ready for Freezing!

I also pull out any glaring stems that I might have missed at this point. One year I did a test and left the stems in. You can if you want, Lord knows you’ll save a lot of time with step 12, but we all thought they were yuck-o.

The stems almost separate themselves. How did I miss that many?

21a) I clean my nails

Kale Nails. The opposite of a french manicure.

22) I freeze the sheets of kale

23) I rough-chop the frozen kale (because in the test mentioned above, we also preferred smaller pieces. Plus, it’s fun to chop frozen kale. I don’t do it before I cook it because it falls thru the holes in the turkey fryer pot kale cooker) and put into freezer bags.

rough-chop the frozen kale

Drum roll please…
24) I cross it off my list in my planner.

To use the kale, you grab as much as you need from the bag and put into a fry pan or saute pan on medium/low until it’s warmed through. Cook most of the water off (there shouldn’t be much if you squeezed it well in step 20) and add your fat of choice (butter, olive oil or… BACON FAT!) and a sprinkling of balsamic vinegar. Other things to consider adding: dried cranberries (craisins), chopped bacon crumbles, slivered almonds, a sprinkle of blue cheese…. mmmm. maybe that’s what I’ll have for lunch.

No matter how much I make, we always wish there were more.

Well, anyway. That’s National Kale Day at my house. It’s definitely in my top three things that I’m passionate about. Obviously you can’t plant kale until next year. But at least buy some. Buy a lot. And try cooking some. If you have some left over, freeze some and see if you don’t agree with me. Then plant it next year.

And then, come back here and tell me how great I am.

* “fast” kale is an oxymoron. Kale is only fast, if it is already cooked, chopped and frozen. Otherwise you are washing, de-stemming, boiling, squeezing and sauteing. Then eating. When you do it this way, it’s ready in less than 5 minutes. Hence, “fast.”

Filed Under: Garden, Food Tagged With: boil, preserve, kale, superfood, black tuscan, red russian, freeze

  • « Go to Previous Page
  • Page 1
  • Interim pages omitted …
  • Page 14
  • Page 15
  • Page 16
  • Page 17
  • Page 18
  • Page 19
  • Go to Next Page »

Primary Sidebar

Read in CHRONOLOGICAL ORDER!

  • Big Bend National Park (6)
  • Alaska Road Warriors (46)

Search jenmenke.com

About Me

Jen menke

I’m a mostly-retired, pretend graphics and web developer (but don’t judge my skillz by THIS site!). We sold our dream home in Watertown, MN and downsized to a “Villa” in Excelsior, MN and built a home in our dream location of Eagle, CO and now split our time between the two states. It is truly a dichotomous life of absentee gardening and getting together with friends & family while in MN and playing hard and hermitting while in CO. I’ve let the blog go but a trip to Alaska has me resurrecting the Road Warriors series. My beloved brother is my biggest fan and I am doing this just for him.

Latest Reads:

Jennie's bookshelf: read

Trail of Broken Wings
2 of 5 stars
Trail of Broken Wings
by Sejal Badani
Started out strong and dwindled off for me. I wasn't enamored of the writing and -- maybe it's just me -- but the secrets!? I understand that you have to be willing to swallow a fair amount of incredulity when enjoying a lot of fiction, ...
The Girl on the Train
3 of 5 stars
The Girl on the Train
by Paula Hawkins
Audible book. Good, mindless listen. Pretty good action and twists. Not as good as all the hype, in my opinion, but I did enjoy. --Not enough to choose for my bookclub though: it would have been carved up by those English-teaching wolves...
I'm a Stranger Here Myself: Notes on Returning to America after Twenty Years Away
4 of 5 stars
I'm a Stranger Here Myself: Notes on Returning to America after Twenty Years Away
by Bill Bryson
Not my favorite Bryson book. However, it's been several years since I last read one and I was -- once again -- astounded by his writing style and voice. I just love him. I think this book is mostly compiled from columns he wrote over a c...

goodreads.com
  • Road Warriors
  • Garden
  • Food
  • Babble
  • Home

Copyright © 2025