• Skip to main content
  • Skip to primary sidebar

Jenmenke

Road Warrior

  • Road Warriors
  • Garden
  • Food
  • Babble
  • Home

Food

Tomatoes! Tomatoes! Tomatoes!

October 3, 2009

(And Vomit-Colored Salsa…)

You really can't appreciate the true vomit color of this salsa.

I know, I know. I’m not winning any fans with my title. But it is vomit colored salsa. What can I say?

It tastes just as good as red salsa. Mine just happens to be pinkish-orange because of all the beautiful green and yellow heirloom tomatoes that I use. And for whatever reason, I always seem to have the most of the green ones. They are so delicious and sweet, but when you cook them into sauce? Trust me, it’s a tough sell. Everyone will take a jar of my salsa though, vomit colored or not. So there you go.

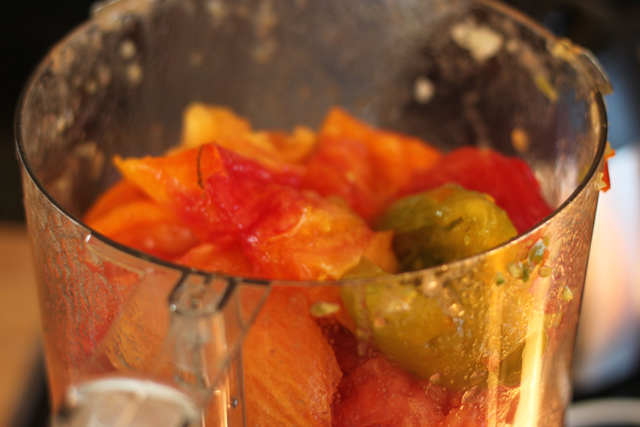
Heirlooms headed for the salsa pot.

I also made a ton of tomato sauce this year. That always seems to be such a ridiculous waste of fresh garden tomatoes, but really, what else can I do with them? I can only give so many away. I still have a crate full…I’ve dried them before and I just really don’t love dried tomatoes all that much. I’ve rough-chopped and frozen them without cooking for chili, soups, etc. It’s easy and works just fine. You tend to get a lot of liquid, but in chili and soup, who cares? I just don’t make that much chili and soup with chunks of tomato. So this year, after making 20 pints of salsa, I made and froze sauce with the remaining tomatoes.

I’ll tell you how to do both.

For Sauce:
For all the tomatoes destined for the sauce pot: cut all the blemishes off and core. Quarter and put into a pot with a tablespoon or two of kosher salt.. Simmer and mash and stir for a couple hours until about an inch of the watery liquid has evaporated off in steam. Either pulse in food processor (tedious) or use an immersion blender in the pot to puree. Then run through a food mill or sieve. Let cool. I use quart-sized freezer bags and put 2 cups into each one. Lay flat on a cookie sheet and freeze.

For Salsa:
This makes about 20 pints.

20 cups tomatoes
8 cups chopped onion
2 chopped green peppers (variable)
10 chopped small to medium hot peppers (variable)
1/3 cup sugar (variable)
4T chili powder (variable)
4T salt (variable)
2.5 cups white vinegar
1/3 cup cornstarch mixed with equal amount of cold water (variable)

Cut of any blemishes, core and roughly peel the tomatoes with a knife. You can do the dip-into-boiling-water-method if you want, but I don’t bother. Ripe garden tomatoes peel pretty easily without that time consuming step. I’ve also skipped peeling them entirely. Salsa was fine, if you don’t mind little strips of skin here and there.

Cored and roughly peeled tomatoes

Pulse these in the food processor to the consistency you like. Remember that they will soften further when you cook them. My kids hate chunks. My husband loves chunks. So I don’t worry about it too much since no one is ever happy anyway. I forget what’s next…

Pulse tomatoes in food processor

OK, I’m back. I had to go get my notes!

Measure the amount of chopped tomatoes as you go and then dump that into a large stock pot. You will need approximately 20 cups of chopped/pureed tomatoes total. I tend to use a little more. More tomatoes won’t hurt the safe canning ratio, because they are acidic. More onions, peppers and cilantro will. Just so you know. You can play around with the recipe — I always do, mostly because I my pepper variety changes year to year — but keep that in mind. If in doubt, add more vinegar at the end.

Garden Salsa and Thai hot peppers

Chop/pulse a combination of sweet and hot peppers. My mix (above) used about 10 medium sized hot, 4 small and 2 very small sweet green peppers. We like it hot, so I use mostly hot peppers. I take the seeds out of the really hot ones (hungarian yellow, habanero) but leave the rest in. You can do it however you want, just know that the seeds make it a lot hotter.

Add to the peppers  6-10 cloves of peeled garlic. Chop/pulse to desired size and consistency, then add to the stock pot.

Chop/pulse about 3-4 big large onions (enough for 8 cups. you can add less, but not more), add to the stock pot.

Add 2.5 cups of white vinegar. Salt to taste (I used 4 Tablespoons. We like salt.). Grind some pepper to taste. Add 2-4 Tablespoons chili powder. Again, this is personal taste. Start at 2T, taste and add more if you like. I used 4T and it’s tastes highly seasoned. I find that as the jars sit for a while, both the hotness of the peppers and the zip of the seasonings diminish, so I tend not to fear a little overseasoning.

Cook to meld flavors (and kill any lurking bacteria!)

Bring to a simmer and add 1/4 to 1 cup of sugar. Again, personal taste. You can skip the sugar entirely, but I’ve gotta say, if you add just a bit (I use 1/3 cup) people go crazy and don’t know why. Mix 1/3 cup cornstarch* with 1/3 cup cold water and slowly add to salsa pot, stirring often. Simmer for about 30 minutes. In the meantime, sterilize your jars and lids. Right before filling jars, stir in 1/2 to 1 cup of cilantro. Mmmmm. mmmmmm. mmmm. (You either love it or hate it.)

Lots of cilantro. Don't add until right before canning!

Fill hot jars with hot salsa to 1/2″ from the top. Wipe rims and seal. Process in a hot water bath for 15 minutes.

OK, I’m going to be honest here. The woman who started me on her version of this recipe doesn’t process her jars. She says, as long as they “pop” and “seal” as they cool, it’s fine. Her mom has been doing this for years and years and years…Sooo. Neither do I!! But I can’t condone this sort of behavior from anyone else because the USDA says it’s not safe. You know the USDA, right? The harbingers of truth and wisdom? If it weren’t for the cilantro, I’d process away, but the more you cook cilantro, the less flavor it has, so I just have such a hard time putting those jars with beautiful cilantro in the water bath! It probably wouldn’t matter since, by the time the sauce goes into the jars, the cilantro is cooked anyway… Can you tell I’m having an attack of conscience? Well, no one has died yet. If someone does, I promise to update this post.

Anyway, make sure all the lids seal tight (you can test by lifting the jar by only the lid, not the band. It should stay sealed) Immediately reprocess or refrigerate those that don’t seal.

*Cornstarch is a secret and optional ingredient but recommended for salsa that just barely “sticks to your chip” without being thick and overly cooked. I learned the cornstarch tip from Kristi Kratch and can’t thank her enough from saving me from the watery, insipid salsa I had been making up until then. She adds a lot more to hers (1.5 cups). You can too if you want. She also gets credit for the sugar. She uses way more than me (1.25 cups) and I love her salsa, but Dave made me cut back to where I’m at today (1/3 cup). So play with it. Just keep the ratio of acid (tomatoes and vinegar) to non-acid (peppers, onions, garlic, cilantro).

Also, and this should go without saying, don’t eat ANY jars that have lost their seal or are bulging.

And don’t come crying to me if you kill someone with your kindness. It’s a chance you have to be willing to take.

Filed Under: Food Tagged With: gross!, tomato sauce, USDA, kill them with kindness, tomato, tomatoes, freezing, heirloom, pink grapefruit, hot salsa, vomit salsa

ONIONS!

October 1, 2009

Ok, I know most gardeners have long since dealt with their onions, since most are ready to harvest in June. In Minnesota, most of us didn’t harvest until July because of the weather. I pulled all mine out in early August, let them air dry outside for a day or two, then put them in our lower garage, which serves as my pseudo root cellar. I have to say, though, August and September don’t really do much for storing root crops. Flipping back through the notebook I keep in my office with all my to-do’s I see that I started writing “Chop Onions” as early as September 2nd. You will be happy to hear that I was finally able to check that off my list… On September 30th.

I would like to share how I deal with my onions.

Harvested and Cured Onions Ready for Storage and Chopping

Maybe it’s just me, but my onions do not keep through the winter. I don’t know if it’s because I am a bad gardener or because I’m a bad store-er. I’m guessing it’s a little of both. Should I cut the tops off before I cure them, or leave them on? Should I let them dry in the sun a day before shuttling them off to the dark depths of the lower garage or let them dry longer? You can find support for just about any variation. Seriously. I’ve researched this. I’m willing to chalk my failures up to variations in circumstances. That rationale has served me well in all areas of life, by the way.

This year was a good onion year, albeit a late one. After harvesting, I leave the tops on, letting them dry for a day in the sun. Then, I put them in a ventilated box (mine is the lid to an old rabbit hutch, the occupants of which I decided would be happier if left to roam the wilds of our 40 acres) and put them in the lower garage, which is dark and cool.

I write “chop onions” on my to do list about a month later. After ignoring that line item for about a month, I decide to “chop onions” on the day that I also have to “make salsa.” It would be easy to continue to ignore “chop onions” except for the fact that I need a lot of chopped onions to “make salsa.” So, the two would seem to go together quite nicely. (“Make Salsa” post coming in the next day or two.)

In the past, I have been totally anal about the chopping of my onions, preferring perfectly diced cubes, which of course requires hand chopping. This year, however, I have decided to cut corners and pulse the onions in the food processor to see if it makes any difference.

First, however, I have to decide which onions to chop and which to store. Since this was a good year for onions, it appears that I have lots I might be able to store for at least a few months. It would be a lot easier just to store them all, but I have to say: grabbing a handful of chopped and frozen onions during the winter for sauteing is a luxury I have learned not to live without. Plus, when I first started growing onions, I learned the hard way that many of the onions start to rot from the center out. That resulted in a lot of wasted onions for me. Now, I am ruthless when it comes to judging whether an onion should be stored or chopped.

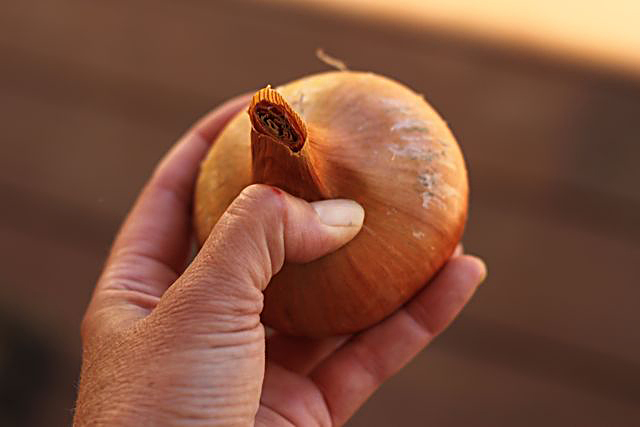
If there is any give at all in the stem area of the onion, it goes into the chopping pile:

Checking Stem End of Onion for Softness. This one is soft.

Sometimes I am right in my assessment:

HA! I was RIGHT! This onion would have rotted within a few weeks.

Sometimes I am wrong:

Oops. This onion would have been just fine to store. Oh Well.

But this year, I am very happy with my storage pile. It’s always nice to have some back-up onions ready for chopping:

Nice Hard Onions Ready for Dark Storage

The rest, I peel and quarter and chop.

Onions ready for chopping.

But either way, let me give you a great tip: USE GOOGLES FOR NO TEAR ONION HANDLING!

Onion Googles! I can't believe I am posting this...

Cute, huh?

I actually saw some onion goggles at a kitchen store in Colorado during our Road Warrior trip. They were $24 dollars! Insane, when you can wear these charming specks designed by Speedo.

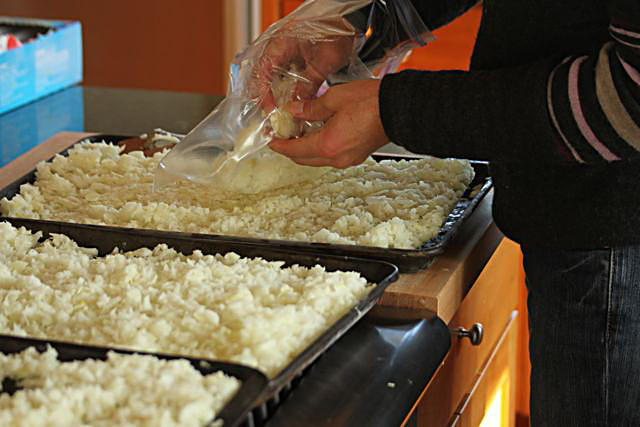
Anyway, I put the the chopped onions on to cookies sheets in a layer about 1/2″ to 1″ thick. And let me give you another valuable tip: USE WAX PAPER AS A SHEET LINER. I did not, and now I have onion smelling cookie sheets. Morgan made some cookies yesterday that have a very peculiar onion aroma that I can’t say added much to the flavor of the cookies.

Chopped and Frozen Onions Ready for Freezer Bags.

I freeze the sheets, and then break into pieces and store in freezer bags.

Break up clumps and store.

Once you try this, you will find yourself growing more and more onions. It is an unbelievable time saver.A winter's worth of chopped and frozen onions!

Filed Under: Garden, Food Tagged With: double onion, food processor, onions, harvest, freezing, storing, hand chop, rotting, soft

Jennie’s Low Sugar, No Pectin, Raspberry Jam

September 18, 2009

Almost too pretty to cook into jam...I am taking a quick break from Road Warriors, which will return to it’s regularly scheduled time in a few days in order to take care of some much needed business. Raspberry jam. If there is anyone out there with raspberry bushes like mine, they will know what I am talking about when I say I’ve got raspberries coming out my eyeballs.

This is a no pectin recipe that I also categorize as low sugar, but that needs to be clarified: low sugar is a relative term when it comes to jam. This recipe is low sugar when compared to other jam recipes, namely, any that use pectin. (One sentence in and I’m already making excuses for myself.)

I’ve been making this jam for years and I continue to tweak it. I’m sorry I can’t give absolutes, but the amount of time needed to cook the berries changes even as the weeks progress. I should do a video to show you the sound it makes when I consider it “done.” But maybe I can try describing it for now. Next time I’ll video it.

Here goes:

Use 8 cups berries to 4 cups sugar for a 4 1/2 – 5 quart heavy pan. A Le Creuset 24 is a perfect fit if you have it. I have a really big one (7.25 qt Le Creuset 28) and can fit 16 cups of berries in at a time, which I do quite often. There is a trade off for doing a big batch at once though, and that is that you end up having to cook it a bit longer than with a smaller batch. Some would argue that the longer the berries cook the less “fresh berry taste” you will have. I disagree. I even made a pectin batch to see if it had a brighter flavor, since you only have to boil jam made with pectin for a minute or two. It really didn’t taste any “fresher.” It was sweeter though. But that makes sense since you use only 4 cups of berries to 6 cups of sugar plus a packet of pectin. YOWZA!

It looks like a LOT of sugar. But compared to others, it's not.

I have also been experimenting with using less and less sugar. So far, so good. I’m down to 16 cups berries to 6 1/2 cups of sugar. We’ll see how that keeps on the shelf. But to be safe, stick with the 2:1 ratio.

I pour the berries into a bowl, or into the pot they will cook in, if that pot is available for most of the day. I put it in a sunny spot if it happens to be sunny out and stir it up every time I pass by. For whatever reason, I seem to always can jam at night, so the berries sit most of the day. This allows the sugar to dissolve and the berries to break up without cooking, which I think helps the flavor in the end.

Stir the sugar into the raspberriesIsn't that PRETTY? Stage one of raspberries melting into the sugarStir, stir, stir!The raspberries start to give up some of their foam after an hour or two...

When it’s time to cook it, I make sure I have clean and sterilized jars ready. I used to be gonzo mental about this. Now I just run them through the dishwasher and call it a day. I put the berries in a pot on a low to medium low heat. You can go ahead and put it on high, but don’t come crying to me when –within a matter of seconds — the liquid foams up and boils all over you stove and into your burners. Have fun with that one. It’s medium low for me. And I don’t leave the kitchen until it has been gently boiling for a few minutes.

Skim as much of the foam off as you can. Don’t be mental about it, it’s not that big of deal. More an aesthetic thing.

Skim the foam off the raspberry liquid

It will boil merrily along for a while and you can get some other stuff done. Just be sure to stir with a rubber spatula every few minutes. My latest recipes were this: After reaching a gentle boil, an 8 cup batch took 12 minutes to be done and a 16 c batch took 20 minutes.

You are looking for a change in consistency from a watery boil to a thick boil. Not a spluttering boil, where globs pop up at you when you stir, just a change in the sound and a visible consistency shift to thicker. If, however you go too long, it isn’t a disaster, it will just be thicker and darker and you won’t get as many jars out of the batch.

Then, while the jam is still hot and simmering, fill the jars to 1/4″ from the top, put the lids and bands on and screw tight. USDA will tell you that you need to process these in a water bath for 10 minutes. I used to do just that. Now I don’t. The jars are warm, the jam is boiling and I still get a nice, tight seal. I can vouch for the fact that my jam, when processed this way, is good for 2 years, as long as the seal is intact when opened. Obviously, store it in the the fridge once it’s been opened.

Ready for the lid and band. Low Sugar, No Pectin, Raspberry Jam!So far no one has died. And the jam looks and tastes so much better.

Filed Under: Garden, Food Tagged With: raspberries, no water bath, kitchen gardener magazine, sun jam, no pectin, low sugar, golden raspberry

Keeping Up With the Beans

August 6, 2009

varieties of beans(and zuchini…)

I have a confession to make: my family & I hate canned and most frozen vegetables.

This poses quite a challenge for the whole local food movement because it disallows us from truly utilizing my garden’s bounty by canning and freezing the excess harvest. Come December, I hang my head in shame as I shop the produce aisle of Cub Foods purchasing plastic bags full of imported green beans. It is a serious shame. But isn’t it worse to slave away, steaming and freezing green beans that languish in the freezer, only to get fed to chickens in July? Tough call.

Anyway, because of the frozen food aversion, I give away a lot of my harvest. It is one of the only nice things I do with no ulterior motives. (Really.) I do still end up preserving quite a bit: raspberry jam, tomato salsa, I cook and freeze kale (it suffers none of the indignities that beans or carrots do when boiled and frozen), etc. Oh, and I pickled several pints of green beans this year, completely ignoring my notes from six years ago that said, and I quote, “do not pickle beans. no one eats them,” because I figured a lot can change in six years. But mostly I ignored the note because I have so many effing green beans. Aside from freezing them again — and notes from last year’s wasted frozen beans score a lot higher on my believability chart than the pickled beans from 6 years ago — I just don’t know what else to do with them! You wouldn’t believe how many of today’s fine UPS and FedEx drivers are uninterested in free bags of green beans! In addition, two large families I used to supply started their own home gardens. The nerve!

Anyway. I have never professed to be a good cook. I cook good. There is a difference. A “good cook” is creative and inventive. I cook other people’s recipes “good.” However, today I actually invented a recipe.

Green Bean Salad

I am calling it my KEEPING UP WITH THE BEANS recipe. Plus, I offloaded several zuchini into it, so that is an undeniable bonus. It also happily accepted cucumbers, cherry tomatoes, and onion. I’m pretty sure that you could add just about anything — in vast quantities.

I will reiterate that last point: It uses vast quantities of garden produce. I say this because of how many times I have searched for recipes in order to use up some massive quantity of zuchini, for example, only to find that instead of four, 5 lb zuchinis, it calls for only 1/2 cup. Totally pointless. This recipe uses LOTS of beans. And since it’s a salad, you can keep it in your fridge for days and munch on it at will. Fatty finds this very handy, and I’m sure you will, too.

Twp important tips:
1) DON’T OVERCOOK VEGGIES AND
2) USE AN ICE BATH IMMEDIATELY TO STOP THE COOKING AND RETAIN COLOR & CRUNCH!!

prepare ice bath

I steamed the beans, corn and zuchini all together. I cut up 2 cukes, 1/2 large onion and as many cherry tomatoes as I had on hand. After that I thought “hmmm….” and added a can of garbanzo beans and bacon crumbles, which were both super good. I went scrounging for some blue cheese as the crowning glory, but alas, my hunk was no longer even blue. It was orange and greenish. And while I am a huge proponent of pushing the expiration envelope, even I have standards. I threw it out and chopped up the remaining fresh mozzarella I had, which was good, but blue would have been better.

For the dressing, I used about 1/4 c balsamic vinegar, 1 teaspoon honey, 1 teaspoon dijon mustard, then slowly whisked in olive oil until the mixture was thick and tasted good. I am guessing it was about 1/4-1/3 cup of olive oil. I added salt and pepper to taste. I tossed the dressing with the cooked, iced and chopped veggies, then chilled. Before serving, I sprinkled skinny strips of basil and mint over the top.

It was FABULOUS and GUILT FREE! Try it. And let me know what changes you made. Pine nuts? edamame? Comment!

Filed Under: Garden, Food Tagged With: tomatoes, keeping up with the beans, zucchini, preserving, recipe, green beans, salad, tomato

Weeding 101

July 16, 2009

IMG_4937

My Friend Recently Asked Me (and I quote): “How Do You Keep the Weeds Down in Your Garden?”

After staring at her for a few seconds to see if she was kidding, or if I had misunderstood her, I finally said, “I pull them.” She tossed her head back laughing (so she was kidding?) and said “No, no, no, no. I mean a lot of weeds!” And I stared at her again and said “What, are you kidding? I pull them.”

Clearly we were not on the same wave length. She kept trying to tell me it was impossible to pull the amount of weeds she was talking about — surely I didn’t understand what she was dealing with.

Oh no?

How about this?

Weeds in the pumpkins and squash plants

If you look closely you will see there are some wee plants tucked in among the weeds. Crab grass? Barn grass? Who cares grass. It’s a pain-in-my-ass grass and it has to come out.

If you have a yard, a garden, dirt in a bucket then you battle weeds. I’m not above using Round-Up, or even Weed-B-Gone in some areas of the yard. I try not to, but sometimes I do. But in my garden, well, isn’t that the whole point of growing your own stuff? To not have it laced with chemicals? So I pull them, dig them, hoe them, mow them. And I try really hard not to let them go to seed. Which is just about effing impossible.

When it is weeding day, I get my garden gloves and my iPod. I play several back-to-back Good Food or MacBreak Weekly podcasts, or listen to a good (and sometime bad) Audible book. And the hours pass. If you are looking for an escape from family life, it’s a great activity, because no sane child or husband will come looking for you while you are weeding, lest they be given a bucket and put to work. And, in the end the Weeds B Gone with no bad chemicals. Plus, Fatty got some exercise.

Weeds B Gone

And if this is all just too confusing and technical for you, I’ve made a simple, easy-to-follow how-to video:

Filed Under: Food Tagged With: pork shoulder, feed a crowd, roaster oven, cooking, cheap food, pulled pork

Need to Feed the Masses but Don’t Have the Cashes?

July 14, 2009

ready to serveI’m not going to really use that headline. Or am I…

Anyway. This is one super easy, super cheap, super good way to feed a crowd. I’m not going to belabor the point with witty prose. Let’s get to the meat of it.

Buy lots ‘O  pork shoulder from your local butcher. Yes, your local butcher. Costco carried it last time I was there and you can get it from them, but you will have to live with the guilt of supporting mass feed lot economics and all that goes with it. When I started making this on a regular basis, Costco didn’t carry it, or I probably would have bought it there. So I had to find large quantities of it elsewhere. And I’m glad I did, because buying local helps me to feel superior and better than you. I can’t remember what Costco sells it for, but my local meat market (Reider Meat Market in Delano, MN) sells it to me for $1.36/lb. You can’t even buy bones for that anymore! So it makes me very happy to buy it there.

Three shoulders (about 27lb) fits very nicely inside my very inexpensive roaster oven, and costs roughly $36 (the pork, not the roaster oven).

Roaster Pan

You rub the meat with seasoning. I use a mix that a friend made for me, or I use pork producers (is that a local thing, or does everyone know what pork producers is?), or Chef Paul Blackened Redfish Magic (yes, you read that right. it’s awesome on just about everything), or just salt and pepper. But here’s the thing: BE GENEROUS with the rub. Slap the seasoned pork into the roaster, cover it and cook at about 225 degree F until the meat falls apart when you stab it with a fork. I like to cook it outside on our screen porch overnight. I turn it on around 10pm and Dave turns it off when he leaves for work around 6am. The point is this: this recipe is like “give or take an hour or more.” It’s pretty hard to mess up. (Tell that to my dad, who wants exact times, quantities, etc. He was using a meat thermometer and obsessing. Hear me on this: do not use a meat thermometer. Simply cook it on a low temp until it falls apart when you stab it with a fork.)

3 shoulders

After it cools a bit, you strain the juices off into a separator.

defat broth

And then start pulling the pork. I don’t know how the experts do it, but I do it with my hands. Or in this case, with Charlie’s hands. It’s always nice to force your kids to help. I take a hunk of meat, get the fat off and hand it to Charlie to shred. There is a fair amount of fat, and as much as I love the stuff (I really do), this gelatinous goo needs to be culled. Your guests will thank you.

pulling pork

Once that’s done, you can serve it as is with BBQ sauce on the side or, as I have found works better, toss it with the sauce beforehand and serve warm in a crockpot. Let me explain: I love shredded pork in my freezer for lots of stuff: tacos, pozole, etc. And while I love BBQ Pork sandwiches, I don’t love them nearly as much as the other stuff I make with the pork. So I am always a little reluctant to add the sauce to all that precious pork we just pulled. But, if you really have the masses coming to eat, chances are you will eat it up anyway. So: I make enough to fit in my large crockpot. The rest I store in the refrigerator (and hope I won’t have to serve) until the party is over and then freeze, for my own personal use later. I have found that when I have selfishly served the BBQ sauce on the side (the better to have the untainted leftovers, should that miraculously happen) people either didn’t use it, or didn’t use enough and the result was less than spectacular sandwiches. And since the only reason I entertain in the first place is to be fawned over and praised, that was a losing deal for everyone concerned. So I mix the damn sauce into the pork.

I don’t have a set recipe for the sauce. But here is it in a nutshell: For one large crockpot, I use one bottle of store-bought BBQ sauce, lots of the defatted broth, apple cider vinegar, some honey, some worcehstershire sauce and anything else within arms reach that sounds good at the time.

some ingredientsI like it tangy and maybe a little spicy. But here’s the important thing: IT NEEDS TO BE THIN! If you use the BBQ sauce out of the bottle, your pulled pork will be thick and gooey. And it will make sick noises when you spoon it onto your bun. It’s gross, so don’t do it.

Add more sauce than you think you need. Serve with cole slaw (on the bun is best!) and chips on the side. How else can you feed 80 people generously on $36?

ready to serve

Filed Under: Food Tagged With: cheap food, pulled pork, pork shoulder, feed a crowd, roaster oven, cooking

  • « Go to Previous Page
  • Page 1
  • Interim pages omitted …
  • Page 16
  • Page 17
  • Page 18
  • Page 19
  • Go to Next Page »

Primary Sidebar

Read in CHRONOLOGICAL ORDER!

  • Big Bend National Park (6)
  • Alaska Road Warriors (46)

Search jenmenke.com

About Me

Jen menke

I’m a mostly-retired, pretend graphics and web developer (but don’t judge my skillz by THIS site!). We sold our dream home in Watertown, MN and downsized to a “Villa” in Excelsior, MN and built a home in our dream location of Eagle, CO and now split our time between the two states. It is truly a dichotomous life of absentee gardening and getting together with friends & family while in MN and playing hard and hermitting while in CO. I’ve let the blog go but a trip to Alaska has me resurrecting the Road Warriors series. My beloved brother is my biggest fan and I am doing this just for him.

Latest Reads:

Jennie's bookshelf: read

Trail of Broken Wings
2 of 5 stars
Trail of Broken Wings
by Sejal Badani
Started out strong and dwindled off for me. I wasn't enamored of the writing and -- maybe it's just me -- but the secrets!? I understand that you have to be willing to swallow a fair amount of incredulity when enjoying a lot of fiction, ...
The Girl on the Train
3 of 5 stars
The Girl on the Train
by Paula Hawkins
Audible book. Good, mindless listen. Pretty good action and twists. Not as good as all the hype, in my opinion, but I did enjoy. --Not enough to choose for my bookclub though: it would have been carved up by those English-teaching wolves...
I'm a Stranger Here Myself: Notes on Returning to America after Twenty Years Away
4 of 5 stars
I'm a Stranger Here Myself: Notes on Returning to America after Twenty Years Away
by Bill Bryson
Not my favorite Bryson book. However, it's been several years since I last read one and I was -- once again -- astounded by his writing style and voice. I just love him. I think this book is mostly compiled from columns he wrote over a c...

goodreads.com
  • Road Warriors
  • Garden
  • Food
  • Babble
  • Home

Copyright © 2025