• Skip to main content
  • Skip to primary sidebar

Jenmenke

Road Warrior

  • Road Warriors
  • Garden
  • Food
  • Babble
  • Home

easy

The Best Banana Bread

August 22, 2010

A quick break from Road Warriors to bring you this timely post:

The Best Banana Bread, otherwise known to me this week as: Hot and Humid Banana Bread.

Because if you are anywhere like Minnesota this August, you, too, have bananas rotting on your countertop.

I am going to share my favorite banana bread recipe, since I have tried many, many, many recipes. Because banana bread is an intensely personal experience, I will tell you what I want out of my banana bread in order of importance:

  1. Moistness
  2. Lightness (as in not heavy)
  3. Sweetness (must be sweet, but not too sweet. Also must not taste like “health food”)

Just so we are clear.

So, if you are looking for whole wheat, hockey puck banana bread, where the butter had been replaced with applesauce, and the all-purpose subbed out for flax seed meal, click the back arrow on your browser now.

This is also not overly fatty banana bread.

But it is also not low fat.

It is happy banana bread.

I share it with you now.

It is from one of my all-time favorite cookbooks: Cook’s Illustrated The Best Recipe. (note the messy stains on the paper.)

I omit the walnuts, but you can do whatever you want.

Here are some Jennie-ism’s:

  • Because I never sift my flour, but also because I feel like a should sift my flour, I have devised a little shortcut. I whisk my flour in the container it is stored, and then I use the whisk to fill the measuring cup, then level it with a knife. Then I just bang the whisk on my leg, wipe it with my hand and put it away.
  • I am *ahem* known to often be missing key ingredients when embarking on a recipe. In today’s recipe, I was lacking plain yogurt. However, I did have vanilla yogurt. I just used the vanilla and cut the vanilla extract down to 3/4 teaspoon. I also cut the sugar by about 3 tablespoons.
  • When I don’t have yogurt, I sub buttermilk
  • And since I rarely have buttermilk, I often use the somewhat tried and true sub of adding 1 tablespoon white vinegar to a cup of milk and letting it sit about 10 minutes. Either of which works fine with this recipe. I know, because I have done it. …several times.
  • I never grease and then flour a pan. I either just use cooking spray and cross my fingers, or I use this can of… I’ve got to go see what the name of it is… Baker’s Joy. It is cooking spray with flour in it. But to be honest, I don’t really notice that big of difference.

Cook’s Illustrated Banana Bread

  • 2 cups all purpose flour
  • 3/4 cups sugar (can be reduced to 1/2 and still taste fine if you are in to that sort of thing)
  • 3/4 t baking soda
  • 1/2 t salt
  • 3 very ripe bananas
  • 1/4 plain yogurt (or vanilla yogurt or buttermilk)
  • 2 large eggs
  • 6 T butter, melted and cooled slightly
  • 1 t vanilla extract

Preheat oven to 350. Grease a 9 x 5 loaf pan.

Whisk the flour, sugar, baking soda and salt together in a medium bowl.

In a large mixing bowl, mash the bananas well with a fork, then mix in yogurt, eggs, butter and vanilla and mix well with fork.

Switch to a rubber spatula and gently fold dry ingredients into banana mixuture until just combined.

Batter will be think and slightly chunky.

Pour/scrape batter into pan and bake approximately 55 minutes until toothpick inserted in center comes out clean. Don’t overcook! And also be aware that sometimes — just sometimes — there will be a pocket of banana in the batter that will always come out on the toothpick, so be sure to poke around in other areas.

Cool in pan 5 minutes, then remove bread to a wire rack.

Filed Under: Food Tagged With: humid, bananas, ripe, easy, hot, The best banana bread, Cook's Illustrated

Exactly How Far Will She Go?

July 26, 2010

I wonder myself sometimes.

I bought this formerly lovely broccoli — I don’t know — a week ago? Two? Actually, now that I think about it, Michelle Sandquist bought the broccoli for me when her family came over for dinner last weekend.

Oh dear. I just looked at the calendar and realized it wasn’t last weekend it was the weekend before last. July 9th to be exact.

OK, so the broccoli was 15 “crisper days old” when I unearthed it and decided it was “just fine”.

Yes, it looks bad, but honestly, it tasted “just fine.” Not slimy at all. Just strangely brown colored…

I simply vigorously rubbed the brown nubbins’ (Morgan absolutely hates the word “nubbins” and so I use it just as much as I possibly can) into the sink…

and proceded with the recipe I intended to make two weeks earlier.

I’ve mentioned I’ve been busy lately, right?

This salad was served at who-knows-how-many graduation parties this spring. I have always loved it, saying “What IS the dressing on this? It’s SO good!” to many a hostess, only to be met with blank and/or incredulous stares.

Apparently, EVERYONE knows how to make this salad dressing except for me. But since I consider myself a cultured and experienced cook, I can’t admit that I truly am the only one in the dark. and so I share it with you today in case you, too, are broccoli salad clueless. (With some tweaks, of course). (Let me know in the comments if I really am the only one who didn’t know the wonder of combining mayo with cider vinegar and sugar)

Broccoli Bacon Salad

  • 1/2 cup light or regular mayo
  • 1/2 cup apple cider vinegar
  • 1/4 cup sugar
  • 1 head broccoli cut into small pieces. (I use most of the stem, too, but peel tough part off)
  • 1 small or 1/2 a medium onion, diced
  • 1/2 cup slivered almonds, toasted
  • 1/2 – 1 cup craisins (dried cranberries)
  • Lots ‘O Bacon crumbles (I used the stuff in the big bags at Costco, because it’s so easy)

Put broccoli, onion, craisins, almonds and bacon in a large bowl. Mix mayonnaise, vinegar and sugar together. Adjust to taste. If you like it creamier, add more mayo, sweeter, more sugar, etc. Pour dressing over ingredients and mix well. Serve at room temp or chill.

Try to disregard how awful mine looks. Trust me, it tasted just fine.

Filed Under: Food Tagged With: bacon, fast, no cook, summer, craisins, salad, broccoli, easy

Al Sicherman’s Rhubarb Pudding Cake

April 17, 2010

My Very Favorite Rhubarb Recipe

Dear Mom,

Your rhubarb cake recipe has been usurped. And here’s why:

  1. I have to make glaze for your recipe and I hate making that stupid glaze.
  2. Al’s recipe keeps for much longer than yours.
  3. Al’s recipe doesn’t call for buttermilk. I never have buttermilk, so I always use milk with a teaspoon of vinegar in it. I’m convinced that–for your recipe–that is an inferior substitution.
  4. I get a sick thrill out of pouring boiling water over the sugar-covered batter in Al’s recipe.
  5. I like the crisp top on his cake.

Please don’t feel hurt.

Love always and forever,

Jennie

This recipe was published in the Minneapolis StarTribune upon Al’s retirement from over 400 years of service to the newspaper.* Out of all the recipes, I thank God every day for this one.

Preheat oven to 350. Chop 4 cups of rhubarb. I often use more, but never less.

Spray 9 x12 pan with cooking spray (I always spray on the open door of my dishwasher to contain the mess)

Then spread chopped rhubarb in pan in an even layer.

Sift together 2 cups of flour, 1 1/2 cups sugar , 2 teaspoons baking powder, 1/2 teaspoon salt into the bowl of a mixer. (Fatty sometimes reduces sugar to 1 cup. did it first time on accident and didn’t notice it, so I do know it works just fine.)

Add 6 tablespoons melted butter, 2/3 cup of milk and 1 teaspoon vanilla. Mix thoroughly, scraping beater and sides of bowl. Beat in one egg.

Spoon batter onto rhubarb, then spread evenly and carefully, attempting to completely cover the rhubarb.

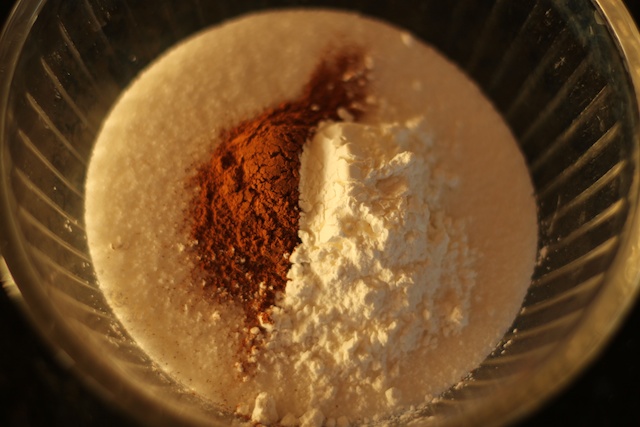
Mix 1/2 to 1 cup of sugar (I always try to use less than 1 cup, but the sugar is what gives the cake the crispy top), 1 tablespoon of cornstarch and 1 teaspoon of cinnamon in a bowl and spoon/sprinkle evenly over the top of the batter.

Pour 1 1/4 cup of boiling water gently over the top of the cake.

Bake at 350 for 50 minutes, until top is evenly browned and toothpick comes out of cake part clean. (The bottom will always be gooey.)

Let cool as long as you can stand it before digging in. It is, as my battered recipe states, “to die for.”


* I like to make up ridiculous ‘facts’ like this so that I don’t have to actually go and research it. You get the point. Al was at the StarTrib a very long time. Thank you Al.

Al Sicherman’s Rhubarb Pudding Cake
  • 4 c chopped rhubarb
  • 2 cups flour
  • 1 1/2 cups sugar
  • 2 t baking powder
  • 1/2 t salt
  • 6 T melted butter
  • 2/3 c milk
  • 1 t vanilla
  • 1 egg

Topping

  • 1 cup sugar
  • 1 T cornstarch
  • 1 t cinnamon (Al’s calls for 1/2 t. I like a bit more)
  • 1 1/4 cups boiling water

Preheat oven to 350. Spray 9 x 12 pan with cooking spray. Chop/slice rhubarb and spread in an even layer in pan.

Sift together flour, 1 1/2 c sugar, baking powder and salt into bowl of an electric mixer. With mixer on low, add melted butter, milk and vanilla. Mix well, scraping sides and bottom. Add egg and mix on medium until thoroughly mixed.

Spoon onto rhubarb and then carefully spread batter over rhubarb, completely covering. (I have found an offset spatula makes this task much easier).

Mix topping ingredients together and spread over batter.

Gently pour 1 1/4 cups boiling water over entire surface. Bake at 350 for 5o minutes. Toothpick should come out of cake layer clean.

Filed Under: Food Tagged With: easy, fast, rhubarb, al sicherman, startribune, cake, pudding cake

Compost 2010

April 13, 2010

The Good, the Bad and the Ugly.

Even though I dealt with my annual compost task a couple weeks ago, I thought it might bear sharing, since I wrote one of my first blog posts about it and thought a picture of the same pile a year later would be cool.

Unfortunately, the photos aren’t the best. That’s because the GSP has perfected her craft of breaking into the pile and feasting on its putrified contents, and I had to find a way to stop her. Not because she’d puke it up or have accidents — that dog could handily digest a bucket of bolts with nary a fart. But rather, the compost needs those green fuzzy cantaloupe peels, not her! So now I have wire on the top, wire on the front, all hammered in with U-nails. … And I was too lazy to take them off for the photo. So use your squinting skills.

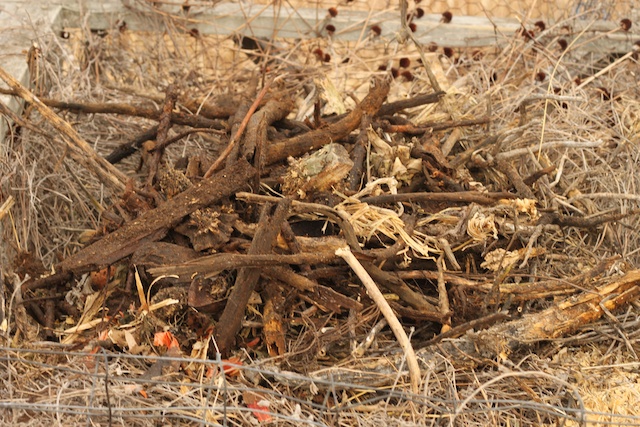
The left is the pile this time last year, the right is the same side 12 months later (now).

Again, I do nothing to this pile, aside from adding everything except blooming weeds (and car parts). No aerating, no turning. No paying attention to the ratio of green versus brown contents. Nothing.

Therefore, there are always things that don’t completely rot: avocado pits, cantaloupe peels, big sticks and branches, some egg shells, clam shells… Maybe I shouldn’t be adding clam shells…

As I dig the compost out, I pull any large item out and set it aside.

I also pull out the garbage that has made its way in to the pile.

And rescue any kitchen utensils that were inadvertently thrown away. (Just found my missing vegetable peeler, thank-you-very-much.)

Then I spread it in the garden.

After I have completely emptied the finished compost…

…which I guess I was not quite done with when I took this picture…

I use those large sticks, peels and shells that I had set aside as the base for the new pile, layering it directly on top of the dirt. On top of that, I put any leftover dried brown plant material, like asparagus tops or dead kale plants, leaves or raked brown grass

Then I cover up the other side and label with a skull and crossbones to warn the kids not to add to that pile. Well, not really. I just yell at them a lot when the inevitably screw up. So, in the photo above, the left side is now the “active” side and the other will be left alone until this time next year.

The only downside is that I never have enough. There was a point last year that I actually started catching grass clipping so that I’d have more stuff to add to the compost pile. Then I realized that was, well, insane. And I stopped.

Filed Under: Garden Tagged With: easy, compost, aerate

My Favorite Way to Plant Potatoes

April 5, 2010

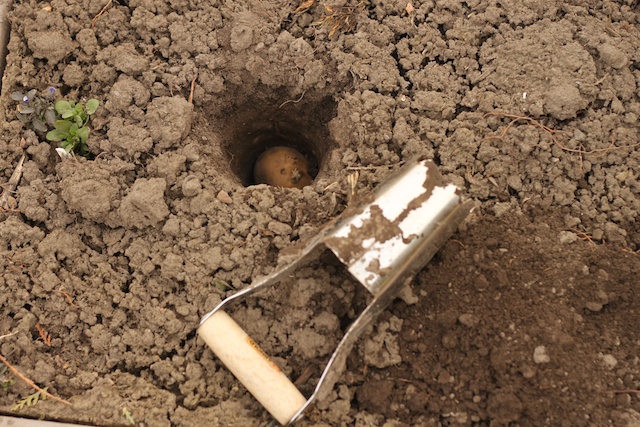
…With a bulb planter

While I like to pretend to know what I’m talking about, in this case, you must take my preachings with a grain of salt.

Or maybe even less.

As I’ve said before, I tend to cut corners on tasks that I don’t care for.

And one of those tasks is planting potatoes.

Truth be told, now that I’m writing about the third consecutive task that I don’t care for in the garden, I am starting to wonder if I really like gardening at all? Could it be possible that I’m only out there to escape questions like “Mom? Mom?… Mom?… ”   To which I yell, WHAT? Only to hear: “Where is Morgan?”

How the Hell would I know where Morgan is?

Yes, the garden beckons…

I love the garden…

And when people say “But it’s so much work. Where do you find the time?”

I just laugh.

[But I still hate planting potatoes.]

So this is the epiphany I had a couple years ago.

Use a bulb planter! Seems to work great. Why dig a whole row when you only need to get the one spud down deep?

Oh, and also? Buy enough potatoes so that you don’t have to cut them up. It’s a pain. And I’ve heard that cut potatoes are more susceptible to rot. So why bother? Seed potatoes (from the grocery store) cost practically nothing. Just buy enough whole ones and pick out the smallest ones you can find.

Soooooo. Much. Easier.

Have I written about my red potatoes? The ones I planted from last year? Good grief. I can’t remember… OK, I just checked. And I didn’t. I think I’m losing it….

Anyway, remember the crazy red potatoes I joked about using for Meatless Monday Eight? No, I didn’t actually cook them, but I did plant them! In Mid-March, no less, due to our ridiculously early Spring here in Minnesota.

Never before have I been able to keep potatoes full circle–from planting to storage to planting again– so I am very excited. I’m a bit worried about how soft they were and how long the sprouts were, but I figure if they don’t produce, I will still have time to replace them.

And, once again, I will be able to proclaim that I made something out of garbage from the garden! You see, I rescued these withered beauties from the compost bucket, where Dave unceremoniously dumped them a few weeks ago.

I will keep you updated on their progress.

Provided I remember to do so…

Filed Under: Garden Tagged With: easy, planting, red, potatoes, bulb planter, yukon, garden, gardening

Fast Easy Ciabatta Bread

April 1, 2010

Redux.

I know I have written about ciabatta bread before, and I have the video up on YouTube. Yes. It should be enough. But until everyone I know is making their own bread, it is not enough. This ciabatta bread is so easy, I just won’t rest until you try it. So please, just comply. It will save me nag time.

Another thing:

Traditional ciabatta bread is made a little differently. I have made it that way, and I have made it this way. The traditional ciabatta bread is supposed to be better. Have more flavor. Better crumb.

Blah. blah. blah.

I just can’t tell the difference.

Maybe I’m just too rough around the edges.

Or dumb.

Uncouth.

Unsophisticated palatte.

Whatever.

I guess my point is, unless you are more refined than I, you won’t notice the difference either. So why go to the extra trouble when you can make it so quickly and easily? I keep coming back to my fast recipe. Start it in the morning, eat it in the afternoon, gone by nightfall. Go to bed. Repeat.

Anyway, I just thought that maybe if I posted pictures, instead of a video, maybe more people would read it and be engaged. Are videos off-putting? I have no idea…

I also think that maybe my weight version of the recipe could be off-putting. So I’ve tried to make it easy for regular volume measurement baking.

But you do need a stand mixer. So, if you don’t have one of those, and still want to make this bread, visit thefreshloaf.com and search ‘ciabatta no mixer’. There are lots of amish-types over there making it successfully by hand. And they probably have really nice looking, muscular arms, too.

Not me. I got a nice cherry red mixer so that I can have nice, puffy, shapeless arms.

Set up: Put a baking stone to go across one oven rack. If not using a stone, then plan to bake the ciabatta directly on a sheet pan/cookie sheet lined with parchment paper. Plan to add a few minutes to the baking time if not using a stone.
If using steam (which contributes to slightly more rise and a thinner, crisper crust), place a medium cast iron fry pan in the bottom of the oven which you preheat in the overn and pour hot water in to create steam.

Go get some bread flour, salt and instant yeast (I use SAF instant yeast).

Measure 3-5/8 cups of flour (500 grams) into the stand mixer bowl, add 2 teaspoons of salt (10 grams) and 1 teaspoon of yeast. Then add 2-1/8 cups of tepid water (485 grams). Mix on low with the regular paddle attachment for about 3 minutes and let stand about 20 minutes. [When I’m in a rush, I skip this step, having no idea what the purpose of it is.]

After the rest, turn the mixer to high (speed 8 on a KitchenAid) until the dough starts to crawl up the paddle. Wait too long and you’ll have a mess on your hands, so watch carefully. I recommend a Mukka Latte and the newspaper to pass the time.

Once the dough begins to climb, clean the paddle off and switch to the hook, resuming mixing on medium high speed until dough begins to whack around the sides of the bowl and stay together, mostly clearing the sides of the bowl.

Pour into a greased container and cover either with a lid or plastic wrap.

Allow to rise as long as it takes to more than double the volume. For me it takes about 3-4 hours in the cooler months when my kitchen is about 66-67 degrees. It takes much less time in warmer months.

After it has more than doubled, dust the work surface well with flour and pour the dough out.

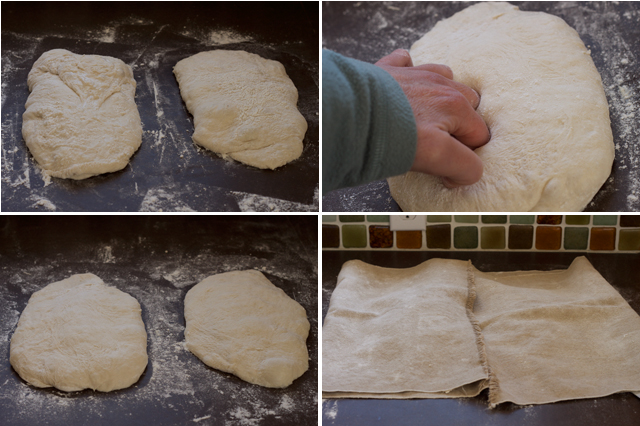
Flour the dough generously. Divide the dough into two equal pieces. Using two bench scrapers (big hand-held spatulas), lift, pull and stretch the dough, folding it over on itself once in every direction.

Flour well once more and cover well with a kitchen towel for 30 minutes.

Turn your oven on to 500 degrees around this time. Stretch and fold each piece once more then, using your knuckles, gently pound out the bubbles and mostly deflate the dough (bottom left photo). Dust more flour across the tops when your knuckles start to stick. Don’t obsess about adding too much or too little flour. It will be impossible to completely flatten it — and you wouldn’t want to. What you are doing here is getting rid of the bigger bubbles so that you don’t have big, gaping holes in your baked bread. Even when you take this step, though, big bubbles do sometimes happen. After deflating, use the bench scraper, dust loaves well with flour again and coax the dough into the final shape of the loaves. Cover again for 30 minutes.

Dust a large sheet of parchment paper set on top of a similar sized cutting board, with flour. Using two bench scrapers (or any other MacGiver-type apparatus that works), scoop/pinch a loaf up/together and flip upside down onto the floured parchment. Dust the top with flour again, dip the scrapers into the flour and coax back into a nice loaf shape. Repeat for the other loaf. Dust with flour again before baking.

If using steam, fill a cup with about 3/4 cup warm/hot water and have it ready. Slide the loaves, along with the parchment onto the baking stone. Then carefully pour the hot water into the cast iron pan below. Shut the oven door and set the timer for about 8 minutes. You’ll want to keep an eye on things, however. I moved my loaves from front to back about 3/4 of the way through the baking time because the rear position tends to burn. You will learn your oven better after you make bread a couple times. 500 degrees is hot and things are a little more intense at that temp.

When the loaves are well browned, remove to a cooling rack. Internal temp should be at least 200 degrees. Let loaves cool completely before cutting. If you can’t wait, just know that the bread will compress if you cut it before it is cooled and the interior will be a little damp and mooshed. [But it will still taste good.]

Filed Under: Food Tagged With: easy, quick, big bubbles, baking stone, fast, mixer, steam, ciabatta

One of my Favorite Things

March 26, 2010

My Mukka Express!

Every single day — well almost every single day — I drive the kids to school, then come home and make myself a Latte. Oh, I know. I should work out first. I should march straight outside for a run or walk. Or head up to do yoga before I have my coffee.

But I don’t.

And I won’t.

And therefore, there are many days I never actually do go out for a run or a walk.

And I never head upstairs to do yoga. I don’t even know what made me write that.

It’s not because I don’t like yoga. I do. I just can’t do it at home. I’ve tried. There is no “relaxing into the breath” with two dogs whining outside the door, the phone ringing far away, knowing a client is going to read about me doing yoga instead of doing their logo on Twitter an hour later.

Ok, I suppose I could refrain from blabbing about it on Twitter.

No, actually I couldn’t. I blab about everything. Not necessarily on Twitter, because I really don’t like Twitter all that much…

Where was I…? My latte.

I. Love. My. Mukka. It has become a horoscope of sorts. Because every day the milk froth is a little bit different. And trust me: I’ve tried running experiments. It’s not the milk. And what else could it be? Some days the froth is sort of lame. And other days all fluffy and puffy. Fluffy and puffy is good.

But when I get a huge froth and my cupeth *almost* runneth over?

Well, then I know it’ll be a good day.

It takes just minutes. I add the water to the line on the inside:

Add finely ground coffee:

Screw the top on and add the milk to the line inside the top part:

Wait about 2 minutes till the steam thing pops and starts bringing the espresso into the milk

Then it gets quiet for another minute or two until all the rest of the water and steam starts making noise again and finishes frothing the milk

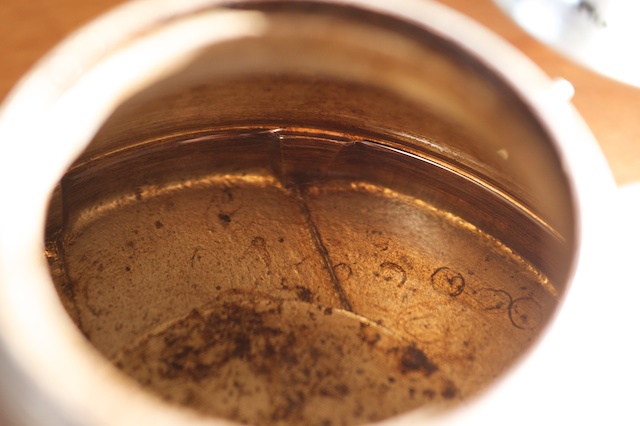
Sometimes there is so much froth is comes up to the top rim. Sadly, not today.

Mmmmm….

As you can see above. My cup does not runneth over today. It is a lame froth day. But it doesn’t matter. It still tastes the same. So was my day bad? Actually, it sort of was…

Anyway, another great thing is the Mukka dollars it saves me. [get it?] If you spend $3 or more on coffee three times a week or more, well, You Do the Math.

(I think I’ll end every post with “you do the math” from now on. It has a certain punch to it, no?)

Filed Under: Home Tagged With: easy, fast, mukka, Bialetti, latte, coffee, save money

  • Page 1
  • Page 2
  • Go to Next Page »

Primary Sidebar

Read in CHRONOLOGICAL ORDER!

  • Big Bend National Park (6)
  • Alaska Road Warriors (46)

Search jenmenke.com

About Me

Jen menke

I’m a mostly-retired, pretend graphics and web developer (but don’t judge my skillz by THIS site!). We sold our dream home in Watertown, MN and downsized to a “Villa” in Excelsior, MN and built a home in our dream location of Eagle, CO and now split our time between the two states. It is truly a dichotomous life of absentee gardening and getting together with friends & family while in MN and playing hard and hermitting while in CO. I’ve let the blog go but a trip to Alaska has me resurrecting the Road Warriors series. My beloved brother is my biggest fan and I am doing this just for him.

Latest Reads:

Jennie's bookshelf: read

Trail of Broken Wings
2 of 5 stars
Trail of Broken Wings
by Sejal Badani
Started out strong and dwindled off for me. I wasn't enamored of the writing and -- maybe it's just me -- but the secrets!? I understand that you have to be willing to swallow a fair amount of incredulity when enjoying a lot of fiction, ...
The Girl on the Train
3 of 5 stars
The Girl on the Train
by Paula Hawkins
Audible book. Good, mindless listen. Pretty good action and twists. Not as good as all the hype, in my opinion, but I did enjoy. --Not enough to choose for my bookclub though: it would have been carved up by those English-teaching wolves...
I'm a Stranger Here Myself: Notes on Returning to America after Twenty Years Away
4 of 5 stars
I'm a Stranger Here Myself: Notes on Returning to America after Twenty Years Away
by Bill Bryson
Not my favorite Bryson book. However, it's been several years since I last read one and I was -- once again -- astounded by his writing style and voice. I just love him. I think this book is mostly compiled from columns he wrote over a c...

goodreads.com
  • Road Warriors
  • Garden
  • Food
  • Babble
  • Home

Copyright © 2025