• Skip to main content
  • Skip to primary sidebar

Jenmenke

Road Warrior

  • Road Warriors
  • Garden
  • Food
  • Babble
  • Home

recipe

No Added Pectin Apple Rosemary Jelly Update!

October 17, 2013

Low Sugar Apple Rosemary Jelly

I thought it was worth re-visiting my original Apple Rosemary Jelly Post, since I have been making a lot of it this past week and have been experimenting with the amount of sugar necessary for a good gel. That recipe has generated a lot of comments and questions from people who want to make a lower-sugar jelly and I really didn’t have any answers at the time.

And, to be fair, I still don’t really have ANSWERS so much as solid experience that says using less sugar should work for you, since it has consistently worked for me. To make the jelly, be sure to read the original post for the recipe and directions. For lower sugar, read on!

The base of the problem is that jams and jellies are all about food science. I have neither the time nor the inclination to do the full research on the subject. I just want jams and jellies that spread. I want to make it once, not two — or God forbid — three times. I did spend time delving into the subject online to see if I could understand how the amounts of water, sugar, acid and natural pectin affect the end product, but alas, I am not much more informed than I was when I set out.

What I WILL say, is that I am so VERY sick of reading about the USDA standard for jams and jellies and all kinds of nonsense. I’m not a proponent of putting anyone’s safety at stake, however, I surely beg to differ that you need to use a box of Sure-Jell. Good grief. Have you read those recipes? Four cups of juice to eight cups of sugar… and I rest my case.

The bottom line is that you can cook just about any fruit down to a spreadable consistency with very little sugar. Period.

Jelly is a little trickier.

So this is what I’ve learned:  220 degrees is the magic gelling temperature — as stated in my original apple jelly recipe. Just to compare, I checked the temp of my raspberry jam when done (using my normal sight and sound cues described here) and it was also 220 degrees! I thought that was pretty cool.

I’ve noticed that using less sugar for the jelly takes longer to reach that temperature. I’m not sure if the longer cooking time is a factor of how much water is present in the juice or from the reduced sugar. I just don’t know. At any rate, you also end up with less end product when you use less sugar (obviously). What gets my brain running in circles is this: Is it possible that by the time you reach 220 degrees, you’ve boiled off enough water and juice to have the same amount of sugar to apple juice in the finished jelly? My dad, a food scientist in his working days, says no. But then, it’s my dad. And I have a long history of not believing him. So why start now?

Ha ha ha. I love to tweak on my dad.

Anyway, that’s the scoop. My former Apple Rosemary jelly used a 1:1 ratio of apple juices to sugar. 4 cups juice, 4 cups sugar (which is still low sugar, when compared to commercial pectin recipes). My 2013 jellies have used ratios of 2:1 all the way to 4:1 juice to sugar. And they have all worked. I like to think the jelly is lower sugar, but I can’t say that it is for sure. What is truly amazing though, is that the lower sugar jelly tastes just as sweet. The only difference that I can detect is that it tastes more “apple-y”! Cuz, duh, I’m not a martyr. I still want my jelly sweet…

For all the questions this will generate (and, no doubt, sad stories of failures) Here are some visual clues to the point at which your jelly will set.

When it is in the early stages and boiling hard the mixture is foamy, like bubble bath.

Low Sugar Apple Jelly begins cooking

After a while the bubbles start to get shinier and slightly darker

Apple Jelly cooking and nearly there

It takes a long time to go from 216 degrees to 220 degrees. But once it hits 220 degrees, look out! It will rise quickly and you want to get it off the heat and in to hot, sterilized jars quickly. As you can see, in just the time it took to focus my camera, the bubbling mass went up almost 2 degrees!

Apple Jelly cooking 220 degrees

At the end, the mixture it is dark and shiny and sort of ANGRY looking.

Low Sugar Apple Jelly at the gel point

10 minutes in a water bath will complete the process and leave you with with jars of joy that should definitely be left out on your countertop (preferably in a window where you can enjoy the beautiful color) and pat yourself on the back every time you glance their way.

Canned Apple Jelly

It’s been a long few weeks of harvesting, canning and freezing tomatoes, picking sorting and cooking apples. Picking carrots and beets. Making beet chips — the ONLY way I can tolerate a beet, I might add. Picking and hauling pumpkins and squash. Next up is kale, kale and more kale, along with washing my dreaded windows. All of that will have to wait though, as I am planning to zoom off to Madison for the weekend for some retail therapy with Morgan. Yes, I do hate to shop, but Morgan does not!

Filed Under: Food Tagged With: low sugar, harvest, apple, fall, jelly, no added pectin, recipe

Preserved Lemons? Or Yellow Orbs of Death?

June 10, 2011

That is the question.

A question, I hope, that I have answered, since we are now actively eating them. No one has died. No one has even gotten a stomach ache. So, hopefully we’ve ruled out botulism.

I’m sure that inspires you not. But, who knows. You sit here reading this blog, don’t you? Who am I to make judgements about what you actually will, or will not, do?

Am I endorsing the making of preserved lemons? No. No, I’m not. Frankly, I don’t think they are all that. But then, maybe I made them wrong. Well, I mean, I know I made them wrong, as you will soon see. But you are still eating lemon rinds, for pete sake. How good can they actually be, even if you have made them right? (This is where my faithful readers should chime in and tell me how wonderful preserved lemons are.)

But hopefully, you all know me well enough to know that, dammitalltohellanyway, I will be making them again. The right way. Just to see if I am missing some gourmand gene that allows me to swoon over preserved lemons like my friends do.

For your ensured longevity, I will be giving you the correct technique for preserving lemons. For your reading pleasure, I will tell you how I preserved mine.

Correct Technique #1: Start small. Buy 8-10 lemons. Use a quart canning jar. Because, you will probably never eat them all anyway.

Incorrect Technique #1: Buy a 20 lb bag of lemons at Costco. Buy a 2-gallon canning jar at Sur La Table.

Correct Technique #2: Optional. Soak the lemons in water to soften the rind for three days, changing the water daily.

Correct Technique #3: Cut the lemons in half lengthwise almost through to the other side, leaving the stem end intact. Rotate 90 degrees and cut again lengthwise so it is quartered, again leaving the base intact. You should be able to open the lemon like a flower. Sprinkle the insides of the lemon generously with salt.

Correct Technique #4: Put 2 tablespoons of salt in the bottom of the sterilized jar and pack lemons tightly into the jar, squishing them mercilessly so that juice is extracted and rises above the packed lemons. If necessary, add more freshly squeezed lemon juice** to cover lemons. Top off with another 2 tablespoons of salt. Seal jar and put in a dark, cool place. Every few days, tip jar over to move the juices around. The lemons will be ready in about 30 days.

Incorrect Techniques #2, #3 & #4: After preparing the lemons, pack them into the far-too-large jar. Decide that looks are more important than preservation, and spend a lot of time making the lemons look good inside the jar. You’ll be putting these on your counter, right? Next, after realizing you will need another 20 lb bag of lemons from Costco in order to come up with enough fresh juice to cover them, determine that the bottled organic 100% lemon juice you have in the refrigerator from Costco is just as good a freshly squeezed. Add everything you’ve got. Note that your lemons still are not covered with juice. Since your lemons are not squeezed and packed tight into your jar, they are free to bob around inside and float to the top. Because you are now out of 100% fresh organic bottled juice, and suddenly understanding that you will need another 4-5 cups of juice, since the damn lemons float, add a little water. (This is a cognizant and flagrant departure from the the very vague recipe your dear friend verbally related to you at bookclub about four months ago. And it feels…wrong.) As you begin to add the water, you have a better idea. Isn’t olive oil a preserving ingredient? And maybe the lemons won’t float so much in the oil. Great idea! You are a good ad-libber! You add about an inch of olive oil to the top. Since you have yet to have your very handy MacBook Air in the kitchen with you to quickly and easily google a recipe, and since you are also very late on time, you do not bother your sometimes-pretty little head about this detail. You cook and can all the time. It will be fine. You shut the lid and put it in a dark, cool place.

(To ferment.)

The lemons will be ready in about 30 days.

Correct Technique #5: Enjoy your safely-perserved and no-doubt delicious lemons by removing a lemon with a clean untensil to prevent contaminating the container with bacteria. Cut the lemon (rind only or rind and flesh) in small pieces and add to what ever you want a bright citrus note. A little goes a long way. (Or so I’m told.)

Incorrect Techniques #5, #6 & #7: You are excited to try these delightful things.

Carefully open your overly large jar of bobbing lemons. (Learn from the master here and consider safety goggles.) Stand back as the flip top explodes off the jar backward on its hinge and bruises your hand.

Hmmm. Can that be right?

Since you now DO have your MacBook Air in the kitchen with you (safely ensconced with a user password so your Facebook stalking daughter can’t steal it), google, “What should preserved lemons look like.” Spend a lot of time that you do not have reading about all the things you did wrong. Stir the lemons around to release all the carbonation and re-cap. Store in a cool, dark place for another 30 days.

Maybe they will go away.

Since they don’t go away, and since your very well-intentioned husband continues to buy way more than you need during his pilgrimages to Costco, re-organize your cool, dark pantry. Push the lemons to the left. Dust the glass. Stare at the swirling liquid. Shut the pantry door.

It’s time to vacuum and mop. And yes, it’s time to do the pantry floor. Move the preserved lemons to the right. Mop underneath. Move them back. Shut the door.

Can they really be that bad? Maybe the carbonation is normal. Maybe the carbonation is gone. Open the jar by protecting your hands with several layers of towels. (Brilliant idea, by the way.)

No, the carbonation is still there, gurgling to the top long after the lid is opened.

On the positive side, there is no obvious mold and they smell delightful!

Spend more time reading about preserved lemons. Try not to focus on the fact that you highly suspect you don’t even really like preserved lemons and that this is nothing but a stubborn and giant waste of time.

You learn:

  • the carbonation is from the bottled lemon juice. A well-known no-no with no explanation as to why.
  • other cooks have also experienced bubbly preserved lemons, asking if this is ‘normal’ on cooking sites, forums and places like yahoo answers — which, from my experience is not a place for answers.
  • in these forums, no one has screamed (in capital letters) DON’T EAT THEM! DANGER! DANGER! They only say things like, “no, that is not normal. did you use bottled lemon juice?”
  • olive oil is mentioned no where.
  • botulism is a scary, strange, odorless, deadly bacteria. I do not want botulism. However, it is unlikely to grow in so much salt and acid. (I did not learn that on yahoo answers.)
  • you have made non-lethal, slightly fermented, preserved lemons. Something closer to limoncello, the Italian lemon liqueur. (This is not necessarily a bad thing.)

You decide:

  • you will try these “preserved lemons” by first eating them yourself. You have lived a good life. Even if you die, you will have time to say goodbye to loved ones.
  • they are OK. Nothing so great as to merit all this angst, however.
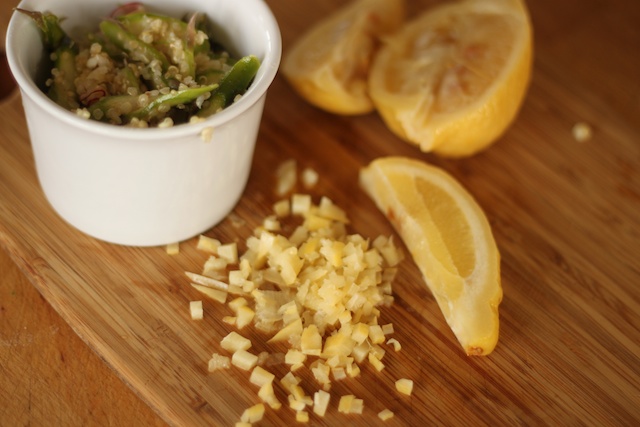
  • you live, unscathed, and begin to serve them in everything, including the hot new Asparagus Quinoa Salad, where you think they actually might deserve a permanent spot.

And finally, next time, you will follow the recipe.

** Only fresh squeezed, out of the fresh, yellow fruit, juice. Not bottled. Not water. No olive oil.


Filed Under: Food Tagged With: recipe, preserved lemons, carbonated preserved lemons, what preserved lemons should look like

The Great Pumpkin

October 11, 2010

…Or Not.

Remember my nail biting back in late June about whether or not I’d get pumpkins grown in time this year due to my late planting date of June 28th?

Well, thanks –I think– to the hot summer and an unusually late first frost, I did!

I had a few surprises though. This was one of them:

To my knowledge, I did not plant any cantaloupe. I thought I had planted Cinderella pumpkins but never got any of those. It’s pretty hard to mistake thin and whimpy cantaloupe seeds for massive Rouge vif d’ Etampes seeds — the proper name for the cinderella pumpkin, and my favorite — so that doesn’t really make sense. Who knows. Unfortunately, I didn’t know about the cantaloupes until last week, since they were completely hidden from view until the frost, and all but one were overripe.

All was not lost, however. I did get enough pumpkins to decorate my front steps:

The regular pumpkins — with such cool stems this year — are just starting to turn orange. I like them when they are in that transition period. I wish they would stay this way.

This one is my favorite:

I also got enough butternut squash to keep me happy for a while.

I don’t know why, but the three summers prior to this one were horrible for butternut squash. I just couldn’t get them to germinate and when they finally did, where overtaken by the more vigorous pumpkins. So, I’m happy with this bunch.

We really only eat the butternut, though we could eat all of them, I think. Every year I vow to finally try one of the pale green “Sweetmeat” squash that I grow only because they are so pretty (the gray-green one in the the photos above). They are supposed to be delicious.

The problem is, I get very befuddled about what to do with giant squash. We tend to be a bit single-minded in our squash consumption (see favored recipe below). Like many other things in life I have vowed not to do and failed (plant corn, underplant/interplant chaos, swear at my kids), I have vowed not to fall prey to another squash soup recipe. I don’t know what it is, but I am drawn to the idea of squash soup. I make one every year and am always disappointed with the results.  So many of them have that sort of heavy cinnamon/clove combo that I don’t like all that much in anything but desserts. Others have curry or apple… which sounds good right now, but I know from experience I haven’t liked them.

And inevitably I’m left with gallons of the stuff that no one wants to eat.

Then I feel too guilty to just dump it, and end up eating it for lunch for the next week, freezing the rest, and eating that throughout the winter — vowing each time to never, ever make squash soup again.

Is it just me? All these food writers wax poetic about luscious, velvety squash soup and I end up feeling so inadequate…

Anyway, it’s hard to beat this Ina Garten original recipe for caramelized butternut squash. Try it and tell me it isn’t the best way you’ve ever had it:

Carmelized Butternut Squash (serves 4)

  • 1 butternut squash
  • 3T butter, melted
  • 1/8 cup brown sugar
  • 1t salt
  • 1t freshly ground pepper
  • sprinkling of cayenne (optional)

Preheat oven to 400. Cut off ends of squash, then peel with a vegetable peeler, making sure to get through to the deep orange of the squash (otherwise the outside is tough). Cut in half and remove seeds. Cut squash into  2″ cubes and place on a heavy baking sheet or large cast iron pan.

Stir together the melted butter, brown sugar, salt and pepper and pour over the squash, stirring to coat thoroughly with your hands. Spread in a single layer on the pan and roast for 45 to 55 minutes, until squash is tender and glaze begins to caramelize.

While roasting turn the squash with a spatula to ensure even browning. Serve hot.


Filed Under: Garden, Food Tagged With: caramelized, Ina Garten, Barefoot Contessa, recipe, pumpkins, pumpkin, squash, butternut, cinderlla, Rouge vif d' Etampes

Apple Madness, Part One. Ugly-But-Useable-Apples Recipes.

October 21, 2009

Ugly But Useable Apples

Ugh.

Ugh.

I wish I could be more upbeat about this whole harvest thing, but MAN. I’m ridiculously SICK of it. How do orchard people stay happy? How does anyone stay happy? It’s just one thing after another thing after another… it’s never over. I’m never done!

aah. I digress. Again.

Not only do I sit and think “Oh my gosh, I’ve got to deal with those _______.” (fill in the blank with apples, peppers, eggplant, kale plants, beets, carrots, parsnips, etc.) But then I think “Oh my gosh, I’ve got to get that apple post up on the blog.” And then I wonder “What the hell am I even doing this stupid blog for?” For which I do not have an answer.

Aside from my petulance about all the harvest things I have yet to do, I am really, really excited smug about this pairing of apple recipes.

First, know this: I grow organic apples.

Second, know this: I grow organic apples because it is the easiest way to grow apples. You basically do nothing, versus spraying chemicals on the apples every two weeks. I can’t be counted on to do anything “every two weeks.”

Third, know this: my organic apples are very ugly and hard to give away.

Fourth, know this: I hate to waste garden food and therefore I have a lot of ugly apples. Very tasty, ugly apples. Hence this combo of recipes.

Backstory
We had two hard freezes before September was over. Normally we have a few frosts, things wind down slowly and the apples are about the last garden item to be harvested, along with carrots and parsnips. This year however, our first frost was not a frost, but a freeze. The apples were mostly OK that night (26), but a week later the temps dipped down to 20. Not 25, but 20! So I spent the day picking all the apples and sorting them into 3 piles: compost, really ugly but useable, and maybe-I-can-eat-this-apple-fresh piles.

I use the “Really Ugly but Useable” apples for pies and sauce. I basically just cut away everything gross and use what I can. Last year, I was making tons of pies to freeze. I had a bucket of peels and cores under the sink in the compost bucket. I think I might have even emptied some coffee ground on top of them. Then I read something about boiling the peels and cores to get juice that you use for apple jelly. Honestly! That’s like making food from garbage!

So I brushed the coffee grounds off the browned peels and cores and dumped them in a pan with some water and started boiling. I got only 1 pint of jelly out of it, but oh MAN, it was so insanely good! In my opinion, it’s way better than my raspberry jam that everyone seems to want. The jelly was too runny last year, but I didn’t care. This year, I was hoping I could do it better.

So here is my process. And if I may be allowed to say so, it’s brilliant. I don’t know how many other people have ugly apples, but if you do, please don’t throw them away: try this!

Apple Sauce and Apple Jelly

The ugliest useable apples go into the Sauce/Jelly pile (this is a very complicated pile system) while the prettier ones go into the Pie/Jelly pile (that’s Apples Part Two, coming soon). Just for the record, my apples are a mixture of Honey Crisp, Haralson and two mystery varieties.

I take an apple, and cut it in half, then quarters, and assess the situation:

Would your child eat this apple?

if looks OK, I cut the core out and put that in the jelly pot. The quarters go into the Sauce Pot.

1) Learn to Focus your camera. 2) Put this apple in the Sauce Pot cuz it's fine.

If it looks über yucky, I use what I can.

Yucky Apple: Just cut off the bad parts and assess

Nice bright pieces go into the Sauce Pot.

Sauce Pot Apples

Mottled brownish pieces (trails from the Apple Magot Fly) go into the Jelly Pot.

Jelly Pot Apples

I do confess that we often just eat the less disgusting brownish ones. They are only trails of worms long gone. You can hardly see some of them. Just so you know: I like to think I’m preparing my family for some apocalypse that will take place some time in the future. My kids are going to be way more immune to gross food than yours will be.

Brown Apple Maggot Fly Tunnels. Go ahead. Eat it. It's Fine!

I work my way thru the pile (which isn’t disappearing nearly fast enough). And yes, that’s a trash can and yes, it’s kind of dirty…

Are you KIDDING ME? I still have all these Ugly But Useable Sauce Apples?!

The pectin for the jelly comes from the peels and the seeds, so you need those for the jelly. The peels stay on the sauce apples because I will put those thru the food mill and they make the sauce pink, which is very pretty. I could leave the cores on the sauce apples as well, but they are helpful for the jelly and it’s easy enough to just cut those out. Is this as confusing as I think it is? It shouldn’t be…

Oh my gosh I have a terrible headache… But I still have 42% battery left on my laptop, so I must press on!

I basically just keep going until one or the other pots fill up. Then I add about 1 cup of water to the sauce apples and turn on low and cover. I almost cover the Jelly Apples with water and add a whole bunch of ROSEMARY (my favorite flavor). Do not skip this step. If you don’t have any, go buy some. Seriously.

Rosemary! My Favorite! A MUST for Apple Jelly!

Add 1/2 cup of fresh squeezed (not!) lemon juice. (I’ll squeeze up to 1/4 cup. More than that, and I use this stuff, kindly given to me by my friend Chris when I complained that real lemon juice — as opposed to RealLemon brand yucko — didn’t exist. She got this at CostCo.

This upscale, organic Lemon Juice still tastes not fresh. Oh Well.

Stir it up and turn on low, cover and cook till apples are soft, at least an hour.

Just cover jelly apples with water and add rosemary.

Once soft and tender, line a strainer with several layers of cheese cloth (or use a jelly bag, whatever the Hell that is, if you happen to have one. I do not.) set over a large bowl and pour in. Do NOT push or force apples thru.

Jelly apples strain thru cheese cloth for several hours

This mixture needs to sit a good long time, preferably overnight in a cool place. I’m thinking that maybe it’ll be cool enough on my porch tonight. Ya think?

Meanwhile enjoy the October 3rd snow...

Meanwhile, the Sauce Apples should be soft and ready to process. Put the Sauce apples thru a food mill to get rid of the peels and any seeds.

Sauce apples go thru a food mill.

I put the food mill right back over the pot they cooked in because once you are done processing them, turn the heat back up, add 1/4 c lemon juice for about 4 lbs of cut apples and sugar to taste. I added about 1/2 cup. I also add about 1 teaspoon of cinnamon because we like that. Bring to a simmer and ladle into clean, hot sterilized canning jars.

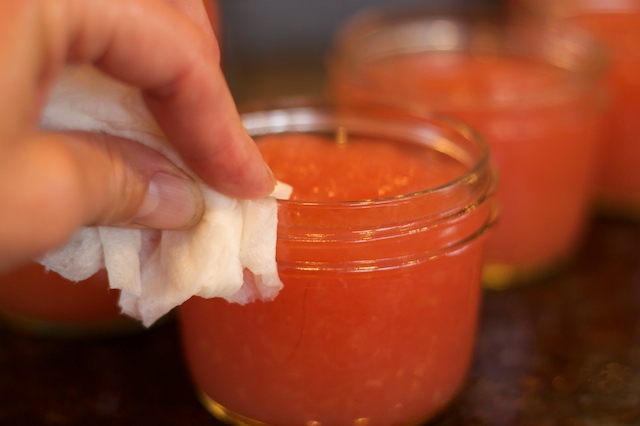
Once again, learn to focus camera as you fill sauce jars.Be sure to wipe jar rims or they won't seal!

Heat process (steam or boil) 10 minutes for 1/2 pint jars.

10 minutes for 1/2 pints.

You are now done for the day, go to bed feeling like a superstar. Tomorrow, though, it all begins again, so sleep well.

In the morning (or several hours later), put the juice from the strained apple rosemary mash into a measuring cup.

Beautiful Apple juice really for jelly making! (the next day)

I have just over 4 cups, so that means I need to add 4 cups of sugar. Put it into a big-ass pot, because the jelly needs to be cooked at a full rolling, foamy boil.

Rolling Boil to 220 degrees F

It took me about 20 minutes to reach the magic temperature of 220 degrees F. Be sure to skim off as much of the foam as possible because it makes a bigger difference for clear jellies. I don’t worry about it too much with my jam, but you can see it below, suspended in my jelly. As soon as it reaches 220, turn off the heat and ladle into hot, sterilized 1/2 pint jars, wipe the rims and seal. Heat process for 10 minutes. Refrigerate any jars that don’t seal.

Apple Rosemary Jelly (with bits of foam suspended in jar, dammit!)

See the foam? Really ticked me off, I have to say. But then, just another reason to keep it for myself.

I am just too damn good.

Apple Sauce and Apple Jelly. Leave it on your counter to admire for a couple days, then trudge it out to the garage or basement or where ever you store that type of thing.

No wait. This is just too damn good!

And this year, It’s the PERFECT consistency! So happy.

Filed Under: Garden, Food Tagged With: no pectin, Honey Crisp, Apples, Haralson, organic apples, apple jelly, apple sauce, apple maggot fly, wormy apples, ugly apples, hard frost, harvesting, recipe, Rosemary

Keeping Up With the Beans

August 6, 2009

varieties of beans(and zuchini…)

I have a confession to make: my family & I hate canned and most frozen vegetables.

This poses quite a challenge for the whole local food movement because it disallows us from truly utilizing my garden’s bounty by canning and freezing the excess harvest. Come December, I hang my head in shame as I shop the produce aisle of Cub Foods purchasing plastic bags full of imported green beans. It is a serious shame. But isn’t it worse to slave away, steaming and freezing green beans that languish in the freezer, only to get fed to chickens in July? Tough call.

Anyway, because of the frozen food aversion, I give away a lot of my harvest. It is one of the only nice things I do with no ulterior motives. (Really.) I do still end up preserving quite a bit: raspberry jam, tomato salsa, I cook and freeze kale (it suffers none of the indignities that beans or carrots do when boiled and frozen), etc. Oh, and I pickled several pints of green beans this year, completely ignoring my notes from six years ago that said, and I quote, “do not pickle beans. no one eats them,” because I figured a lot can change in six years. But mostly I ignored the note because I have so many effing green beans. Aside from freezing them again — and notes from last year’s wasted frozen beans score a lot higher on my believability chart than the pickled beans from 6 years ago — I just don’t know what else to do with them! You wouldn’t believe how many of today’s fine UPS and FedEx drivers are uninterested in free bags of green beans! In addition, two large families I used to supply started their own home gardens. The nerve!

Anyway. I have never professed to be a good cook. I cook good. There is a difference. A “good cook” is creative and inventive. I cook other people’s recipes “good.” However, today I actually invented a recipe.

Green Bean Salad

I am calling it my KEEPING UP WITH THE BEANS recipe. Plus, I offloaded several zuchini into it, so that is an undeniable bonus. It also happily accepted cucumbers, cherry tomatoes, and onion. I’m pretty sure that you could add just about anything — in vast quantities.

I will reiterate that last point: It uses vast quantities of garden produce. I say this because of how many times I have searched for recipes in order to use up some massive quantity of zuchini, for example, only to find that instead of four, 5 lb zuchinis, it calls for only 1/2 cup. Totally pointless. This recipe uses LOTS of beans. And since it’s a salad, you can keep it in your fridge for days and munch on it at will. Fatty finds this very handy, and I’m sure you will, too.

Twp important tips:
1) DON’T OVERCOOK VEGGIES AND
2) USE AN ICE BATH IMMEDIATELY TO STOP THE COOKING AND RETAIN COLOR & CRUNCH!!

prepare ice bath

I steamed the beans, corn and zuchini all together. I cut up 2 cukes, 1/2 large onion and as many cherry tomatoes as I had on hand. After that I thought “hmmm….” and added a can of garbanzo beans and bacon crumbles, which were both super good. I went scrounging for some blue cheese as the crowning glory, but alas, my hunk was no longer even blue. It was orange and greenish. And while I am a huge proponent of pushing the expiration envelope, even I have standards. I threw it out and chopped up the remaining fresh mozzarella I had, which was good, but blue would have been better.

For the dressing, I used about 1/4 c balsamic vinegar, 1 teaspoon honey, 1 teaspoon dijon mustard, then slowly whisked in olive oil until the mixture was thick and tasted good. I am guessing it was about 1/4-1/3 cup of olive oil. I added salt and pepper to taste. I tossed the dressing with the cooked, iced and chopped veggies, then chilled. Before serving, I sprinkled skinny strips of basil and mint over the top.

It was FABULOUS and GUILT FREE! Try it. And let me know what changes you made. Pine nuts? edamame? Comment!

Filed Under: Garden, Food Tagged With: green beans, salad, tomato, tomatoes, keeping up with the beans, zucchini, preserving, recipe

I Hate Beets

July 2, 2009

beet greensI hate them boiled, roasted, pickled and pureed. I hate them with orange vinegarette and in salads. I’ve tried every recipe that starts with “Even people who say they hate beets love this recipe…” (You would be amazed at the number of beet recipes that lead off with something along those lines, which tends to make me to believe that I must not be the only beet-hater out there.)

So why do I grow them? Well. My family loves beets, so I grow (and cook) the insipid things for them. I think it grossly unfair that in the intermixed gene pool that are my children, my food preferences seem not to be represented. I love mushrooms; no one else does. I love eggplant; no one else does. I love tofu; no one else does. On the other hand, Dave loves pizza; so do the kids. Dave loves olives; so do the kids. And, of course, Dave loves beets; and so do the kids.

What’s a beet-hater to do? Eat the tops. They are delicious.

Beet Greens Saute

1) Rough-chop the tops of the dreaded beets you will feed someone else
2) Heat about 2T olive oil in pan
3) Add 1-2 minced or chopped cloves of garlic. (Do not brown)
4) Add beet greens and stir until mostly wilted
5) Add a splash of balsamic vinegar*

*Of course, I could simply drink balsamic and be happy.)

Filed Under: Garden, Food Tagged With: beets, i hate beets, beet greens, gene pool, recipe

Primary Sidebar

Read in CHRONOLOGICAL ORDER!

  • Big Bend National Park (6)
  • Alaska Road Warriors (46)

Search jenmenke.com

About Me

Jen menke

I’m a mostly-retired, pretend graphics and web developer (but don’t judge my skillz by THIS site!). We sold our dream home in Watertown, MN and downsized to a “Villa” in Excelsior, MN and built a home in our dream location of Eagle, CO and now split our time between the two states. It is truly a dichotomous life of absentee gardening and getting together with friends & family while in MN and playing hard and hermitting while in CO. I’ve let the blog go but a trip to Alaska has me resurrecting the Road Warriors series. My beloved brother is my biggest fan and I am doing this just for him.

Latest Reads:

Jennie's bookshelf: read

Trail of Broken Wings
2 of 5 stars
Trail of Broken Wings
by Sejal Badani
Started out strong and dwindled off for me. I wasn't enamored of the writing and -- maybe it's just me -- but the secrets!? I understand that you have to be willing to swallow a fair amount of incredulity when enjoying a lot of fiction, ...
The Girl on the Train
3 of 5 stars
The Girl on the Train
by Paula Hawkins
Audible book. Good, mindless listen. Pretty good action and twists. Not as good as all the hype, in my opinion, but I did enjoy. --Not enough to choose for my bookclub though: it would have been carved up by those English-teaching wolves...
I'm a Stranger Here Myself: Notes on Returning to America after Twenty Years Away
4 of 5 stars
I'm a Stranger Here Myself: Notes on Returning to America after Twenty Years Away
by Bill Bryson
Not my favorite Bryson book. However, it's been several years since I last read one and I was -- once again -- astounded by his writing style and voice. I just love him. I think this book is mostly compiled from columns he wrote over a c...

goodreads.com
  • Road Warriors
  • Garden
  • Food
  • Babble
  • Home

Copyright © 2025