• Skip to main content
  • Skip to primary sidebar

Jenmenke

Road Warrior

  • Road Warriors
  • Garden
  • Food
  • Babble
  • Home

tomato

How much of a good thing is too much?

August 12, 2011

Garden Tomatoes.

Can you ever have too many?

Yes and no, is what I say. Yes, if you are buried under mounds of work and untended-to yard and garden chores. No, if you have all the time in the world. Like my kids seem to have…

nevermind.

I am told it is a bad year for tomatoes in these parts. In my little corner of the world, it isn’t so bad. Better than last year for sure, but not as good a a few years ago.

I think all the rain — records smashed here in Minnesota– has made them get the blight sooner for most people, though not for me. I struggle with that particular problem every year, no matter where I plant them, what they are mulched with, or how much rain we get. Blight just seems to be my lot in life.

I accept that.

Right now though, I’ve got tomatoes coming out my ears. I picked a full bowl yesterday.

And left at least that many more on the vine. Making salsa is out of the question. I have no time. Hopefully I will soon, but even if I did have the time, there is something about preserving garden surplus that just doesn’t sit well with me in August.

Why is that? The most I seem to be able to do is chop and freeze. Or, on a really good day, roast, puree and freeze.

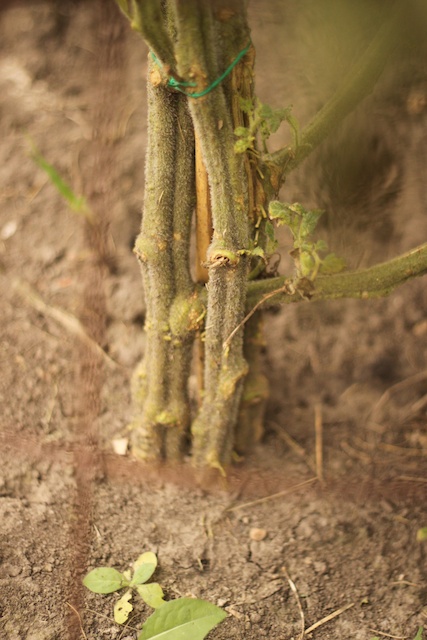
One thing I meant to write about earlier in the season was the strange way the plants were sold by the nursery this year. I bought them from a different place than usual since I was so behind schedule and had to pick them up when I could find them. Sadly, I had no time for a special trip to my local grower. I found my main-stay Brandywine in a fairly large sized pot while shopping for flowers and bought two pots. Oddly, this nursery had allowed several seedlings in the same pot to grow. So instead of having one sturdy seedling, there were about six. My understanding has always been that this is a huge no-no, so I asked one of the people at the nursery and they said not to pinch any back, but to let them all grow. I’m still not sure if they knew what they were talking about, but at the very least, because I also planted a pot with a only single seedling, it would prove to be a fun experiment.

With pretty much no conclusion.

At this stage in the game, when compared to my single-seedling plants there isn’t much difference. I can’t even say for sure if the multi-seedling plants were more susceptible to the blight or not. That was my hunch, but I would guess, from looking at them planted all together, that blight damage is more a factor of proximity to another blight-damaged plant than to multiple seedlings in a single planting.

This is a very boring post, isn’t it.

Anyway, getting back to the title, “how much is too much”, it really didn’t refer to the harvest. It pointed back to the eating. How much is too much?

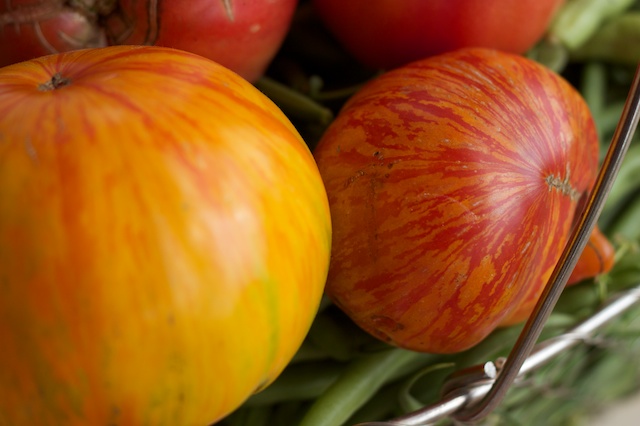
Is this too much?

Because that was my lunch yesterday. I decided to eat the split tomatoes before the fruit flies (curiously absent so far this year) found the leaking fruits. But there were three (!) split tomatoes.

So I ate them all.

Is that too much?

Is that gluttony?

I tempered it with some fresh moz. I love fresh mozzarella. Sometimes I think the tomatoes are just an excuse.

I also heaped the rest of my quinoa salad on the side. Which I thought I had already posted here, but I apparently did not. Or did I? I can’t find it. Can anyone help me resolve this burning question?

Anyway, this salad is SO GOOD! Make some today or as soon as the temperature starts to melt you. It keeps in the fridge for about 3 weeks.

I’m kidding. Not three weeks. More like 1 or 2. Just smell it for gawd sake. Everyone is so flipping freaked about about things going bad! Just SMELL IT! If there isn’t anything funky growing on it and smells the same, eat it and stop being so paranoid. I’m still alive. That should give you some confidence.

Or not.

Quinoa Salad with Fresh Anything

  • 2 cups quinoa, rinsed (skip the rinse if you are lazy like me)
  • 2 teaspoons salt
  • 1/4 cup fresh-squeezed lemon juice (more or less to taste)
  • 1/4 cup olive oil
  • various fresh veggies diced: onion, cucumber, tomato, sugar snap peas, asparagus, sweet peppers, fresh raw corn, etc.
  • 2T chopped fresh herbs: any combo or single addition of basil, mint, cilantro.
In a medium saucepan, add a film of olive oil and toast quinoa over medium heat for about 5 minutes it starts to smell good. Again, if you are über lazy, you may skip this step. It just adds a dimension to the flavor. Add 3 cups of water and 2t salt to pan and bring to a boil, then turn to low, cover and simmer about 12-15 minutes. Fluff and cool.
In a large bowl, whisk lemon juice and olive oil together. Add add quinoa and diced veggies. Stir in chopped herbs. Salt and pepper to taste. A stunning additions is — of course — diced, fresh mozzarella. Another thing I tried was left-over strips of warm flank steak. It was yum!

Filed Under: Garden, Food Tagged With: quinoa, blight, salad, tomato, tomatoes, how to plant, Growing

Meatless Monday 40

October 21, 2010

Normally this stuff just flows from my fingers without pause. But it is confirmed. I officially dread writing about Meatless Mondays.

This post has been half-finished for over a week now. And I won’t let myself post anything new until I get it done. The agony… of bad pictures and uninspired writing.

But you have to give me kudos for trying. And trying I am still. The past two weeks we have had two — actually three — meatless dishes. But remember, oh yee of actual vegetarianism: I consider fish and shellfish to be meatless. So I know that negates at least one of the dishes for the truly hardcore.

And, as usual, I lack photos. The days are getting shorter here in Minnesota. A lot shorter. And we eat late. I mean really late. I’m not all that concerned about photography when I’m frantically trying to get dinner on the table before 9 pm.

I’m also not a writer dedicated to showcasing my photography to the point of making meals in the middle of the day in order to style the dish and photograph it on a sublime background in the pleasing light of the setting sun. Do you know how many people actually do that? It is truly mind boggling. You can go ooh and ahh over their posts. Here’s a funny irony: my friends shake their heads at me and say “Where do you find the time…” and I shake my head at all those beautiful photos on those beautiful blogs and say “Where do they find the time…”

No, I grab the closest camera and snap. Flash and all.

Did you know that flash photography is the horror of all horrors? Seriously. Another little known fact for all you non-food-blogging types. Which, I hope for my sake, are most of you reading this.

But I have  two Meatless Monday winners that I haven’t posted before, so I should at least share the basics. The first, Meatless Monday 40, is a dish I tried to replicate from the old Sidney’s Restaurants here in the Twin Cities. They made this spicy sausage with peppers in tomato cream sauce which I just loved. I came up with a recipe that I thought came fairly close. Of course it wasn’t quite as good, because I could never knowingly use as much cream as they did and still enjoy eating it.

That’s probably why we all like to eat out so much. Because ignorance is bliss. Well, I guess I can’t slap that generalization on The Pioneer Woman who starts every recipe with a pint of cream and a stick of butter, but she is a CATTLE RANCHER, for goodness sake. I sit on my butt all day doing graphic design for free. I have to live by different rules.

Anyway, I recently made this for Meatless Monday, sans the italian sausage. The sausage was sadly missed but the dish was still surprisingly good.

Spicy Penne with Tomato Cream and Sweet Red Peppers*

* The photo shown above does not show this incarnation of the recipe. It shows Meatless Monday 36, when I made it with sage and yellow peppers and lots of oregano. It wasn’t nearly as good, though I did love those big pasta tubes! I recommend the following version of the dish. While the recipe is not precise, the herbs are more subtle and the red peppers more plentiful.

  • 1 lb Penne or Rigatoni pasta, cooked al dente in salted water
  • 1 small onion diced
  • 1 clove fresh garlic minced or 3 cloves Garlic Confit mashed
  • 1-2 cups of diced or pureed tomato — canned or fresh or combo — amount depending on your love of tomatoes
  • ~ 1/2 cup  half and half or cream — amount and type depending on your love of a flat stomach
  • 1 t red pepper flakes
  • 1-2 t sugar
  • 1 sweet red pepper sliced into skinny strips– green works if it is winter and red peppers cost as much as truffles.
  • 1 t dried thyme (or 1T fresh)
  • salt and pepper to taste
  • 1/4 cup fresh pecorino shreds — or parmigiano  if you are rich

Obviously there is no rocket science here. Saute the onion in a bit of olive oil over low to medium heat until translucent. Add the garlic and saute another minute, then add the tomatoes, thyme, salt, pepper and sugar and cook on low for a bit — maybe 10 minutes or so. About 5 minutes before serving add the peppers and cream. I like my peppers to stay firm and not be mushy. If you like them soft, add them earlier. Don’t let the cream boil.

Toss the half pasta with the sauce, adding pasta until you get the consistency you like. (I use about 3/4 of the pasta usually and save the rest for eating with butter. mmm). Sprinkle pecorino over and serve hot!

*******

Something I discovered that you probably already know: heat your pasta bowl in a very low oven (250 or so) for 10 minutes before tossing your pasta in it. I was always afraid to do this with my big, pretty bowls. But as I get older, I don’t care as much. Maybe it’s because I have more bowls. Anyway, IT MAKES A HUGE DIFFERENCE and keeps the pasts SO FRICKEN HOT for so much LONGER. It makes me feel like I’m eating it in a restaurant where I never fail to marvel, “How the heck do they get the pasta this hot?” Now I know.

Filed Under: Food, Meatless Monday Tagged With: penne, photography, rigatoni, tomato, short days, meatless monday, pasta, Minnesota, thyme, cream, red peppers, sweet

Planting the Tomatoes

May 29, 2010

With the Help of Heavy-Duty Concrete Reinforcing Wire.

I finally bought my tomato and pepper plants. I should really buy them sooner. Actually, I should start them from seed in March. Better yet, I should save my seed from the previous year, thereby keeping only the best…

You see? You see the black hole of my thoughts?

How can I ever be happy and satisfied when I am constantly being shoulded-upon?

Back to the tomatoes.

They are itty-bitty little things, but that’s OK, they’ll catch up. I have learned over the years, that even when I buy a large tomato and plant it with itty bitty tomato plants, the small ones tend to catch up. The big ones might even have tomatoes on them and yet they only produce red tomatoes maybe a week sooner. In fact, I think transplanting the larger tomatoes stresses them and sets them back. Otherwise it just doesn’t make sense.

I even bought a large 2′ tomato plant this year to test it and really watch it so I could do a controlled experiment and chronicle it here. An Early Girl hybrid, since all the rest of my plants were to be heirlooms.

Well, forget about that plan. Because I forgot about that plant. Forgot to water it. And now it’s dead. Too bad I forgot to take a picture, because once I got over being mad, it was pretty funny.

Aside from doing nothing and letting the vines sprawl on the ground, there are two main ways to grow tomatoes. Staking and caging. There are pros and cons to each.

Pros of Staking: If driven deep into the ground, staked plants won’t blow over like caged plants can. Many say staked plants produce larger fruit because plant energy is concentrated on the tomatoes and not on excess foliage . There is less disease due to more air circulation (though that didn’t seem to help me all that much). Staked plants take up less room.
Cons of Staking:  Staked plants have less foliage which can reduce the sweetness of the tomato and can promote sun-scald in high heat/sun areas. Pruning takes commitment. (Basically, what that means is, if you plan to go out of town for more than a day or two, forget it. You will come home to chaos. In your frantic effort to get the plants back to one stem, you will need to “pinch off” a 1″ diameter sucker. You will inadvertently pinch off the central leader and doom your tomato plant to a stunted existence. And your hands will always smell like tomato plants.)

I used to always stake, because that’s how my mom did it. Simple as that.

I even tried the staking method that has you wind the stems around strings run vertically. It was an interesting season. It ended in disaster when the whole rig came crashing down from the top. I suppose that’s another downside of staking. IF something happens to the main stem, it’s a goner.

I was never good at staking.

Now I cage.

But caging hasn’t been without its own set of problems. Aside from strong winds that have blown my cages over, I’ve been through many iterations of the cage. The ones you buy at the store are, what? Two or three feet high? Even in Minnesota with a short growing season, most plants grow to twice that size. Honestly, there ought to be a law against 3′ tomato cages… In order to find a cage that was actually tall enough to support the plants, I was forced to make my own, which then made staking seem like a better idea again…

But no, I persevered.  I bought wire and made the cages. I only forgot one small detail: you have to be able to get your hand through the wire to pick the tomatoes.

Not to worry. I used wire cutters and cut larger holes here and there. The bummer was, the holes never seemed to be in the right place, and when I stuck my hand through, I inevitably cut my hand on the sharp wire.

They were the worst tomato cages ever! [Maybe even as bad as the ones the stores sell.]

Tomato cage adaptation number three was the one I had been trying to avoid: concrete reinforcing wire. You buy it in rolls that weigh about 200 pounds. I’m not kidding. It wasn’t something I could do by myself. Since I am not a team player, and I don’t like to ask for help, I had avoided it for several years. But it was clear: if I didn’t want to stake my plants, and if I didn’t want to be making tomato cages every damn year, then I was going to have to ask Dave for help gettin’ me a load of concrete reinforcing wire home from Home Depot. [Why doesn’t someone go into business selling these?]

It was a big job, and since doing it more than 6 years ago, I’ve never had to make another tomato cage again. They really are worth the effort. They are heavy, don’t blow over and have nice, large holes for your hands. They patina (rust) as they age and fit right in aesthetically… I’ve even grown pole beans and other climbing things on them. They are the best tomato cages ever! But caging also has its pros and cons.

Pros of Caging: Easy; not much maintenance. Supports the plants. Bushier growth and more greens-to-red ratio promotes sweeter tomatoes, or so they say.
Cons of Caging: Sometimes a weaker plant doesn’t grow bushy enough to truly be supported by the cage. Smaller fruits. Cages takes up more room per plant. Plants are more prone to disease if growth is dense and shady

Still, I’m a cager. This year, though, I’m trying something new: I’m planting the tomato at the base of a stake inside the cage so that should the plant need additional support, there will be something there to tie it to.

Genius, I know.

I also usually prune the early suckers (growth at occurs at the “v” between the stem and lateral branch) until they get away from me.

Back to the act of planting of my tomatoes.

FIRST, I had to decide where to put the tomato plants: inside the garden proper or outside it, where they were last year when I moved them out by the squash and pumpkins because I had had two bad tomato years in a row with early blight.

What’s early blight?

Early blight is some lame generic term for: your-tomatoes-are-dying-from-the-ground-up-earlier-than-they-should-be-and-who-knows-why.

You know, the leaves turn spotty yellow then spotty brownish black. Then the stem falls off. Then the spotties hop from one branch to the next until all you have is a vertical plant with about 5 leaves at the very top and 10 tomatoes on it. The fruits will still ripen, but they don’t taste as good because it’s the healthy greens that give the tomato its sweetness. I hate early blight. It’s like having a glaring failure for all the world to see when they walk through your garden…

So I moved them out by the squash and melons hoping to get away from what I figured was contaminated dirt inside my garden. The blight was less pronounced out there. Maybe that’s because they were watered exclusively with a soaker hose. (Tomatoes don’t like to be watered from the top. Tell that to the Creator who deemed otherwise). It was a hard decision and one that I had given a lot of thought to. I was still on the fence until I went out there with the plants and compared the current state of my planting site choices:

Hmmm. Tough choice. Let’s see. I can spend the next 4 hours weeding the patch outside the garden…. Or I can spend 5 minutes weeding the box inside the garden. Hmmmmm.

So the tomatoes are inside the garden this year. We’ll see how it goes.

And just so you know. I actually pulled out some borage seedling volunteers that were all around the chives. I didn’t move them to another spot (I was short on time). I didn’t leave them there to enjoy. I ruthlessly pulled them out.

And I still feel bad out it.

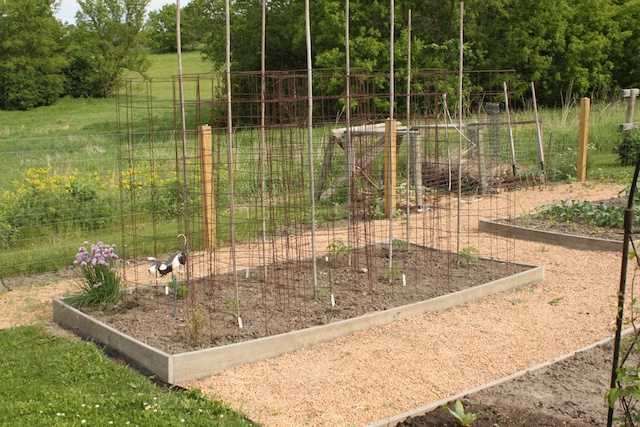
So this is how it looks all finished:

and a little closer:

…and should you ever require nice unobtrusive stakes for you pepper plants (because mine always break in a storm), consider another concrete reinforcing product: rods!

I think they look almost arty.

Filed Under: Garden, Babble Tagged With: tomato, pruning, planting tomatoes, staking, caging, pros and cons, early tomato blight

Tomatoes! Tomatoes! Tomatoes!

October 3, 2009

(And Vomit-Colored Salsa…)

You really can't appreciate the true vomit color of this salsa.

I know, I know. I’m not winning any fans with my title. But it is vomit colored salsa. What can I say?

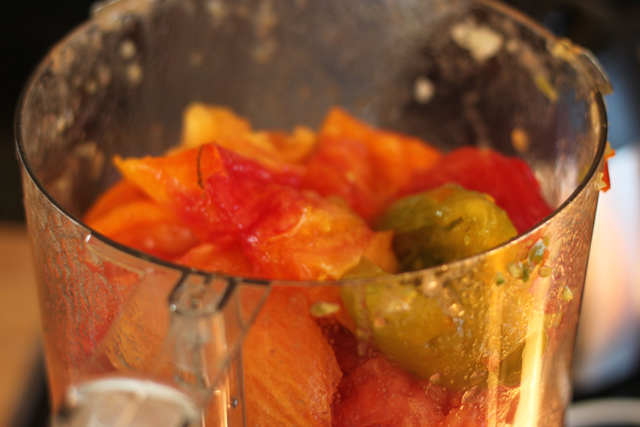
It tastes just as good as red salsa. Mine just happens to be pinkish-orange because of all the beautiful green and yellow heirloom tomatoes that I use. And for whatever reason, I always seem to have the most of the green ones. They are so delicious and sweet, but when you cook them into sauce? Trust me, it’s a tough sell. Everyone will take a jar of my salsa though, vomit colored or not. So there you go.

Heirlooms headed for the salsa pot.

I also made a ton of tomato sauce this year. That always seems to be such a ridiculous waste of fresh garden tomatoes, but really, what else can I do with them? I can only give so many away. I still have a crate full…I’ve dried them before and I just really don’t love dried tomatoes all that much. I’ve rough-chopped and frozen them without cooking for chili, soups, etc. It’s easy and works just fine. You tend to get a lot of liquid, but in chili and soup, who cares? I just don’t make that much chili and soup with chunks of tomato. So this year, after making 20 pints of salsa, I made and froze sauce with the remaining tomatoes.

I’ll tell you how to do both.

For Sauce:
For all the tomatoes destined for the sauce pot: cut all the blemishes off and core. Quarter and put into a pot with a tablespoon or two of kosher salt.. Simmer and mash and stir for a couple hours until about an inch of the watery liquid has evaporated off in steam. Either pulse in food processor (tedious) or use an immersion blender in the pot to puree. Then run through a food mill or sieve. Let cool. I use quart-sized freezer bags and put 2 cups into each one. Lay flat on a cookie sheet and freeze.

For Salsa:
This makes about 20 pints.

20 cups tomatoes
8 cups chopped onion
2 chopped green peppers (variable)
10 chopped small to medium hot peppers (variable)
1/3 cup sugar (variable)
4T chili powder (variable)
4T salt (variable)
2.5 cups white vinegar
1/3 cup cornstarch mixed with equal amount of cold water (variable)

Cut of any blemishes, core and roughly peel the tomatoes with a knife. You can do the dip-into-boiling-water-method if you want, but I don’t bother. Ripe garden tomatoes peel pretty easily without that time consuming step. I’ve also skipped peeling them entirely. Salsa was fine, if you don’t mind little strips of skin here and there.

Cored and roughly peeled tomatoes

Pulse these in the food processor to the consistency you like. Remember that they will soften further when you cook them. My kids hate chunks. My husband loves chunks. So I don’t worry about it too much since no one is ever happy anyway. I forget what’s next…

Pulse tomatoes in food processor

OK, I’m back. I had to go get my notes!

Measure the amount of chopped tomatoes as you go and then dump that into a large stock pot. You will need approximately 20 cups of chopped/pureed tomatoes total. I tend to use a little more. More tomatoes won’t hurt the safe canning ratio, because they are acidic. More onions, peppers and cilantro will. Just so you know. You can play around with the recipe — I always do, mostly because I my pepper variety changes year to year — but keep that in mind. If in doubt, add more vinegar at the end.

Garden Salsa and Thai hot peppers

Chop/pulse a combination of sweet and hot peppers. My mix (above) used about 10 medium sized hot, 4 small and 2 very small sweet green peppers. We like it hot, so I use mostly hot peppers. I take the seeds out of the really hot ones (hungarian yellow, habanero) but leave the rest in. You can do it however you want, just know that the seeds make it a lot hotter.

Add to the peppers  6-10 cloves of peeled garlic. Chop/pulse to desired size and consistency, then add to the stock pot.

Chop/pulse about 3-4 big large onions (enough for 8 cups. you can add less, but not more), add to the stock pot.

Add 2.5 cups of white vinegar. Salt to taste (I used 4 Tablespoons. We like salt.). Grind some pepper to taste. Add 2-4 Tablespoons chili powder. Again, this is personal taste. Start at 2T, taste and add more if you like. I used 4T and it’s tastes highly seasoned. I find that as the jars sit for a while, both the hotness of the peppers and the zip of the seasonings diminish, so I tend not to fear a little overseasoning.

Cook to meld flavors (and kill any lurking bacteria!)

Bring to a simmer and add 1/4 to 1 cup of sugar. Again, personal taste. You can skip the sugar entirely, but I’ve gotta say, if you add just a bit (I use 1/3 cup) people go crazy and don’t know why. Mix 1/3 cup cornstarch* with 1/3 cup cold water and slowly add to salsa pot, stirring often. Simmer for about 30 minutes. In the meantime, sterilize your jars and lids. Right before filling jars, stir in 1/2 to 1 cup of cilantro. Mmmmm. mmmmmm. mmmm. (You either love it or hate it.)

Lots of cilantro. Don't add until right before canning!

Fill hot jars with hot salsa to 1/2″ from the top. Wipe rims and seal. Process in a hot water bath for 15 minutes.

OK, I’m going to be honest here. The woman who started me on her version of this recipe doesn’t process her jars. She says, as long as they “pop” and “seal” as they cool, it’s fine. Her mom has been doing this for years and years and years…Sooo. Neither do I!! But I can’t condone this sort of behavior from anyone else because the USDA says it’s not safe. You know the USDA, right? The harbingers of truth and wisdom? If it weren’t for the cilantro, I’d process away, but the more you cook cilantro, the less flavor it has, so I just have such a hard time putting those jars with beautiful cilantro in the water bath! It probably wouldn’t matter since, by the time the sauce goes into the jars, the cilantro is cooked anyway… Can you tell I’m having an attack of conscience? Well, no one has died yet. If someone does, I promise to update this post.

Anyway, make sure all the lids seal tight (you can test by lifting the jar by only the lid, not the band. It should stay sealed) Immediately reprocess or refrigerate those that don’t seal.

*Cornstarch is a secret and optional ingredient but recommended for salsa that just barely “sticks to your chip” without being thick and overly cooked. I learned the cornstarch tip from Kristi Kratch and can’t thank her enough from saving me from the watery, insipid salsa I had been making up until then. She adds a lot more to hers (1.5 cups). You can too if you want. She also gets credit for the sugar. She uses way more than me (1.25 cups) and I love her salsa, but Dave made me cut back to where I’m at today (1/3 cup). So play with it. Just keep the ratio of acid (tomatoes and vinegar) to non-acid (peppers, onions, garlic, cilantro).

Also, and this should go without saying, don’t eat ANY jars that have lost their seal or are bulging.

And don’t come crying to me if you kill someone with your kindness. It’s a chance you have to be willing to take.

Filed Under: Food Tagged With: USDA, kill them with kindness, tomato, tomatoes, freezing, heirloom, pink grapefruit, hot salsa, vomit salsa, gross!, tomato sauce

Keeping Up With the Beans

August 6, 2009

varieties of beans(and zuchini…)

I have a confession to make: my family & I hate canned and most frozen vegetables.

This poses quite a challenge for the whole local food movement because it disallows us from truly utilizing my garden’s bounty by canning and freezing the excess harvest. Come December, I hang my head in shame as I shop the produce aisle of Cub Foods purchasing plastic bags full of imported green beans. It is a serious shame. But isn’t it worse to slave away, steaming and freezing green beans that languish in the freezer, only to get fed to chickens in July? Tough call.

Anyway, because of the frozen food aversion, I give away a lot of my harvest. It is one of the only nice things I do with no ulterior motives. (Really.) I do still end up preserving quite a bit: raspberry jam, tomato salsa, I cook and freeze kale (it suffers none of the indignities that beans or carrots do when boiled and frozen), etc. Oh, and I pickled several pints of green beans this year, completely ignoring my notes from six years ago that said, and I quote, “do not pickle beans. no one eats them,” because I figured a lot can change in six years. But mostly I ignored the note because I have so many effing green beans. Aside from freezing them again — and notes from last year’s wasted frozen beans score a lot higher on my believability chart than the pickled beans from 6 years ago — I just don’t know what else to do with them! You wouldn’t believe how many of today’s fine UPS and FedEx drivers are uninterested in free bags of green beans! In addition, two large families I used to supply started their own home gardens. The nerve!

Anyway. I have never professed to be a good cook. I cook good. There is a difference. A “good cook” is creative and inventive. I cook other people’s recipes “good.” However, today I actually invented a recipe.

Green Bean Salad

I am calling it my KEEPING UP WITH THE BEANS recipe. Plus, I offloaded several zuchini into it, so that is an undeniable bonus. It also happily accepted cucumbers, cherry tomatoes, and onion. I’m pretty sure that you could add just about anything — in vast quantities.

I will reiterate that last point: It uses vast quantities of garden produce. I say this because of how many times I have searched for recipes in order to use up some massive quantity of zuchini, for example, only to find that instead of four, 5 lb zuchinis, it calls for only 1/2 cup. Totally pointless. This recipe uses LOTS of beans. And since it’s a salad, you can keep it in your fridge for days and munch on it at will. Fatty finds this very handy, and I’m sure you will, too.

Twp important tips:
1) DON’T OVERCOOK VEGGIES AND
2) USE AN ICE BATH IMMEDIATELY TO STOP THE COOKING AND RETAIN COLOR & CRUNCH!!

prepare ice bath

I steamed the beans, corn and zuchini all together. I cut up 2 cukes, 1/2 large onion and as many cherry tomatoes as I had on hand. After that I thought “hmmm….” and added a can of garbanzo beans and bacon crumbles, which were both super good. I went scrounging for some blue cheese as the crowning glory, but alas, my hunk was no longer even blue. It was orange and greenish. And while I am a huge proponent of pushing the expiration envelope, even I have standards. I threw it out and chopped up the remaining fresh mozzarella I had, which was good, but blue would have been better.

For the dressing, I used about 1/4 c balsamic vinegar, 1 teaspoon honey, 1 teaspoon dijon mustard, then slowly whisked in olive oil until the mixture was thick and tasted good. I am guessing it was about 1/4-1/3 cup of olive oil. I added salt and pepper to taste. I tossed the dressing with the cooked, iced and chopped veggies, then chilled. Before serving, I sprinkled skinny strips of basil and mint over the top.

It was FABULOUS and GUILT FREE! Try it. And let me know what changes you made. Pine nuts? edamame? Comment!

Filed Under: Garden, Food Tagged With: recipe, green beans, salad, tomato, tomatoes, keeping up with the beans, zucchini, preserving

Primary Sidebar

Read in CHRONOLOGICAL ORDER!

  • Big Bend National Park (6)
  • Alaska Road Warriors (46)

Search jenmenke.com

About Me

Jen menke

I’m a mostly-retired, pretend graphics and web developer (but don’t judge my skillz by THIS site!). We sold our dream home in Watertown, MN and downsized to a “Villa” in Excelsior, MN and built a home in our dream location of Eagle, CO and now split our time between the two states. It is truly a dichotomous life of absentee gardening and getting together with friends & family while in MN and playing hard and hermitting while in CO. I’ve let the blog go but a trip to Alaska has me resurrecting the Road Warriors series. My beloved brother is my biggest fan and I am doing this just for him.

Latest Reads:

Jennie's bookshelf: read

Trail of Broken Wings
2 of 5 stars
Trail of Broken Wings
by Sejal Badani
Started out strong and dwindled off for me. I wasn't enamored of the writing and -- maybe it's just me -- but the secrets!? I understand that you have to be willing to swallow a fair amount of incredulity when enjoying a lot of fiction, ...
The Girl on the Train
3 of 5 stars
The Girl on the Train
by Paula Hawkins
Audible book. Good, mindless listen. Pretty good action and twists. Not as good as all the hype, in my opinion, but I did enjoy. --Not enough to choose for my bookclub though: it would have been carved up by those English-teaching wolves...
I'm a Stranger Here Myself: Notes on Returning to America after Twenty Years Away
4 of 5 stars
I'm a Stranger Here Myself: Notes on Returning to America after Twenty Years Away
by Bill Bryson
Not my favorite Bryson book. However, it's been several years since I last read one and I was -- once again -- astounded by his writing style and voice. I just love him. I think this book is mostly compiled from columns he wrote over a c...

goodreads.com
  • Road Warriors
  • Garden
  • Food
  • Babble
  • Home

Copyright © 2025