• Skip to main content
  • Skip to primary sidebar

Jenmenke

Road Warrior

  • Road Warriors
  • Garden
  • Food
  • Babble
  • Home

Garden

More Uses for Garden Garbage

December 4, 2009

Dead Cilantro stuffed into bucketWait! Before you rip those dead plants out of the garden and throw them into the compost/garbage (I seriously hope you aren’t throwing them in the garbage. I just had to tie it in with the title.), ask yourself if you can salvage anything.

Seeds, baby.

In my case, cilantro seeds. All over the internet, in books, in conversations, I hear this: “I just don’t have any luck growing cilantro.” Well, I have the solution.

1) plant some like you normally would, in an area that you won’t care about it going to seed.

Cilantro seedlings

2) curse when it bolts and goes to seed way, WAY earlier than you wanted it to.

Cilantro gone to seed

3) leave it there

4) let it get old and dried out, occasionally running your hands through it and shaking the plants to get some of the seeds to fall to the ground.

Stop! Don't throw this away!

5) rip it out and put it someplace dark and dry. Or in my case, stuff it in a bucket and leave it outside for about a month, let it get rained on and throw it into the compost. Then start all over. Actually, don’t do what I do. Do what I say. Same as parenting.

6) save the seeds. You’ll have a lot. Cook with them like I did here (as coriander). And save the rest for planting next year.

6a) Sort the seeds. I use various sized strainers with differs holes and mesh sizes:

Cilantro Seeds crumbled off plantsIMG_6547Cilantro after 1st sortCilatro last sortingcleaned and sorted coriander

7) in the spring, let the cilantro grow from the volunteer seeds that fell on the ground in the area it was planted the year before. Or, in my case, all around the bench where I inadvertently left it and the compost, where I ultimate threw it.

8 ) amend the volunteers in more orderly rows with the seeds you saved a few weeks after the first volunteers emerge.

9) cilantro doesn’t seem to suffer much, if at all, from pests or virus/wilts and therefore can stay in the same spot for many years. If you lighten up a bit, give up the idea of perfect rows and let nature take its course, you should have cilantro all year long. Sometimes in high summer, I will plant a few additional short rows in dappled shade to make sure I’ve got some in August, which is a tough month for cilantro.

10) let it go to seed, let it go to seed, let it go to seed. Even if you decide not to save the seeds. Walk by and rattled the dried plants. Let the seeds fall to the ground. And you will never have a problem growing cilantro again. You will have this constant cycle of new plants growing amidst the old.

This also works for arugula. In fact, I have arugula EVERYWHERE: in the driveway, in the chicken yard, in the prairie, and in the garden.

I wouldn’t have it any other way.

(That was a good way to end, but I want to mention one more thing, because I tried this and it seems to work quite well. Everyone says you can’t preserve fresh cilantro. And I agree, for the most part. It isn’t good frozen or dried. People do it, but it just doesn’t taste the same. I tried turning it into cilantro butter and storing it in the freezer, though it will keep in the fridge for a couple weeks and tastes a bit better. It is really good. It doesn’t seem to suffer the same fate as when you try to freeze it by itself.  Give it a try!)

cilantro butter


I would be remiss not to mention that it also works for chives and various other weeds.

Filed Under: Garden, Food Tagged With: volunteer seeds, saving cilantro seeds, arugula, growing cilantro, tips

I Hate Chives

November 24, 2009

The Plants, Not the Food.

Awww. Lola.

(And to be honest, I sometimes also hate the blank-eyed sociopath pictured here with the chives. But what a pretty picture!)

Yes, I hate chives. I hate them with a passion. It is different from my hate of beets. I simply don’t like the taste of beets. Chives, I hate from the roots on up.

Tenacious chive seedlings

Oh, I know. I’m just being dramatic. It’s true. I am. I’m just trying to capture the emotion that was seeping and pouring from me last weekend as I finally decided I had had enough and began wrenching them from the ground in my garden. Plant after plant after plant.

There is a life cycle to this hatred and it goes something like this:

itty bitty chive plants in april

Late Winter: I admire their tenacity for growth in all but sub zero weather. Truly: it is the only good thing about them.

spring garden chives

Early Spring: I might even go cut a few sprigs of the now six-inch high greens. Just because I can. Honestly, I just don’t think there is anything all that special about the flavor. But the pretty green color is nice. So, I guess they have that going for them, too.


In their ONLY glory!

Spring: About the time other things are just starting to green up the chives send up their lavender flowers. So there’s that. Very pretty. And really the main reason I planted them, marking each outer path corner.

And then…

BAH! SEEDHEADS!

Late Spring: THE SEEDHEADS. The short window of time between “Oh, I think I’ll let them go a bit longer… they are so pretty…” To: “Oh NO! The seedheads! The seeds! Don’t touch them! They’ll spill seeds! Nooooooo!” It is correct to say that the window between delight and despair is very, very short.


Lookit 'em all! Everywhere!

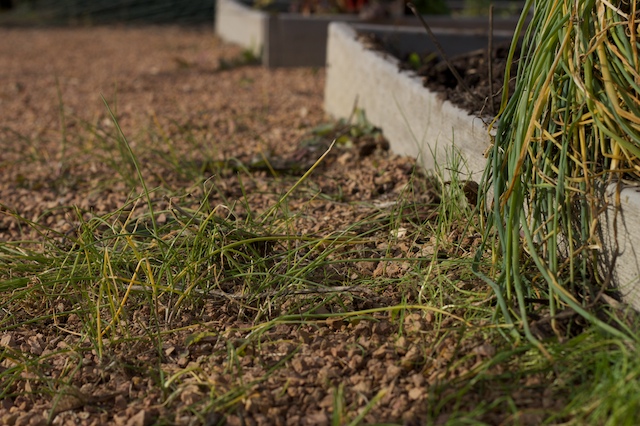
Summer: THE SEEDLINGS. Because the above-mentioned window is so short. I always wait too long. The result is that I have to deal with thousands of chive seedlings from eight different plants every year. In the gravel, in the dirt. Adding to the mother plant. Adding to my misery.


Sad, weary fall chives

Fall: The expansion. The architectural element of the chives was to be so simple. So clean. The fall garden makes it easier to see that the vision is not a reality. The chive plants have overstayed their welcome. They have expanded beyond their allotted space. I hate them. Why did I ever plant chives?


Must Kill.

Late Fall: The chives must die.

I went out to the garden to harvest the kale and ended up digging the chives instead. I had no plan to do so. I just looked at them, oozed hate toward their shaggy and unkempt appearance, grabbed my favorite garden tool (my fork, whose shaft I cracked in the process) and dug in. It was hard. And every heave, rock back-and-forth, move ten degrees clockwise, dig, rock, I was gasping for air and muttering. I. hate. these. damn. CHIVES. Hate them. Hate. *pant* *pant* I have to think that the idea of gardening as this peaceful, meditative practice, rather than the battle with nature that it actually is, is just a marketing gimmick created to make us all feel terrible about our attitudes. Or is that just me?

Anyway. The impromptu plan was to dig them all and toss them into the weeds. Or the compost pile. Would they adequately die in the compost pile? Or would they take root in there and cause me no end of problems come spring? Worse, if I tossed them into the deep grass outside the garden, would they root out there and take over our entire prairie? So many things to contemplate as I dug these horrific, good-for-nothing plants! So huge! So heavy!

The behemoth. took. all. my... energy to dig.

Then, I noticed all the worms living in the mat of roots beneath the surface. Would they die if I heaved the 30 pound plant hunks into the void? Are worms active enough this time of year to move their locale? Maybe I should put them carefully into the compost pile. Poor little worms. Such hard workers in the garden…

And maybe…

Maybe I should just keep these two chive plants at the south gate entrance to the garden. You know, just in case I ever need a few chives someday.

But then. it won’t be balanced.

Hmmm.

Maybe I should just sort of divide the chives and only replant each of the eight as a small little tuft.

Start over.

Next time, I won’t let those seedheads drop their seeds.

I’ll deadhead them at the proper time.

I’ll be merciless in my patrol of the chives.

Yes this time, I’ll do a better job!

Ok. I couldn't help myself. So shoot me.

Chives are really wonderful little plants!

…And that, my friends, is the story of my gardening life. Actually it is the story of my whole life. I can’t quite put it into a nice, snide little package, but I think I painted a rather accurate picture. Some call it ‘hope’ or ‘optimism’; putting a positive spin on it. But really? Isn’t it more like stupidity?

Filed Under: Garden Tagged With: cycle of hatred, dividing, seedheads, deadheading, expanding, chive seeds, chives

National Kale Day

November 20, 2009

(Well, at my house anyway.)

single leaf of black tuscan kale

Why is there no national Kale Day? Actually, I have no idea if there is a National Kale Day. There probably is. If there is, then my question automatically morphs into: Why didn’t I know about National Kale Day?

With that settled, I will tell you why there should be a special day for Kale.

1) It’s a SUPERFOOD. (no, I don’t have the stats on it. Just be content to know that it is, in fact, a superfood.)

2) It is BEAUTIFUL.

3) It is DELICIOUS.

4) It FREEZES so well, you wouldn’t know it had ever been frozen at all.

I could go on and on… Maybe I should. I have read that having “top 10” lists on your blog increases traffic exponentially. But then, that would just be a cheap trick to drive traffic and I absolutely hate bloggers who have gimmicks, exploit their subjects & commenters and whine about traffic. So I’m stopping at four.

I realize of course, that I will soon be out of topics that I am as over-the-moon, passionate about as I am about kale. Things that I am so completely sure will change everyone’s life if they would only try it. Like:  Making bread. Planting garlic. Composting the lazy way. Making apple jelly from the garbage of your pies… There’s so much more (just read the archives), but those are the ones that come to mind. If I had to rate them, I’d have to put bread at the top of the heap. Almost EVERYONE loves fresh bread. It is so easy to make. So easy. Why aren’t you making bread?

I digress.

This post is about KALE.

black tuscan kale

Why isn’t everyone planting Kale? And eating organic, fast*, superfood kale all winter long? Maybe you don’t think you like it. Maybe you don’t even know about it. Three years ago, on impulse, I bought a four-pack of kale plants at Shady Acres because I thought it was pretty. By November, I wished I had more. Two years ago, I planted more, and tried to “overwinter” it. Note to Minnesotans: nothing overwinters here, so just forget about it, Yes, even when your father in law explains how they did it. Don’t be tempted. Last year, I stumbled upon this preservation method for my kale. I’m not saying it’s the best way…

Actually, I am saying it’s the best way. So pay attention.

1) I plant my kale.

2) I battle the damn cabbage worms all summer long. [You probably won’t have this step. I seem to host the world’s largest population of cabbage moths/worms. These guys plague my broccoli, too.]

3) I plant another couple rows of kale after the broccoli is harvested, some time in July. Usually this works great, but not this year. My second planting was a failure. I am devastated over this because now I will only have half the amount of Kale as I planned on. I don’t know what happened. But I can tell you this: it is November 19th and that planting is now growing fantastically. We didn’t have a hot summer, but maybe it was just too hot for that variety of kale (red russian). Who knows. Currently, it is growing so earnestly, I can’t even bring myself to turn it under like I have with the rest of the garden. …Maybe I can overwinter it.

Red Russian Kale, happily growing in... November.

3) I wait until a few hard frosts kills just about everything else above ground.

kale, happily growing along in mid November

4) I add “harvest kale” to my to-do list in my planner

5) I deal with the apples

6) I wash the windows

7) I turn a new page in my planner and re-write “harvest kale”

8 ) I clean out the greenhouse

9) I clean the pool cover

10) I install a new garden fence

11) When I am in danger of turning another page in my planner. (Or, if snow and ice is forecasted) I actually do “harvest the kale”

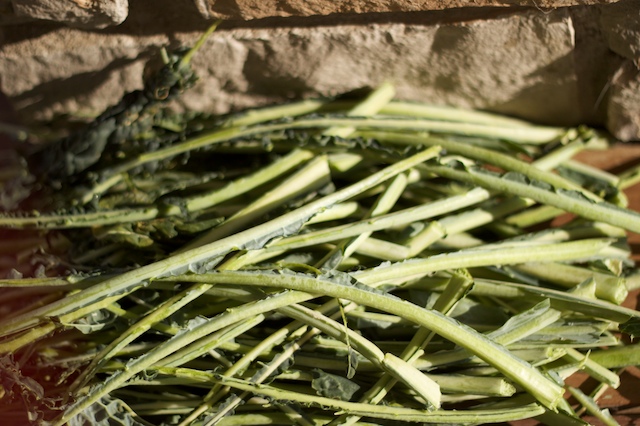
12) I sit on the step in the sun, bundled up, and cut the central stem out of the kale. Tip: find a great audiobook or podcast to listen to while you do this. A chore becomes a vacation.

late afternoon sun, destemming kale

All the kale pictured here is Black Tuscan Kale (or Nero Di Toscana among many other names), which has long, narrow leaves. Usually, I also have the curly kale and/or a russian variety. I take the central stems out of all varieties. But, as the case usually goes, black tuscan is the most tedious. And that’s all I have this year.

my 2-hour pile of kale stems. (removed)

13) I get out my big deep fat turkey fryer that hasn’t been used for that purpose in about ten years (what an insane trend that was), fill the pot 3/4 full of water, and add about 1/2 cup of salt.

the turkey fryer mod

14) I begin the hunt for a propane tank to attach to the turkey fryer kale cooker.

15) I don’t have any propane. The tank is empty. This is a problem.

16) I decide to cook the kale in the house. Tip: cook it outside if you can. It stinks.

now thatsabowl-a kale! (About the amount I cook at once in big pot)

17) I add the kale to boiling water and cook for about 10-15 minutes, stirring frequently with tongs.

stir frequently while cooking

It will go through stages. It will want to float at the beginning. Then it will foam madly for a bit (don’t let it boil over, it’s a mess), then it pretty much sinks. I always figure it’s almost done at that point. Some recipes call for sauteing, braising, etc. But I’m with the person who said that boiled kale tastes the best because it takes out any bitterness. For the record, Kale is the ONLY vegetable I will say this about. I never boil any other greens, broccoli, asparagus. Never.

Morgoon assists the photographer. Don't be confused. She wasn't helping the cook. There's a big difference.

18) I don’t pour the water out, because I have three or four batches more to cook. I lift the kale out with tongs and then lift the turkey fryer kale cooker insert out to get the rest.

Cooked kale

19)  I dump the hot, cooked kale into my (clean) sink to cool and put the next batch in to cook.

Cooking off in the sink

20) I squeeze as much water out as possible as soon as it’s cool enough to touch.

Squeeze, squeeze, squeeze. YUCK. Nothing pleasant about it.

21) I pull apart the squeezed wads (yes, that’s a gross word to describe kale, but — honestly — it is gross. And it is a wad) and spread out on cookie sheets.

Cooked, Squeezed, Picked apart and Ready for Freezing!

I also pull out any glaring stems that I might have missed at this point. One year I did a test and left the stems in. You can if you want, Lord knows you’ll save a lot of time with step 12, but we all thought they were yuck-o.

The stems almost separate themselves. How did I miss that many?

21a) I clean my nails

Kale Nails. The opposite of a french manicure.

22) I freeze the sheets of kale

23) I rough-chop the frozen kale (because in the test mentioned above, we also preferred smaller pieces. Plus, it’s fun to chop frozen kale. I don’t do it before I cook it because it falls thru the holes in the turkey fryer pot kale cooker) and put into freezer bags.

rough-chop the frozen kale

Drum roll please…
24) I cross it off my list in my planner.

To use the kale, you grab as much as you need from the bag and put into a fry pan or saute pan on medium/low until it’s warmed through. Cook most of the water off (there shouldn’t be much if you squeezed it well in step 20) and add your fat of choice (butter, olive oil or… BACON FAT!) and a sprinkling of balsamic vinegar. Other things to consider adding: dried cranberries (craisins), chopped bacon crumbles, slivered almonds, a sprinkle of blue cheese…. mmmm. maybe that’s what I’ll have for lunch.

No matter how much I make, we always wish there were more.

Well, anyway. That’s National Kale Day at my house. It’s definitely in my top three things that I’m passionate about. Obviously you can’t plant kale until next year. But at least buy some. Buy a lot. And try cooking some. If you have some left over, freeze some and see if you don’t agree with me. Then plant it next year.

And then, come back here and tell me how great I am.

* “fast” kale is an oxymoron. Kale is only fast, if it is already cooked, chopped and frozen. Otherwise you are washing, de-stemming, boiling, squeezing and sauteing. Then eating. When you do it this way, it’s ready in less than 5 minutes. Hence, “fast.”

Filed Under: Food, Garden Tagged With: boil, preserve, kale, superfood, black tuscan, red russian, freeze

Simply the BEST Way to Preserve a lot of Garlic: Confit!

November 16, 2009

mmm. garlic confit!

Recently, I wrote about planting garlic, and how now is the time to do it in the northern states. I mentioned that when I have a lot of garlic, I like to preserve it in oil. Not only does it allow you to store it pretty much forever (an ongoing theme of mine you may recognize by now), but it makes garlic far more digestible for those who have problems with it.

I would note however, that I wouldn’t dream of doing this with my homegrown garden garlic for a couple reasons. First, it’s so easy to peel the fresh stuff, that I don’t find myself cursing it like I do the store bought stuff. Second, it stores well through the winter months, so I usually run out of it.

polish red and mystery softneck garlic

I make garlic confit from store bought garlic that I buy already peeled. You can get mongo-sized jars from CostCo for pennies a clove, but I’ve also seen it at grocery stores and it still seems pretty reasonable, considering you would spend about nine hours peeling the same number of cloves yourself…

I would have waited until the waning days of winter to write this, which is when I usually find myself making the confit, but when I was working in the garden last weekend, turning the soil, I happened upon a few dozen tiny garlic cloves (and two red potatoes!) that were starting to sprout.

surprises in the garden!

I have absolutely no idea where they came from. Left alone, they would have been delightful surprises come spring — albeit in the wrong place. But I wrenched them from the ground prematurely and didn’t have the time or the patience to lovingly replant them in a more appropriate place. That they had already sprouted small green shoots, meant that the center of the clove would likely be tough, so I decided to do a small batch of Garlic Confit. I post the directions for you now, in hopes that you will try it yourself.

First, peel and trim the root ends of a bunch of garlic.

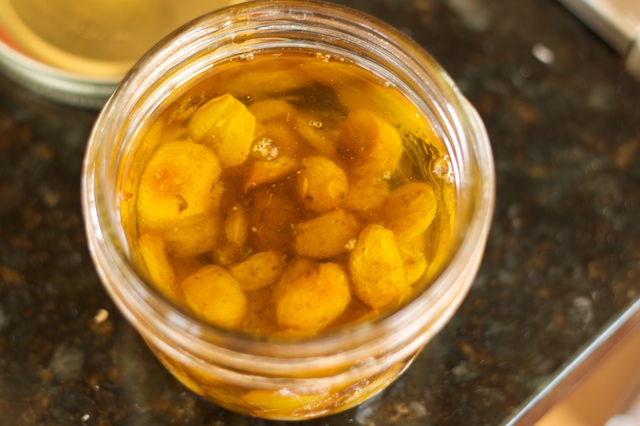
Barely cover the cloves with delicious tasting olive oil.

barely cover cloves with olive oil

I, personally, love both the taste and the price of CostCo’s Kirland brand. And before any of you judge me for shopping at CostCo and not pressing my own, you gotta hear this. I heard on Evan Kleiman’s GoodFood podcast that giving up meat just one day a week does more good for the enviornment than eating every single thing from local sources! I digress, but isn’t that amazing?

Cook over the lowest, lowest, lowest heat setting. The goal is to cook these guys for at least an hour without them getting too dark. I cooked mine (below) almost two hours due to those feisty center stems and as a result, they got a little more brown than normal.

shoot! Too brown! Oh well.

Basically, you just want them to get as soft as butter. When that happens, they’re done.

Finally, pour the oil and the cloves into glass canning jars, or whatever container you like, and store in the refrigerator.

store in the refrigerator. use the oil too!

Use the cloves in place of raw garlic, use the oil for sauteing and subtle garlic flavoring. As usual, it keeps indefinitely!

In addition to being so quick to use for cooking, it also allows me to up the garlic quotient considerably in my recipes, since my husband is one of those vexing people who get stomachaches from eating raw garlic. It is true, I considered divorce.

Thank goodness I discovered Garlic Confit! It practically saved my marriage!

Filed Under: Garden, Food Tagged With: garlic confit, spreadable garlic, easy to digest, olive oil, preserve, already peeled

Horseradish and the Fall Garden

November 12, 2009

Horseradish. I have to wonder if it is an old fashioned taste that has lost favor like cold aspic meat jello dishes and fruit salad. No one ever talks about regular old horseradish anymore!

clean and peel horseradish

I just LOVE horseradish. Love, love it. In all it’s forms. Oddly enough, as I was getting ready to write this, I was reading my twitter stream where I follow Jaden (@steamykitchen). She just came out with a cookbook, has a beautiful website/blog and is seriously a very nice person. One of very few people on twitter, in fact, who seem genuinely interested in what others have to say vs. screaming their own links and promotions, etc. etc. Frankly, I’m a bit sick of twitter these days. I digress. Sorry.

Horseradish.

Horseradish is a root. Much like Wasabi, the green japanese horseradish powder that is mixed with water and eaten with sushi. Mmmm. That’s where Jaden came in. She posted this picture, that — I swear — looked exactly like a gnarly tomato hornworm past its prime. Along with the picture she wrote: “so overjoyed right now.” Or something like that. I was HORRIFIED. Have you ever SEEN a tomato hornworm?

tomato hornworm

I have, and it isn’t pretty. I didn’t know insects got that big in Minnesota. They (well at least the ones I’ve seen) are about 4″ long and about 1/2″ in diameter with freakish horns on their heads. Worse, they are almost impossible to see. My first encounter with a hornworm was when I discovered two of my tomato plants had become all but decimated and defoliated overnight. I knew there must be a worm infestation of some kind, but try as I might, I couldn’t find any. My three chickens were in the garden, following at my feet, pecking around and looking for bugs, when suddenly one of them saw something (the giant worm) and plucked it off the stem. I had about five seconds for it to register on my “ick” scale before they had pulled it apart, pecked into pieces, and gulped down the whole thing.  (That scene, by the way, was much higher on the ick scale than the worm alone).

Then, as if that memory were not bad enough. Eric, he of @ericgardenfork on twitter, sends me this link to his own experience with tomato hornworms — parasite infested, no less! Ick, Ick, ICK! (It is easy to see how something like twitter can take you down the rabbit hole, eh?)

Sorry, but that was the background I was coming from when I looked at Jaden’s first photo. A deflated and decaying hornworm laying across some packaged produce? Was she just being a sicko?

Mystery solved a few minutes later when she put another picture up with two of these monstrosities side-by-side with the text: Wasabi root! Suffice to say, wasabi root is much uglier than our own locally grown horseradish root. It got me thinking: I wonder if I could make a powder out of my roots that could be mixed with water like wasabi. I will have to research that.

About the plant

1/2 it's summer size. This is after November freeze shrinkage.

It has taken me three years to appreciate what I read over and over about horseradish plants. Specifically, that they are extremely invasive and to plant with caution, much like mint. It was really hard for me to picture horseradish as an invasive plant, having never brushed up against it with any of my gardening friends. No one that I knew ever bemoaned their troublesome horseradish patch. The idea was laughable.

Ha.

Ha.

Ha.

Now, I’ve got this ridiculous giantess of a plant sitting right next to my greenhouse door, the spigot and my peonies. In the course of one growing season, it suddenly got taller than me and shaded out even the MINT! Yes, that’s right. The horseradish killed the mint.

Plus, I hear that if even a small chunk of root is left in the ground, you will have yourself a horseradish plant. So far, I’m not in peril, but stay tuned, as I have a hunch I might be the first person I know to bemoan my horseradish patch.

Still. It is a tasty vegetable. At least I think that’s what I read. That it’s a vegetable.

Digging it up was a beast of a job.

digging in

I am ashamed to admit I needed Dave’s help. (Rarely do I ask for help, preferring instead to be the perfect gardening, wifely and motherly martyr). I could hardly get my sharp spade throught the plant, much less pry the tenacious roots out of the earth. Even Dave had trouble. Given the health of the monster plant, I wasn’t concerned about hurting it. I just went to town, chopping and prying it out.

the freshly dug horseradish root

For the record, the best time to dig is Fall or late Fall or early, early Spring in Minnesota. Spring always comes and goes too fast here in Minnesota and there’s always so much to do. I’d rather dig in the Fall when I’m processing everything else. Not to mention that, assuming I want it for a-top my corn beef on St. Patrick’s Day, there is little hope for the ground to be thawed in mid March.

Once the root is dug, you can  store it in a dark, cool place until you are ready to make the horseradish.

in the lower garage for about a week

I wonder how long I would be able to leave a plain dug root in my lower garage… Because as much as I like to open a jar and use the stuff I make, even better would be to grate it and eat it fresh, fresh, FRESH! So pungent and hot! I’ll have to look into that when I’m researching the wasabi powder angle…

To make grated horseradish for storage, clean and peel the root. Then, finely grate it. (You will note, due to laziness on my part that I neglected the “finely” part of those directions.)

lazy girl's way: shred in food processor

In these pictures, I first shredded it with the food processor,

back in to FP for further chopping

Then chopped it up with the food processor blade.

Ready for salt and vinegar

If you love the freshly shredded root, you will like it coarse like I have shown here. However, I have shared some of my finished and jarred horseradish with my dad and a few other people and I am learning that most like it processed a bit finer. Last year, I used a microplane grater because I had so much less to make. That works great for the finer shred. (I, personally, love the coarse shred.)

The fun thing about horseradish is that it isn’t hot until it is exposed to air. I don’t know why I think that is so cool, but I do. So, you begin to grate it. Taste it. Nothing. But wait a few minutes, take a big whif and ZOWIE! That’ll take care of any lingering sinus issues you might have. Grate it in a food processor? Take the lid off? And the kids in the LIVING ROOM will start complaining that the fumes are stinging their eyes. So fun.

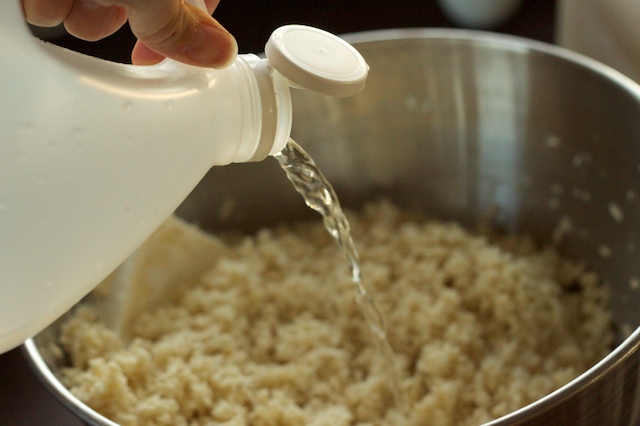
Once you get it to the consistency you like, add a healthy dose of salt and enough white vinegar to coat the shreds.

add vinegar to coat and to taste.

Taste and adjust. Put into glass containers, seal and freeze. Because you are freezing, the amount of vinegar you used is up to you. You can’t heat process this one, sorry. Actually, I’m not sorry at all. I am SICK of canning. I was overJOYED to freeze them.

ready for freezer or sharing

Conservative worry worts tell you that it will keep for two weeks in the refrigerator. As usual, mine keeps indefinitely.

Filed Under: Garden, Food Tagged With: vinegar, shred, freezing, horseradish, root, wasabi, tomato hornworm, canning horseradish

Apple Madness, Part Three: Apple Cider

November 9, 2009

apple grinder

No, I wasn’t planning on a third installment of apples. However, a commenter last week asked me if you could drink the juice from the boiled apples for jelly as apple juice or cider. Having tasted it, I knew you couldn’t. But I wasn’t sure why, so I called my friend Chris, whose husband Joel grew up on an Apple Orchard. They have a cider press, so I asked her some questions about it.

This is where the story gets a little complicated. Suffice it say, I was coerced into participating in the making of apple cider under suspicious intentions. I am well aware how much Joel likes my bread, but it appears he is attempting to one-up me (did anyone see last week’s Office episode with Dwight??) by providing me with more cider we can possibly drink in a year. So that I will be indebted to him.

What do I do when I am indebted to someone? I make them bread.

Are you starting to understand his thinking?

Regardless of the motivations behind the cider making, it was so cool and fun! It was a beautiful Sunday with friends. Yes, I’ll be making bread all day today, but it was worth it!

I was running late and my camera had my big honking lens on it, so I told Morgan to grab the point and shoot (that she has all but claimed as her own). What happens when a 14 year old claims your old point and shoot camera? Anyone?

I’ll help you out: the battery is in a continual stage of dead.

So these pics were taken by Morgan with my iPhone. They capture the day just fine.

The Making of the Apple Cider:

Due to Apple Madness Part One and Part Duex, I only had the motley bin of reject apples I discovered behind the pine tree last week to contribute. Joel, however, knowing he wanted to provide me with high quality cider, had purchased some frozen Honeycrisps from his family’s old orchard. Minnesota orchards suffered a mostly devastating 2009 apple season. First it rained all October. (It seriously did). Then we had two very early hard freezes before the month was out. Depending on where they were, many orchards lost huge amounts of valuable apples in that weather. Joel bought some of those weather damaged apples at a huge discount to make the cider.

I, of course, offered to split the cost with him. But he was having none of that. It would interfere with his well-laid plan… He also got some apples from the top of a neighbor’s tree. Plus, another friend, Tim, came to help and brought a huge amount of really nice looking apples.

apple feedlot. apples awaiting processing
That is, apparently, the key to good cider: you gotta have a good mix.

The first step was to wash and cut out any rot, or very obvious “yuck” from the apples. The few that I brought along? Well, they garnered many laughs and snickers from the crowd. If only they knew that was what ALL my apples looked like. Well actually, maybe it’s best to keep that to myself since I will be gifting these very people with pies and jelly very soon…

no we are not bobbing for apple you idiot

Then, those apples get put into the grinder — the craziest home-spun contraption I’ve ever seen! But it gets the job done. I don’t have a picture of the whole thing, but inside the wooden box is a large wooden cylinder with screws protruding from the surface that grabs and grind the apple. It is run with a little motor and a belt that turns the cylinder.

feeding apples into the grinder

The ground apples get put into a mesh bag and that goes inside this other ancient tool, the press. The handle is slowly screwed down and the cider comes out through a hole in the bottom.

Luke mans the cider press

Charlie catches cider as it is pressed out

We ran out of plastic jugs, which were purchased from the orchard, with lots of apples to go…

how much bread is that amount of cider worth?

So we started filling one of those five gallon water cooler bottles.

serious helper maili holds the funnel for cole

We filled that entirely up and still had a few more pitchers worth of cider.

All in all — and I could be wrong about this — I think we made about 25 or 30 gallons of cider.It lasts about a week in the fridge since there is nothing but pure apple juice in the bottles. But it freezes really well.

So, I’ve got my cider and Joel gets his bread. The only question is. How much and for how long do I provide him bread before I am, once again, ahead?

Filed Under: Garden, Food Tagged With: fallen apples, Buttenhoff, Apples, ugly apples, Honey Crisp, cider, apple, cider press, apple grinder, hard freeze

  • « Go to Previous Page
  • Page 1
  • Interim pages omitted …
  • Page 9
  • Page 10
  • Page 11
  • Page 12
  • Page 13
  • Page 14
  • Go to Next Page »

Primary Sidebar

Read in CHRONOLOGICAL ORDER!

  • Big Bend National Park (6)
  • Alaska Road Warriors (46)

Search jenmenke.com

About Me

Jen menke

I’m a mostly-retired, pretend graphics and web developer (but don’t judge my skillz by THIS site!). We sold our dream home in Watertown, MN and downsized to a “Villa” in Excelsior, MN and built a home in our dream location of Eagle, CO and now split our time between the two states. It is truly a dichotomous life of absentee gardening and getting together with friends & family while in MN and playing hard and hermitting while in CO. I’ve let the blog go but a trip to Alaska has me resurrecting the Road Warriors series. My beloved brother is my biggest fan and I am doing this just for him.

Latest Reads:

Jennie's bookshelf: read

Trail of Broken Wings
2 of 5 stars
Trail of Broken Wings
by Sejal Badani
Started out strong and dwindled off for me. I wasn't enamored of the writing and -- maybe it's just me -- but the secrets!? I understand that you have to be willing to swallow a fair amount of incredulity when enjoying a lot of fiction, ...
The Girl on the Train
3 of 5 stars
The Girl on the Train
by Paula Hawkins
Audible book. Good, mindless listen. Pretty good action and twists. Not as good as all the hype, in my opinion, but I did enjoy. --Not enough to choose for my bookclub though: it would have been carved up by those English-teaching wolves...
I'm a Stranger Here Myself: Notes on Returning to America after Twenty Years Away
4 of 5 stars
I'm a Stranger Here Myself: Notes on Returning to America after Twenty Years Away
by Bill Bryson
Not my favorite Bryson book. However, it's been several years since I last read one and I was -- once again -- astounded by his writing style and voice. I just love him. I think this book is mostly compiled from columns he wrote over a c...

goodreads.com
  • Road Warriors
  • Garden
  • Food
  • Babble
  • Home

Copyright © 2025