• Skip to main content
  • Skip to primary sidebar

Jenmenke

Road Warrior

  • Road Warriors
  • Garden
  • Food
  • Babble
  • Home

harvest

No Added Pectin Apple Rosemary Jelly Update!

October 17, 2013

Low Sugar Apple Rosemary Jelly

I thought it was worth re-visiting my original Apple Rosemary Jelly Post, since I have been making a lot of it this past week and have been experimenting with the amount of sugar necessary for a good gel. That recipe has generated a lot of comments and questions from people who want to make a lower-sugar jelly and I really didn’t have any answers at the time.

And, to be fair, I still don’t really have ANSWERS so much as solid experience that says using less sugar should work for you, since it has consistently worked for me. To make the jelly, be sure to read the original post for the recipe and directions. For lower sugar, read on!

The base of the problem is that jams and jellies are all about food science. I have neither the time nor the inclination to do the full research on the subject. I just want jams and jellies that spread. I want to make it once, not two — or God forbid — three times. I did spend time delving into the subject online to see if I could understand how the amounts of water, sugar, acid and natural pectin affect the end product, but alas, I am not much more informed than I was when I set out.

What I WILL say, is that I am so VERY sick of reading about the USDA standard for jams and jellies and all kinds of nonsense. I’m not a proponent of putting anyone’s safety at stake, however, I surely beg to differ that you need to use a box of Sure-Jell. Good grief. Have you read those recipes? Four cups of juice to eight cups of sugar… and I rest my case.

The bottom line is that you can cook just about any fruit down to a spreadable consistency with very little sugar. Period.

Jelly is a little trickier.

So this is what I’ve learned:  220 degrees is the magic gelling temperature — as stated in my original apple jelly recipe. Just to compare, I checked the temp of my raspberry jam when done (using my normal sight and sound cues described here) and it was also 220 degrees! I thought that was pretty cool.

I’ve noticed that using less sugar for the jelly takes longer to reach that temperature. I’m not sure if the longer cooking time is a factor of how much water is present in the juice or from the reduced sugar. I just don’t know. At any rate, you also end up with less end product when you use less sugar (obviously). What gets my brain running in circles is this: Is it possible that by the time you reach 220 degrees, you’ve boiled off enough water and juice to have the same amount of sugar to apple juice in the finished jelly? My dad, a food scientist in his working days, says no. But then, it’s my dad. And I have a long history of not believing him. So why start now?

Ha ha ha. I love to tweak on my dad.

Anyway, that’s the scoop. My former Apple Rosemary jelly used a 1:1 ratio of apple juices to sugar. 4 cups juice, 4 cups sugar (which is still low sugar, when compared to commercial pectin recipes). My 2013 jellies have used ratios of 2:1 all the way to 4:1 juice to sugar. And they have all worked. I like to think the jelly is lower sugar, but I can’t say that it is for sure. What is truly amazing though, is that the lower sugar jelly tastes just as sweet. The only difference that I can detect is that it tastes more “apple-y”! Cuz, duh, I’m not a martyr. I still want my jelly sweet…

For all the questions this will generate (and, no doubt, sad stories of failures) Here are some visual clues to the point at which your jelly will set.

When it is in the early stages and boiling hard the mixture is foamy, like bubble bath.

Low Sugar Apple Jelly begins cooking

After a while the bubbles start to get shinier and slightly darker

Apple Jelly cooking and nearly there

It takes a long time to go from 216 degrees to 220 degrees. But once it hits 220 degrees, look out! It will rise quickly and you want to get it off the heat and in to hot, sterilized jars quickly. As you can see, in just the time it took to focus my camera, the bubbling mass went up almost 2 degrees!

Apple Jelly cooking 220 degrees

At the end, the mixture it is dark and shiny and sort of ANGRY looking.

Low Sugar Apple Jelly at the gel point

10 minutes in a water bath will complete the process and leave you with with jars of joy that should definitely be left out on your countertop (preferably in a window where you can enjoy the beautiful color) and pat yourself on the back every time you glance their way.

Canned Apple Jelly

It’s been a long few weeks of harvesting, canning and freezing tomatoes, picking sorting and cooking apples. Picking carrots and beets. Making beet chips — the ONLY way I can tolerate a beet, I might add. Picking and hauling pumpkins and squash. Next up is kale, kale and more kale, along with washing my dreaded windows. All of that will have to wait though, as I am planning to zoom off to Madison for the weekend for some retail therapy with Morgan. Yes, I do hate to shop, but Morgan does not!

Filed Under: Food Tagged With: recipe, low sugar, harvest, apple, fall, jelly, no added pectin

We’re Not in Kansas Anymore

November 17, 2010

This is Minnesota, folks.

…Despite those 70 degree October temperatures that somehow, unbelievably, made it in to early November.

We reveled in it. We wore flip-flops in November! The decadence. The sheer thrill!

It’s basically what every other state in the nation gets to do on a regular basis, except us. I bet they wear flip-flops (which I call thongs, but get harassed by the younger set for calling footwear by the now ubiquitous term for a g-string) in Kansas.

Well, no more. We got about 10″ of heavy wet snow on Saturday that is still sticking around on Monday. […and Tuesday, and now Wednesday]

So this post is an ode to Fall. I never got around to posting some of my favorite pictures of late fall. And now the snow went and wrecked it all. It smashed my beautiful Miscanthus grass and the pretty asparagus fronds. It covered up all my shovels in the garden that I was lulled into thinking I would use again. It dashed my hopes for a Christmas photo (no, I still don’t have one yet) in the golden light of a daylight savings savings sunset (at about 3 pm).

If I could embed music, I would choose something sad from The Mission.

None of these have been edited in Photoshop. They are straight out of the camera. Not a credit to me as a photographer, but to God’s majesty and the beautiful colors of fall!

I suppose that could be in focus better, but isn’t it pretty? The color?

I’m a spaz with the focus. It’s true. But this one is better.

This is the perfect picture to show the season: Peegee Hydrangeas caught between Fall and Winter.

Another lesson on how not to focus, but pretty none-the-less. This is the asparagus fronds in the dewy rain of late October.

And then I looked up from my tendency to go “macro” all the time and saw this one lone birch tree.

So pretty.

And now it’s all gone. Including — again! — my sweet meat squash that got froze-to-death and turned to mush. I’ll probably never get to taste one of them.

I do love snow. But I hate the mess. The mud before it really freezes. The cold. The heating bills. The grey skies.

Snow is the only bonus prize of winter.

Filed Under: Tech, Garden Tagged With: photography, harvest, Minnesota, miscanthus, fall, hydrangea, winter, first snow, sweat meat, asparagus, ornamental grass

Kale Harvest and a Winter Soup

November 15, 2010

Mmmmm. I know I tend to go on and on about Kale. But seriously? It’s that good.

Everyone just assumes it tastes like spinach. But it really doesn’t. Lacking a good comparison, however, that’s what most people say. Including me, I’ll admit. Because there isn’t a good comparison.

It tastes like Kale. Nutty, earthy, sweet… so good!

While spinach can be too earthy, a bit mushy, sometimes harsh tasting. –At least in comparison to kale.

So, if you haven’t tried Kale, then go buy some. Or stop by my house and I’ll give you a gallon freezer bag full.

I’ll also admit: it is very difficult for me to buy Kale at the grocery store. You get about six stems for about $3. Seriously insane. It reminds me of a lunch meeting I had. I was a bit late (always) and came in after they had ordered a couple appetizers. Being polite (hardly ever), I didn’t ask what they had ordered. When the waitress set down two steaming bowls of edamame, I blurted out, “You paid money for these?!”

Of course they paid money for those. Everyone pays money for edamame. Except me, who can’t keep up with the ice cream pails full of pods that start coming out of the garden in August. And they are so much better than the ones at the restaurants. So I encourage you to try planting edamame as well. A simpler crop cannot be found.

Anyway.

Kale.

I will admit one more thing. Processing the kale for the freezer takes about three “jennie days” consisting of anywhere from 1-3 hours each:

  1. Cutting and hauling
  2. Stripping stems from leaves
  3. Boiling, freezing and bagging

Four days this year, due to the volume of stems harvested. (It was a good year for kale.)

I detail my process here, if you are interested. Which, of course, you are not, because who but me does stuff like this? This year, I was able to do all the boiling outside which saved me from the usual three-day kale smell in the house. (Not a good thing. Imagine broccoli times ten.)

I also cut one step out of the process. Instead of chopping the frozen pieces before bagging, I simply crunched up the frozen leaves as I put them in the bags, thereby saving the cutting board clean-up. Always the innovator am I.

I saved about 6 fresh leaves and made this amazing, amazing soup. Sort of a take-off on Italian Kale soup. I substituted barley for white beans, since I had frozen barley left over from my Fall Barley Risotto and didn’t have any white beans in my pantry.

This soup was insanely delicious. And so ridiculously simple. I did start with homemade chicken broth. I’ve got a dearth surfeit** of it in the freezer that I’ve got to use up because I’ve also got a dearth surfeit** of chicken bones waiting to be made into more broth. It’s a vicious circle. I am certain it would also be great with store-bought broth.

Kale Soup with Barley, Sausage and Quinoa

  • 1 pkg hot Italian sausage (I used Johnsonville, but Chorizo with be amazing)
  • 1 medium onion diced or equivalent shallots. (I’ve got to use my dearth surfeit** of shallots up, so I used shallots)
  • 3 large cloves garlic, minced
  • 8 cups chicken stock
  • 4 cups thinly sliced kale, stems removed
  • 1 cup pearled barley
  • 1 cup quinoa
  • 1 T balsamic vinegar (yes, every recipe I use includes balsamic)
  • Salt and Pepper to taste
  • shredded Pecorino Romano for garnish

Slice the sausage into disks if using Johnsonville-type with casings. Otherwise roughly break up if using bulk sausage. In a large soup pan, brown sausage and remove from pan, leaving fat. My sausage did not render much fat, so I added some bacon fat to the pan. Sauté the onions until starting to brown, add the garlic and sauté another minute. Add the the chicken stock and barley to the pot and cook an hour until the barley is just about done (My barley was already cooked, so I added everything at once and simmered for about 45 minutes total). Add the kale, quinoa and sausage and cook another 20-30 minutes on a low simmer. Taste for seasonings. Add the balsmic and serve hot with pecorino (or parmesan) shreds and crusty bread.

Serves: 500 with leftovers*

*kidding. It serves: I don’t know, but I’m guessing 16. We ate a ton. I ate 4 days of left overs and I’ve got a container in the freezer with an additional 4 cups. Hope that helps!

**Update, 11/16/2010:
dearth (noun) LACK, scarcity, shortfall, deficiency, ANTONYMS surfeit.

Filed Under: Garden, Food Tagged With: kale, black tuscan, red russian, barley, soup, italian kale and sausage soup, quinoa, garden, freeze kale, harvest

Bury Your Dead

November 1, 2010

Or at least make compost out of it.

It’s that time of year in the garden. Of doing the final tasks.

What amazes me to no end is that the final tasks never actually seem to end. I’ve been doing these final tasks for what seems likes weeks now and I’m still not done!

  • Harvest the apples
  • Dig the carrots
  • Cut the raspberries
  • Harvest the kale almost done!
  • Dig the beets
  • Finish transplanting the herbs almost done! Just found 2 more…
  • Put the tools away
  • Clean up the pumpkin beds
  • Burn the diseased tomato plants
  • Cook and freeze the kale
  • Make applesauce and apple jelly
  • Make pies didn’t make pies. just froze the apples with sugar to make into pies.

I’m probably missing stuff. But even then, as you can see, I’m not nearly done. Harvesting the kale, it should be noted, is about a six hour job, since I strip the stems out of the leaves before I cook it. I tried leaving the buggers in last year, but they seriously depleted our eating enjoyment. So I listen to my book on tape, hunched over a bucket for hours while my shoulders tense up and I cut the leaves from the center stems. I have one more pile to stem before cooking it all and freezing.

Is it sick to say that I enjoy it? I actually told my friend this very morning that I feel guilty for spending so much time at it, because it seems like I am creating busy work just so I can sit on my big butt in the sunshine of my front step and listen to my audible book. (which is coincidently, “Bury Your Dead” by Louise Penny)

“Do you eat the kale?”

“Yes.”

“Would you miss it if you didn’t have it in your freezer this winter?”

“Yes!”

“Then why in the Hell would you feel guilty about it?”

“Ha ha (nervous laugh). Right. Thanks! Bye.”

Mom? Are you reading this?

No?

Good.

I blame my mom for my guilt. I inherited it from her. It’s genetic. I just don’t want her to know that. I’d feel guilty. And she’d feel guilty for making me feel guilty…

Anyway, I’m feeling crazy-behind. I have so many pretty pictures of harvesting.

So I’m condensing. If you want to see more or hear more about any individual event, leave a comment and I will comply. It’s just hard to know if I should write about apples again, for example, after writing three posts about them last year. Or planting garlic again. You know?

I do these things every year, but should I write about them every year? I subject my friends and family to repetitive litanies I guess. I suppose I could do the same here. But I’m feeling lazy. And so I’m going to do a power-post condensed harvest version.

Here we go.

Today, I planned on finishing the kale leaves, but when I went out to the garden to cut the remaining stems, I got waylaid by other tasks. For example, I strode into the garden and saw my garden fork stuck in the garlic bed and said out loud, “Shit! I forgot to plant the garlic!” And ran inside to get the garlic to plant. That took about an hour. And the following two hours were filled with digging weeds — totally pointless at this time of year I would guess, and dealing with those rabid, disease-riddled tomato vines. Ugh.

Here are the three types of garlic I planted

Aside from the fact that, like my face, my hand looks much better in person, can you see the size of the clove on the right? It is HUGE! It’s also the only variety I know for sure by name. It is called “Music” and is a hardneck variety. I planted it for the first time last fall and harvested my first bulbs in June. Very fun. The others are a smaller-cloved red softneck variety and also a red hardneck variety. I’m just grateful to have gotten them in the ground.

Oh my gosh. I just remembered right this very minute that I should also have planted shallots! Will my list never end?

  • Plant shallots

Last week I worked on my very sad apple crop.

Yes. They really did look like that and yes, I really did use them.

Here is why you can’t always judge books by their covers. Or apples by their skin:

Like with the kale, I got to listen to hours of my audible book. For the apples, it was “The Year of Living Biblically.” I pretty much burned through the last 6 hours of the book. It was a little repetitive, but good. I do recommend!

I separate the “good” apples from the “jelly” apples. The best good apples go into pies. The other good ones get made into applesauce. The borderline apples go into the jelly pot. Not to worry, all you people I have given jelly to: the green bin is NOT the jelly pot. Those went into the compost pile… And yes, Lola did eat her share of apples.

Speaking of Lola, here she is finding some volunteer snap peas that sprouted after my disastrous summer crop. She hunts them like she does phesants:

After sorting, cutting, and peeling the apples, I made the sauce and boiled the peels, cores and borderline gross apples into juice.

Here is something to bear in mind. When a recipe calls for a “heavy bottomed pan?” This is why they do that and what happens when you do and don’t follow directions:

The next day I canned the applesauce and made the jelly. My beloved, beloved apple rosemary jelly:

You can read all about it here, if you like.

Oddly, this year, my final batch did not set up. It made no sense. No sense at all. Same juice from the same batch of apples. Same ratio of sugar to juice. Same everything. The one and only thing that was different was that I actually stood in the kitchen and watched over that batch, making sure it didn’t boil too hard.

Which leads me to the conclusion that it must have to boil hard in order to set up. I knew you needed a rolling boil for added pectin jellies, but I didn’t know that about natural pectin ones. Live and learn, live and learn.

I took a few days off from outside garden work and got back to it this past weekend.

This was sort of fun and unexpected: after-the-frost strawberries! Who knew?

They seriously tasted like candy. Ridiculously sweet. Next year, I’ll have to remember that and be looking for them. Far less bugs to compete with at this time of year, too.

With that, I’m taking my last sip of wine and heading off to bed with visions of sugar-strawberries dancing in my head.

(that almost gets me excited for Christmas!)

Almost.

Filed Under: Home, Garden Tagged With: Louise Penny, harvest, applesauce, Apples, jelly, garlic, music, apple, hard neck, kale, soft neck, strawberry, The Year of Living Biblically, Strawberries, Frost, audible, Bury Your Dead

Shallots are In! …I Mean Out!

July 27, 2010

I don’t know how I’ll ever use them all, but roughly calculating along the lines of grocery store prices, I could probably sell them and pay for my daughter’s college. Or better yet, something fun for my office.

Seriously. Why are shallots so damn expensive? They are an onion, for Pete’s sake!

Anyway, it has been years since I planted shallots. I remember getting ticked off trying to peel the paper thin skins and thinking, “never planting these again.” But that was before I started cooking so much. I bet I substitute onions for shallots more than anything else when following recipes. So now — provided they last in my lame root cellar lower garage, I should have enough to last me more than a year.

Successful shallot/onion/garlic storage is all about how you “cure” the bulbs. This is how NOT to do it:

how not to cure your shallots

By the way, if you’ve been following along (and I only just remembered this now), I forgot to plant these last fall and was worried they wouldn’t grow. Obviously, I was wrong. They are just fine. And given the price of the shallot sets you buy to plant, it might be worth not risking a Fall planting here in Minnesota, since harsh winters with little snow cover will kill Fall planted garlic and shallots.

For the record, I have tried planting garlic in the spring, after just that type of cataclysmic winter and it did not work. So the same can not be said for garlic. At least not for me, anyway.

Here is the progression. Hover over the photo to see the date:

To be honest, I wasn’t quite sure when to harvest. And given the frenetic nature of the past two months, I wasn’t inclined to research it, either. I decided to treat them like onions and garlic and wait until the stems were mostly flopping over and 50% or more brownish. It might have been a little long… Oh I don’t know…

What I DO know is that patch looked horrible and needed to be weeded. And low and behold the ground was also dry. In fact, I was just about to turn the sprinkler on for the first time all summer when I realized I didn’t want the shallots to get wet, so I dug them all up and set them out nicely to dry.

About six hours later, the big hailstorm started (video of the end of the storm is above in green “how not to cure shallots”). I took this picture when it was safe to go outside. I think this guy had melted by about 40% or so.

It wasn’t until the end of the storm that I realized that the shallots were not only in the rain, but under the overhang of the roof getting completely pummeled. At least they were now clean:

I’d like to say that was the last time they were rained on, but I would be lying. They were rained on, in approximately the same spot, two more times. I have no idea how that will affect their storage, but I will keep you posted.

This was the beautiful site after the big storm that destroyed farm fields, roofs, shattered windows and cleaned my shallots:

And that’s really what it looked like. The white balance on my camera was perfect. It was beautiful.

Our driveway, however, was not:

Filed Under: Garden Tagged With: harvest, shallots, plant, cure, hail, storm, rainbow

ONIONS!

October 1, 2009

Ok, I know most gardeners have long since dealt with their onions, since most are ready to harvest in June. In Minnesota, most of us didn’t harvest until July because of the weather. I pulled all mine out in early August, let them air dry outside for a day or two, then put them in our lower garage, which serves as my pseudo root cellar. I have to say, though, August and September don’t really do much for storing root crops. Flipping back through the notebook I keep in my office with all my to-do’s I see that I started writing “Chop Onions” as early as September 2nd. You will be happy to hear that I was finally able to check that off my list… On September 30th.

I would like to share how I deal with my onions.

Harvested and Cured Onions Ready for Storage and Chopping

Maybe it’s just me, but my onions do not keep through the winter. I don’t know if it’s because I am a bad gardener or because I’m a bad store-er. I’m guessing it’s a little of both. Should I cut the tops off before I cure them, or leave them on? Should I let them dry in the sun a day before shuttling them off to the dark depths of the lower garage or let them dry longer? You can find support for just about any variation. Seriously. I’ve researched this. I’m willing to chalk my failures up to variations in circumstances. That rationale has served me well in all areas of life, by the way.

This year was a good onion year, albeit a late one. After harvesting, I leave the tops on, letting them dry for a day in the sun. Then, I put them in a ventilated box (mine is the lid to an old rabbit hutch, the occupants of which I decided would be happier if left to roam the wilds of our 40 acres) and put them in the lower garage, which is dark and cool.

I write “chop onions” on my to do list about a month later. After ignoring that line item for about a month, I decide to “chop onions” on the day that I also have to “make salsa.” It would be easy to continue to ignore “chop onions” except for the fact that I need a lot of chopped onions to “make salsa.” So, the two would seem to go together quite nicely. (“Make Salsa” post coming in the next day or two.)

In the past, I have been totally anal about the chopping of my onions, preferring perfectly diced cubes, which of course requires hand chopping. This year, however, I have decided to cut corners and pulse the onions in the food processor to see if it makes any difference.

First, however, I have to decide which onions to chop and which to store. Since this was a good year for onions, it appears that I have lots I might be able to store for at least a few months. It would be a lot easier just to store them all, but I have to say: grabbing a handful of chopped and frozen onions during the winter for sauteing is a luxury I have learned not to live without. Plus, when I first started growing onions, I learned the hard way that many of the onions start to rot from the center out. That resulted in a lot of wasted onions for me. Now, I am ruthless when it comes to judging whether an onion should be stored or chopped.

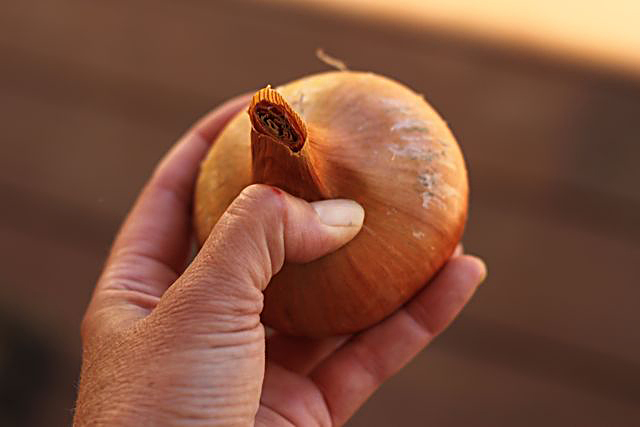
If there is any give at all in the stem area of the onion, it goes into the chopping pile:

Checking Stem End of Onion for Softness. This one is soft.

Sometimes I am right in my assessment:

HA! I was RIGHT! This onion would have rotted within a few weeks.

Sometimes I am wrong:

Oops. This onion would have been just fine to store. Oh Well.

But this year, I am very happy with my storage pile. It’s always nice to have some back-up onions ready for chopping:

Nice Hard Onions Ready for Dark Storage

The rest, I peel and quarter and chop.

Onions ready for chopping.

But either way, let me give you a great tip: USE GOOGLES FOR NO TEAR ONION HANDLING!

Onion Googles! I can't believe I am posting this...

Cute, huh?

I actually saw some onion goggles at a kitchen store in Colorado during our Road Warrior trip. They were $24 dollars! Insane, when you can wear these charming specks designed by Speedo.

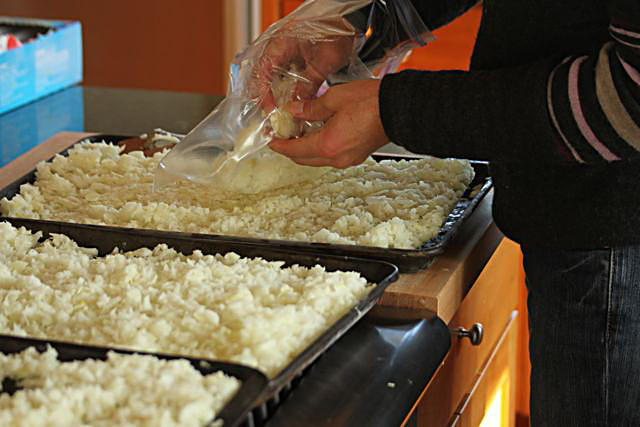
Anyway, I put the the chopped onions on to cookies sheets in a layer about 1/2″ to 1″ thick. And let me give you another valuable tip: USE WAX PAPER AS A SHEET LINER. I did not, and now I have onion smelling cookie sheets. Morgan made some cookies yesterday that have a very peculiar onion aroma that I can’t say added much to the flavor of the cookies.

Chopped and Frozen Onions Ready for Freezer Bags.

I freeze the sheets, and then break into pieces and store in freezer bags.

Break up clumps and store.

Once you try this, you will find yourself growing more and more onions. It is an unbelievable time saver.A winter's worth of chopped and frozen onions!

Filed Under: Garden, Food Tagged With: food processor, onions, harvest, freezing, storing, hand chop, rotting, soft, double onion

Primary Sidebar

Read in CHRONOLOGICAL ORDER!

  • Big Bend National Park (6)
  • Alaska Road Warriors (46)

Search jenmenke.com

About Me

Jen menke

I’m a mostly-retired, pretend graphics and web developer (but don’t judge my skillz by THIS site!). We sold our dream home in Watertown, MN and downsized to a “Villa” in Excelsior, MN and built a home in our dream location of Eagle, CO and now split our time between the two states. It is truly a dichotomous life of absentee gardening and getting together with friends & family while in MN and playing hard and hermitting while in CO. I’ve let the blog go but a trip to Alaska has me resurrecting the Road Warriors series. My beloved brother is my biggest fan and I am doing this just for him.

Latest Reads:

Jennie's bookshelf: read

Trail of Broken Wings
2 of 5 stars
Trail of Broken Wings
by Sejal Badani
Started out strong and dwindled off for me. I wasn't enamored of the writing and -- maybe it's just me -- but the secrets!? I understand that you have to be willing to swallow a fair amount of incredulity when enjoying a lot of fiction, ...
The Girl on the Train
3 of 5 stars
The Girl on the Train
by Paula Hawkins
Audible book. Good, mindless listen. Pretty good action and twists. Not as good as all the hype, in my opinion, but I did enjoy. --Not enough to choose for my bookclub though: it would have been carved up by those English-teaching wolves...
I'm a Stranger Here Myself: Notes on Returning to America after Twenty Years Away
4 of 5 stars
I'm a Stranger Here Myself: Notes on Returning to America after Twenty Years Away
by Bill Bryson
Not my favorite Bryson book. However, it's been several years since I last read one and I was -- once again -- astounded by his writing style and voice. I just love him. I think this book is mostly compiled from columns he wrote over a c...

goodreads.com
  • Road Warriors
  • Garden
  • Food
  • Babble
  • Home

Copyright © 2025